25 Living Room Ceiling Design Ideas That Wow
You probably spend a lot of time in your living room. So why ignore the fifth wall? A refreshed ceiling can change the whole room’s mood. These 25 living room ceiling design ideas will help you find a look that fits your style and budget.
You’ll see options from subtle paint tricks to bold architectural details. Each idea shows what makes it work, the exact materials to gather, clear step-by-step build or styling guidance, and tips for daily use. Whether you want a cozy, rustic vibe or a sleek modern feel, these living room ceiling design ideas give you practical ways to get there.
Pin the looks you love, bookmark a few plans, and pick one project you can finish this weekend. Let’s raise the roof — tastefully.
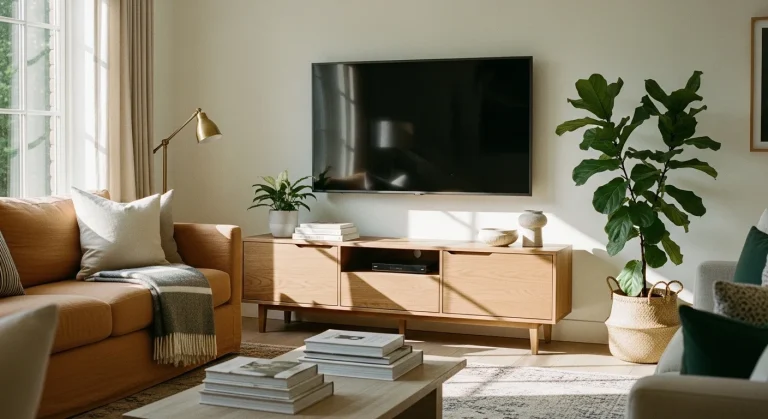
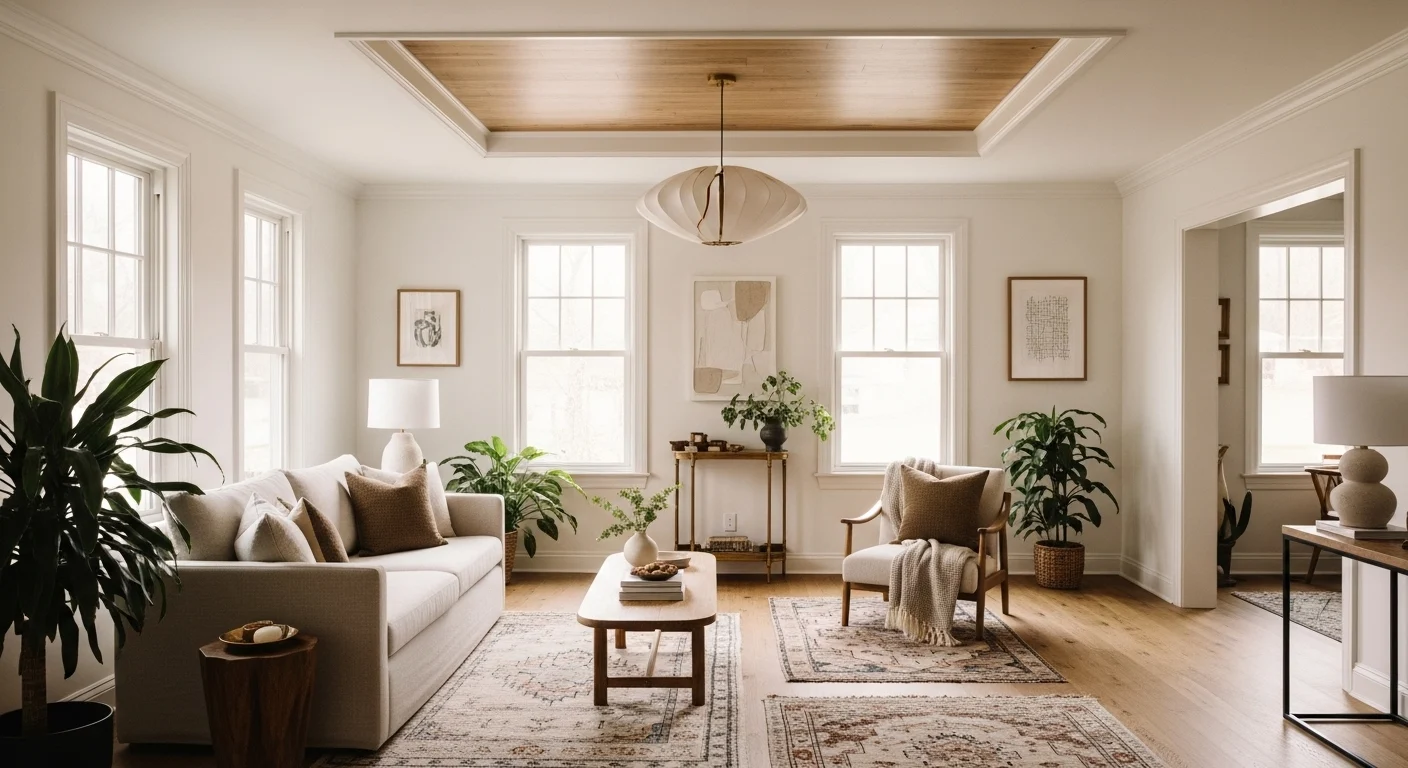
1. Dramatic Tray Ceiling (living room ceiling design ideas)
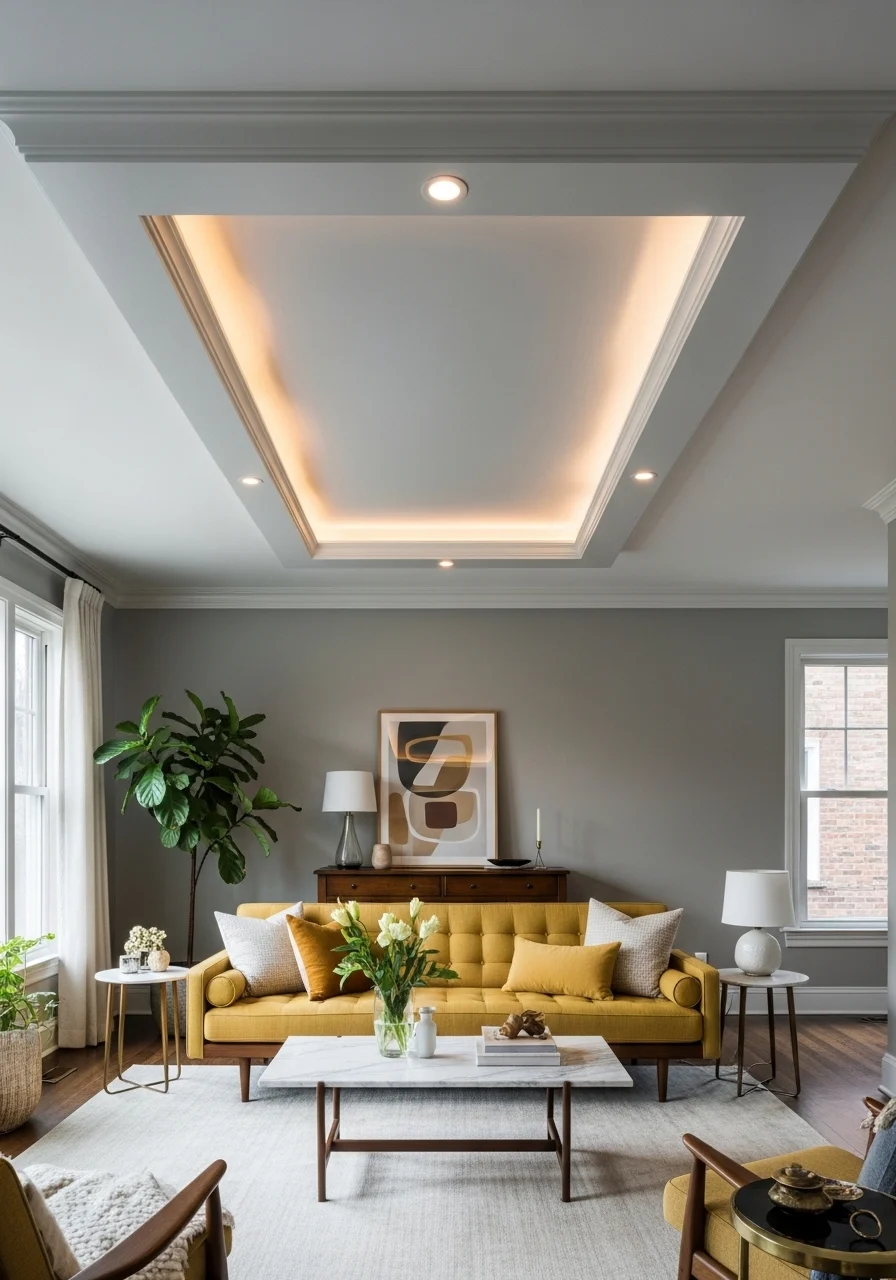
A tray ceiling adds depth and drama without heavy construction. The recessed center creates shadow lines that read like art. Use contrasting paint or wood inlay to highlight the dropped perimeter. It works in both traditional and modern rooms. You’ll feel the room gain height and focus.
Key Elements
- Central recessed tray (4–12 inches depth)
- Contrasting paint: pale ceiling white + darker inner tray
- Recessed LED strip lighting (warm 2700K)
- Crown molding or clean squared edge
- Plaster or gypsum board finish
- Smooth matte paint for inner tray
- Ceiling medallion optional
- Statement pendant or chandelier centered
- Neutral wall tones to emphasize ceiling
- Skilled drywall installer or carpenter
How to Achieve This Look
- Measure ceiling and plan tray proportions (width 20–40% of room).
- Mark perimeter lines and frame a dropped soffit using 2x4s.
- Install 5/8" drywall on the soffit framework.
- Tape, mud, and sand seams until smooth.
- Prime entire ceiling, then paint inner tray with chosen contrast color.
- Install recessed LED strip inside tray cavity.
- Mount centered chandelier with proper support.
- Add crown molding or a squared reveal for definition.
- Caulk and touch up paint for crisp lines.
How to Style / Use It
Hang a low-profile light fixture to keep lines clean. Pair with mid-century furniture for balance. Use warm LEDs to make the tray glow at night. Dust crown moldings regularly. For seasonal change, switch inner tray paint to a richer tone.
2. Coffered Grid Ceiling
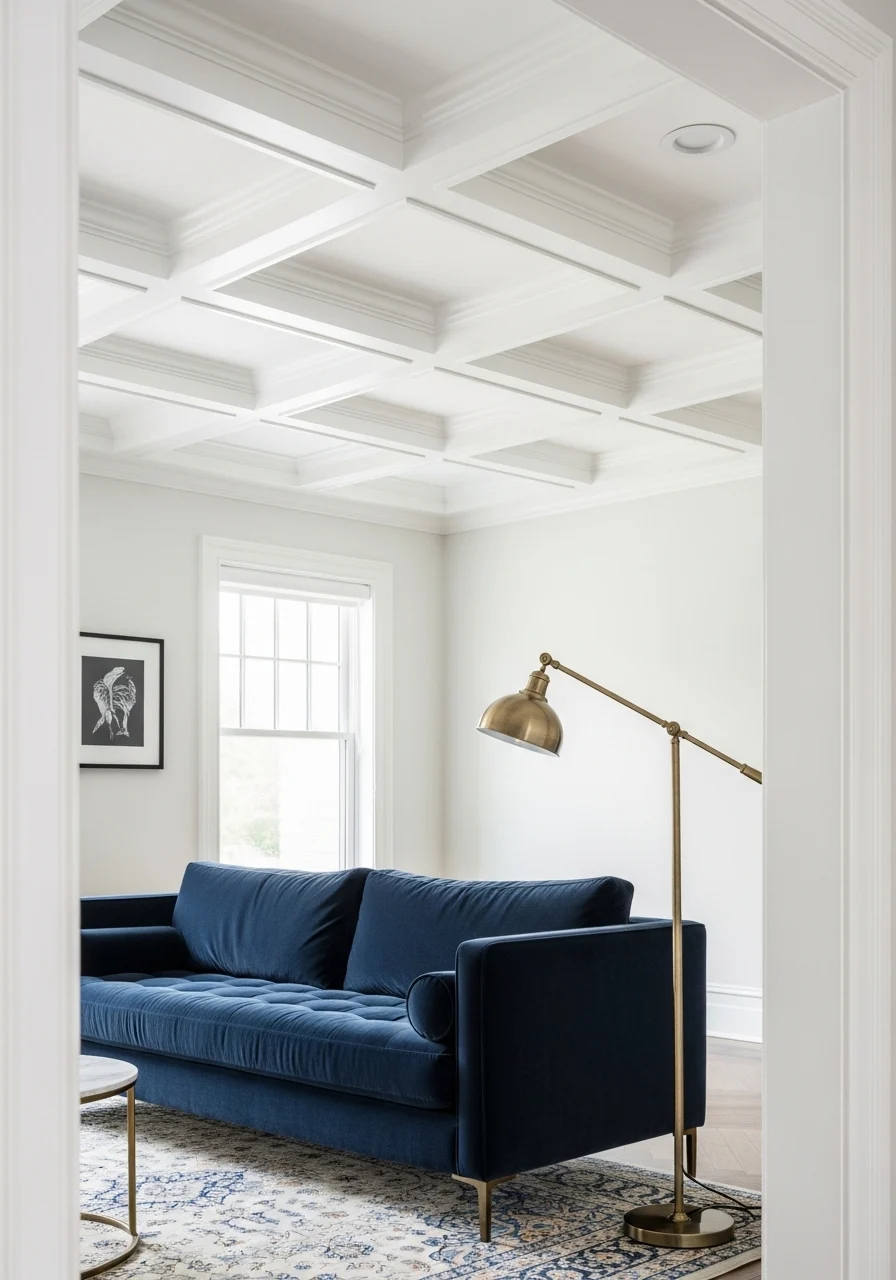
Coffered ceilings bring classic rhythm and texture to any living room. The repeated squares add architectural interest and catch light beautifully. They’re great if you want formal charm or a modern twist with shallow coffers. Builders and DIYers can scale the depth to suit the room height.
Key Elements
- Grid of beams (wood or MDF)
- Coffers sized proportionally (2–4 feet)
- White or soft cream paint
- Crown molding or simple returns
- Shadow gap or reveal for depth
- Ladder joists or furring strips for installation
- Flush-mounted lighting within select coffers
- Wood species: poplar or pine, primed MDF for painted finish
- Screws, construction adhesive, and finishing nails
- Paint primer and semi-matte finish
How to Achieve This Look
- Create a layout plan and mark beam locations.
- Attach furring strips to ceiling for mounting.
- Build beam boxes from MDF or primed pine.
- Secure beam boxes to furring strips with glue and screws.
- Add cross members to form grid coffers.
- Fill seams, sand, and prime all wood surfaces.
- Paint ceiling and beams in final color.
- Install recessed or surface lighting as planned.
- Caulk joints and touch up paint.
How to Style / Use It
Keep furniture lines clean to let the coffered pattern shine. Use soft upholstery and low light fixtures. Add dimmers to highlight shadow play. Dust beams with a microfiber duster. For a modern look, paint beams same color as ceiling.
3. Exposed Beam Ceiling — living room ceiling design ideas
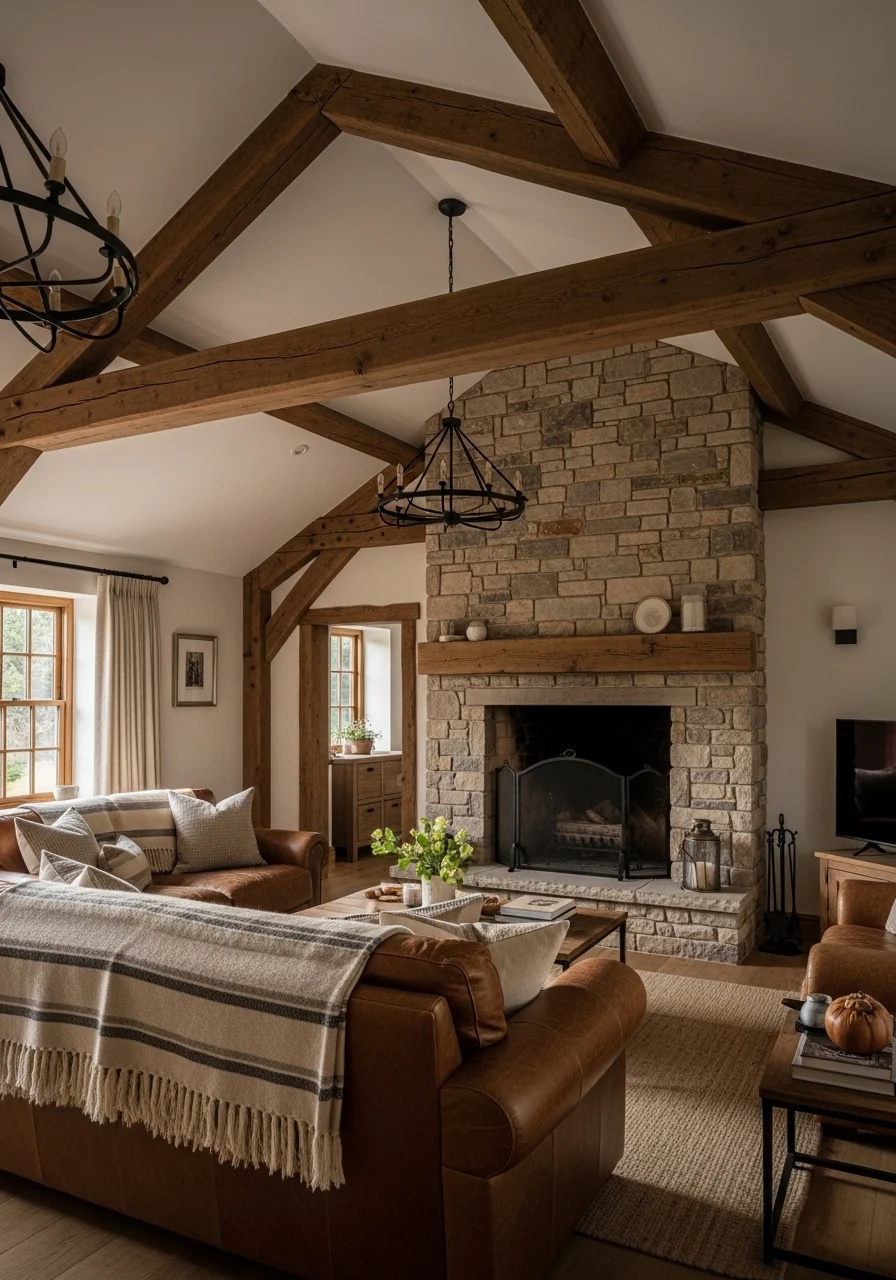
Exposed beams add character and texture. They feel warm and grounded, even in modern interiors. Use reclaimed wood for authenticity or milled timber for a cleaner look. This choice brings a tactile, cozy feel to the living room.
Key Elements
- Solid oak or reclaimed beam finish
- Beam spacing: 2–6 feet
- White or soft plaster between beams
- Visible metal connectors optional
- Matte wood oil or stain
- Beams sized to scale (8×8 or 6×8)
- Insulated ceiling cavity above
- Integrated downlights or uplights
- Natural fiber rugs and leather accents
- Hardware: lag bolts, anchor straps
How to Achieve This Look
- Assess structural needs; consult an engineer for exposed structural beams.
- Choose real or faux beams based on budget.
- Install blocking and supports in ceiling cavity.
- Secure beams with metal straps and lag bolts.
- Finish beams with stain or oil; allow to cure.
- Paint the ceiling between beams in a bright white.
- Add lighting: recessed cans or wall washers.
- Seal beam-joins and touch up paint.
How to Style / Use It
Pair beams with warm textures like wool and leather. Use directional uplights to emphasize wood grain. Keep ceiling colors bright to prevent heaviness. Clean wood with a dry cloth and reapply oil annually.
4. Bold Black Matte Ceiling
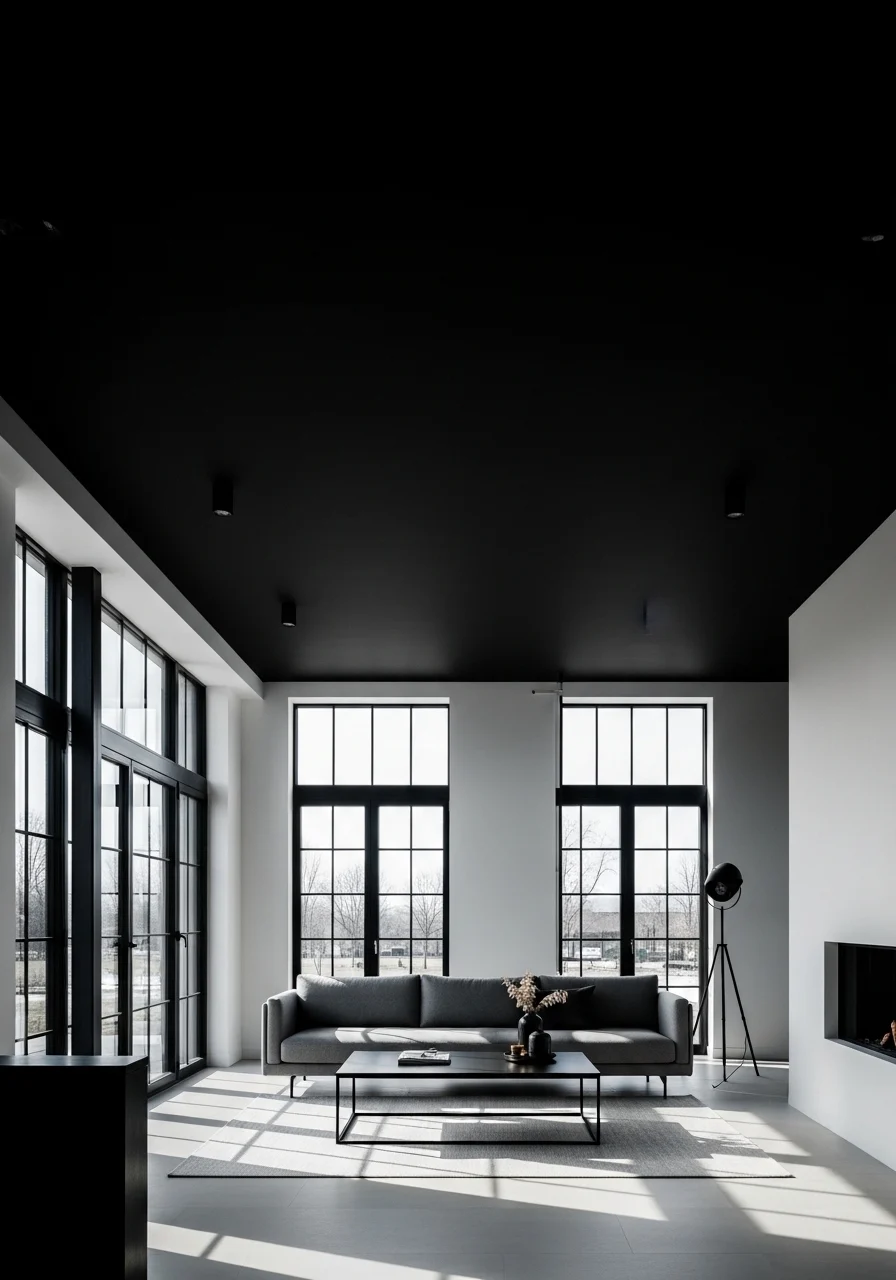
Painting your ceiling black creates intimacy and cinematic drama. It visually lowers the room, making big spaces feel cozier. Matte finish hides imperfections and absorbs light for a moody feel. Use it in open-plan lofts or modern cottage living rooms.
Key Elements
- Flat black or charcoal matte paint
- White or light walls for contrast
- Low-hung pendant or linear fixtures
- Reflective accents: brass, glass
- Dark wood or concrete floors
- Soft textiles to warm the mood
- High-quality primer for coverage
- Ladder and dry roller setup
- Good ventilation for paint fumes
How to Achieve This Look
- Clean ceiling and repair holes or cracks.
- Apply stain-blocking primer for even pigment.
- Tape off walls and fixtures with painter’s tape.
- Use a roller for flat coverage; cut in with an angled brush.
- Apply two coats for full opacity.
- Install warm-tone lighting to avoid a cold feeling.
- Touch up edges and remove tape carefully.
- Let paint cure 48–72 hours before heavy use.
How to Style / Use It
Balance black ceilings with warm woods and soft textiles. Add mirrors on walls to reflect light. Use amber bulbs to soften the mood. Repaint touch-ups as needed; matte can show scuffs in high-traffic homes.
5. Painted Pattern Ceiling
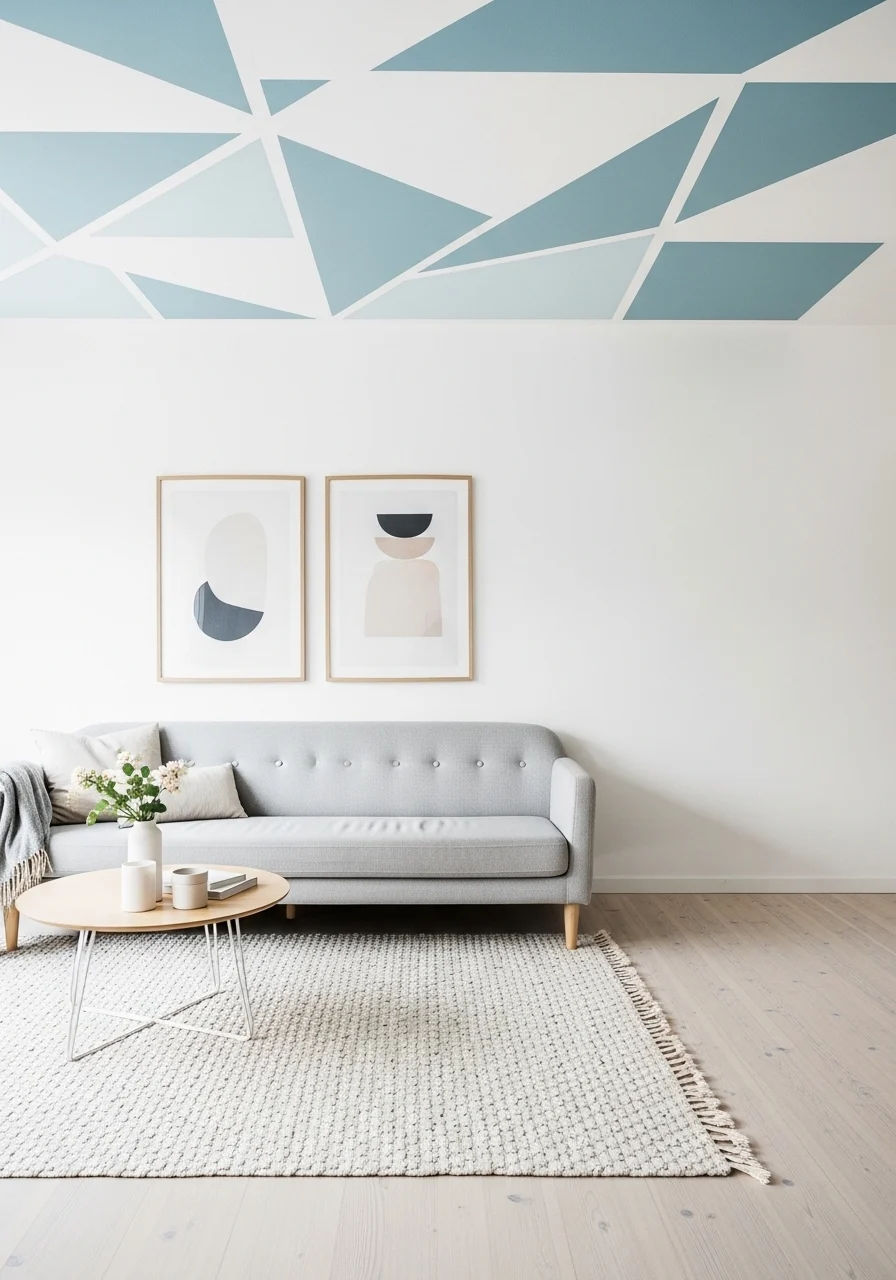
A painted pattern makes the ceiling a focal artwork. Stencils or freehand stripes create visual rhythm overhead. This idea works for renters with removable wallpaper stencils. It’s playful without structural change.
Key Elements
- Water-based ceiling paint in 2–3 colors
- Stencil or painter’s tape for pattern
- Low-VOC primer
- Drop cloths and ladders
- Matte or eggshell finish
- Simple furniture to avoid visual clash
- Accent color repeated in pillows or art
- High-quality brushes and rollers
How to Achieve This Look
- Clean and prime the ceiling surface.
- Sketch your pattern or set stencil guides.
- Apply base coat and let dry fully.
- Use painter’s tape for stripes or a stencil for shapes.
- Paint pattern carefully; remove tape while paint is wet.
- Touch up edges with a small brush.
- Coordinate room accents to tie colors together.
How to Style / Use It
Echo ceiling colors in cushions, throws, or vases. Keep wall decor minimal to let the pattern breathe. For rentals, use temporary peel-and-stick stencils. Wipe painted ceilings gently with a damp sponge.
6. Skylight-Focused Ceiling
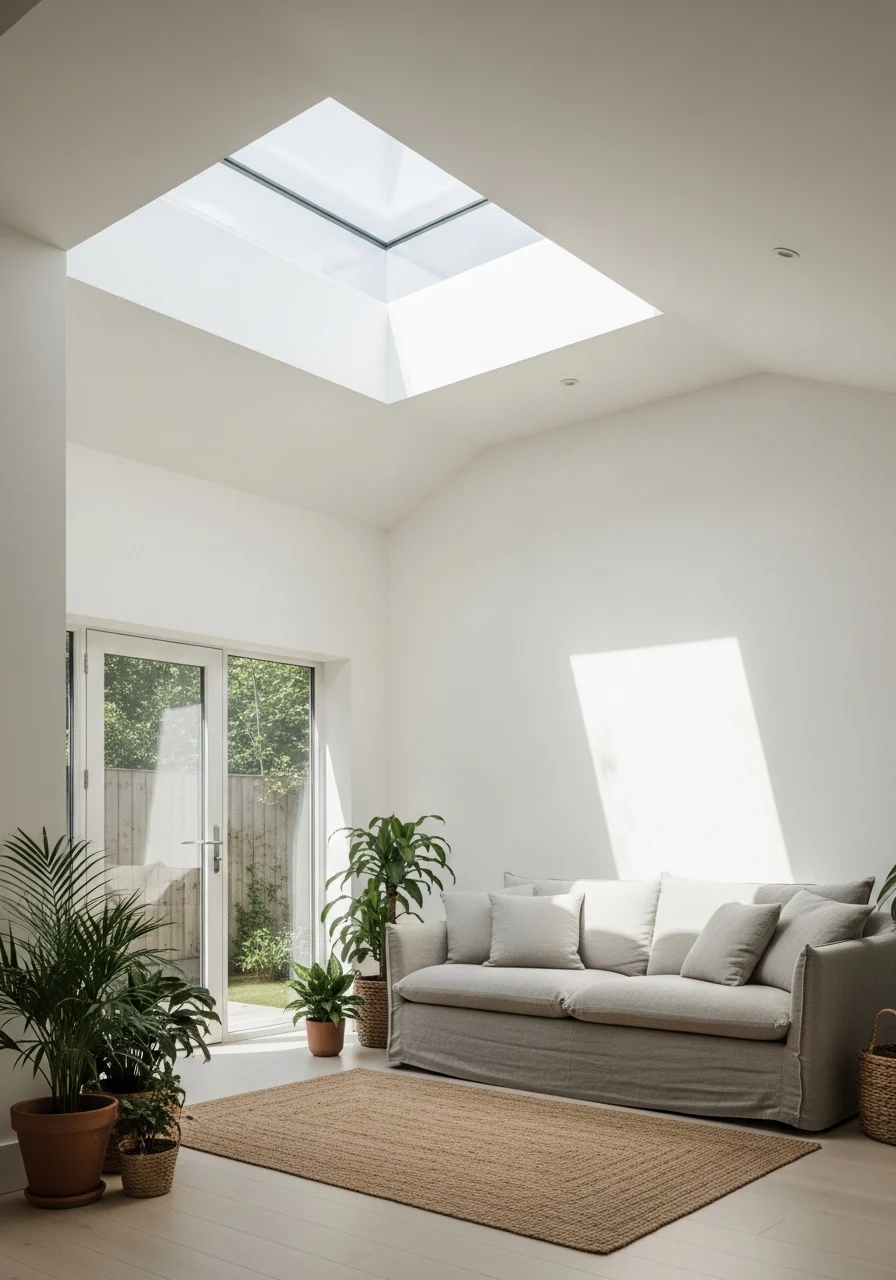
A skylight brings natural light and sky views straight into the living room. It refreshes the space and highlights ceiling details around it. Great for darker rooms or north-facing homes.
Key Elements
- Fixed or venting skylight unit
- Flashing kit and curb
- Insulated curb and finishing trim
- Skylight blinds or shades
- Vaulted or flat ceiling integration
- UV-protective glazing (low-E)
- Proper roof flashing and sealant
- Skylight framing lumber
- Interior trim and drywall finish
How to Achieve This Look
- Choose skylight size and type for room scale.
- Confirm roof pitch and structural needs.
- Cut roof opening and set curb with flashing.
- Install skylight per manufacturer instructions.
- Seal flashing and test for leaks.
- Finish interior with drywall and trim.
- Add blind or shade for light control.
- Add plants or a reading nook beneath.
How to Style / Use It
Place seating to take advantage of sun patches. Use blinds to prevent midday glare. Clean skylight glass twice yearly. Consider venting skylights for heat control in summer.
7. Recessed Cove Lighting (living room ceiling design ideas)

Cove lighting creates a soft, indirect glow that flatters any living room. It outlines ceiling geometry without visible fixtures. Use warm LEDs to make the space inviting. This is one of the easiest upgrades for a calm atmosphere.
Key Elements
- Continuous LED strip (2700K–3000K)
- Aluminum channel and diffuser
- Recessed or soffit cavity
- Dimmer-compatible driver
- Concealed wiring and power access
- Painted reveal for neat finish
- Proper ventilation for LEDs
- Professional electrician for hardwiring
- Low-profile trim or shadow gap finish
How to Achieve This Look
- Plan cove layout and measure perimeter length.
- Build a 2×4 soffit or use furring strips to create a reveal.
- Install aluminum LED channels inside the soffit.
- Run wiring to a switch or dimmer location.
- Mount LED strips and connect driver.
- Test lighting then close soffit with drywall.
- Prime and paint the soffit reveal.
- Set dimmer limits and program scenes.
How to Style / Use It
Use cove lighting for movie nights and soft evenings. Combine with spotlights for task lighting. Keep LED color consistent for a uniform glow. Dust soffits annually and check drivers every few years.
8. Tin or Metal Ceiling Panels
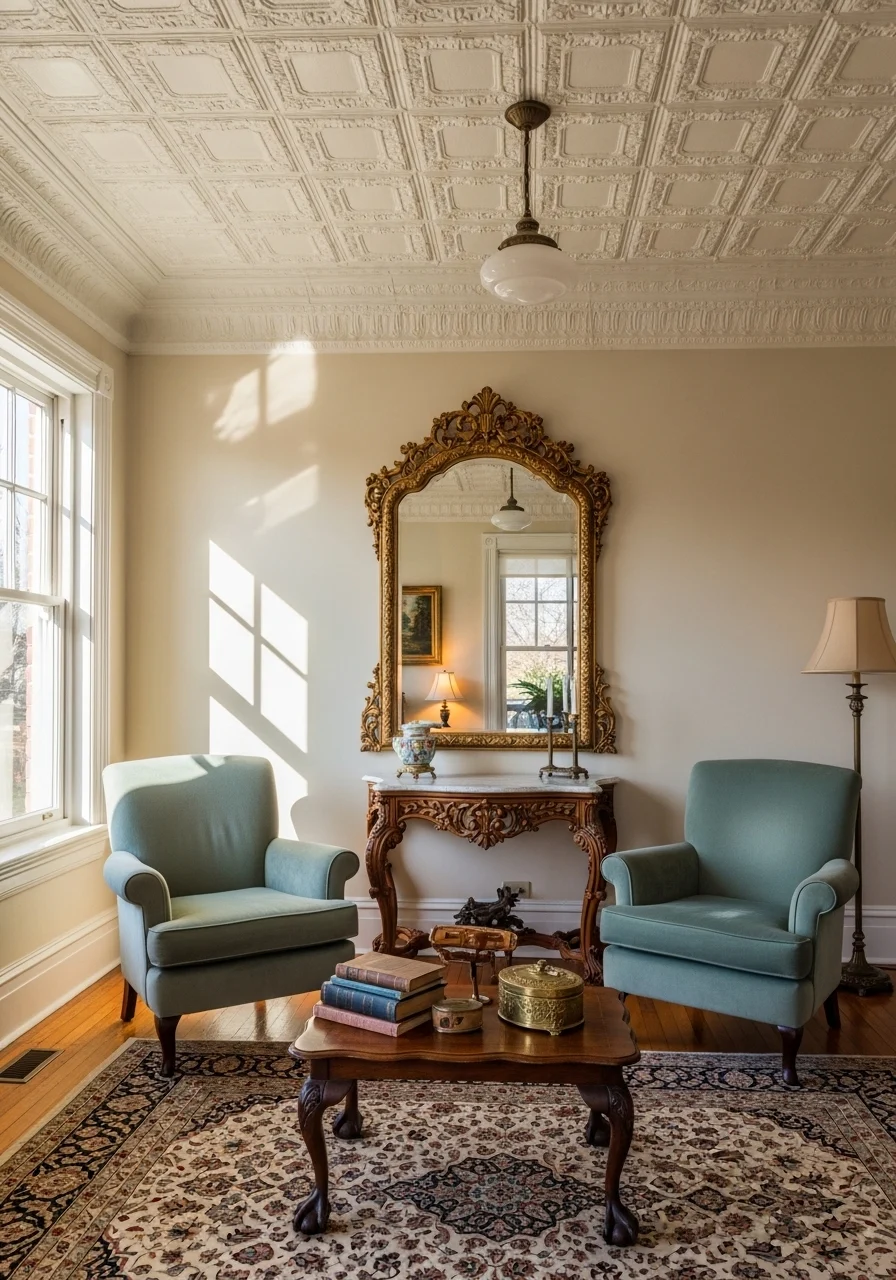
Pressed tin adds vintage charm and intricate texture overhead. Panels come in decorative patterns and can be painted to match your palette. They’re durable and add historic detail to any living room.
Key Elements
- Tin or metal ceiling panels (24×24 common)
- Underlayment plywood or drywall
- Adhesive and finishing nails
- Paintable primer for metal
- Decorative crown molding
- Seams treated with caulk or trim
- Rust-resistant finish if left bare
- Insulation above if needed
- Accurate panel layout plan
How to Achieve This Look
- Measure ceiling and order panels with extra for cuts.
- Prepare ceiling: repair, level, and add underlayment.
- Prime panels and paint if desired.
- Apply adhesive and press panels in place.
- Secure edges with finishing nails or trim.
- Cut panels to fit at edges and fixtures carefully.
- caulk seams and finish with molding.
- Repaint touch-ups as needed.
How to Style / Use It
Pair tin ceilings with classic furniture and brass accents. Clean with a mild soap solution to prevent tarnish. Use a satin paint finish to highlight patterns. Consider partial ceilings over seating areas for a focal moment.
9. Mirrored Ceiling Accent
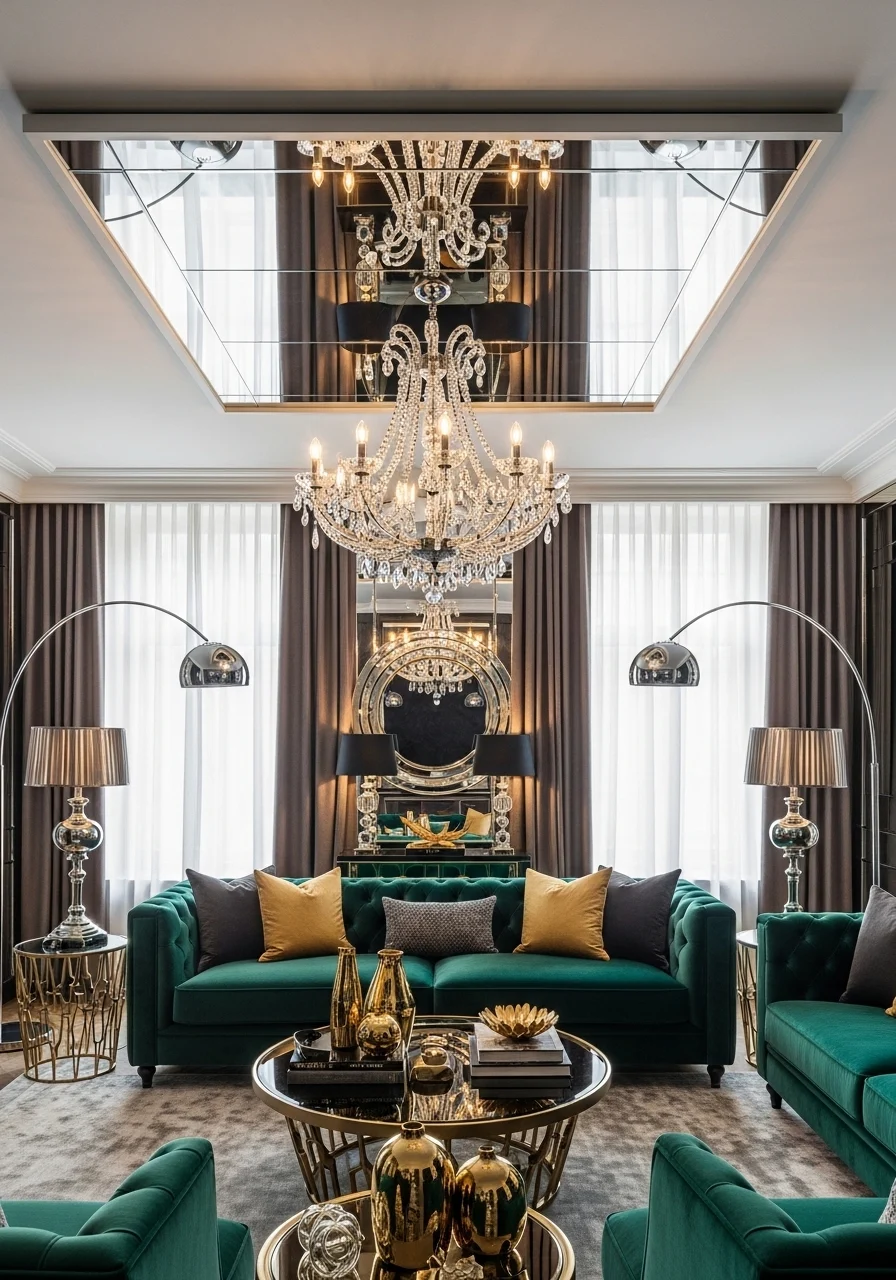
A mirrored ceiling adds glamour and visual expansion. Use it selectively over a seating area or dining corner. Mirrors bounce light and make low ceilings feel taller. Keep mirrored sections minimal to avoid being overpowering.
Key Elements
- Tempered mirror panels (safety glass)
- Metal framing or adhesive mounting
- Backing foam or acoustic pads
- Centered chandelier or pendant
- Clean grout lines or metal reveals
- Anti-corrosion clips and anchors
- Professional mirror installer recommended
- Regular glass cleaner and microfibre cloth
How to Achieve This Look
- Measure area for mirror installation.
- Reinforce ceiling framing if required.
- Order tempered mirror panels to size.
- Install metal framing or use mirror adhesive per spec.
- Mount panels and secure with clips.
- Seal joints with clear silicone if needed.
- Install lighting positioned to reflect.
- Maintain with gentle cleaning.
How to Style / Use It
Use mirrored panels in small doses above seating. Keep room decor streamlined to avoid visual clutter. Choose tempered mirrors for safety. Wipe clean weekly to prevent spotting.
10. Tongue-and-Groove Plank Ceiling
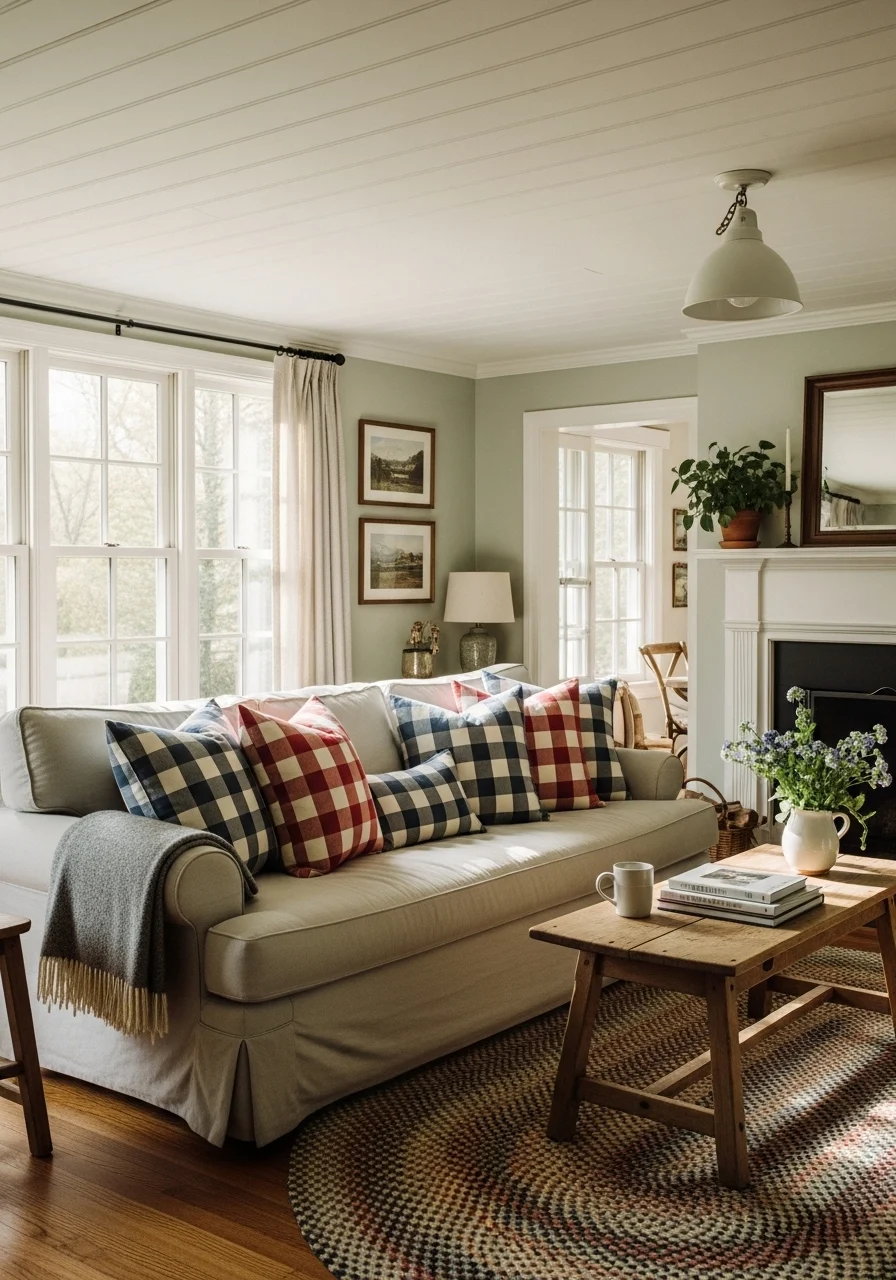
Tongue-and-groove planks create a cottage or farmhouse charm. You can paint them or let the wood show through. They offer texture and linear rhythm for a calming overhead look.
Key Elements
- Pine or cedar tongue-and-groove boards
- Nail gun and finishing nails
- Moisture-resistant primer or stain
- V-joint or shiplap profile options
- Underlayment for sound control
- Crown molding or fascia trim
- Paint or clear polyurethane finish
- Wood filler and caulk
How to Achieve This Look
- Acclimate boards to room humidity for 48 hours.
- Install furring strips perpendicular to board direction.
- Start at one wall and nail boards into furring strips.
- Use a flooring nailer for tight seams.
- Stagger joints for visual appeal.
- Fill nail holes and sand lightly.
- Prime and paint or stain and seal.
- Install trim and touch up paint.
How to Style / Use It
Paint planks white for brightness or stain for warmth. Keep beadboard for small rooms or whole ceilings for big impact. Recoat polyurethane every few years to protect wood.
11. Fabric-Draped Ceiling
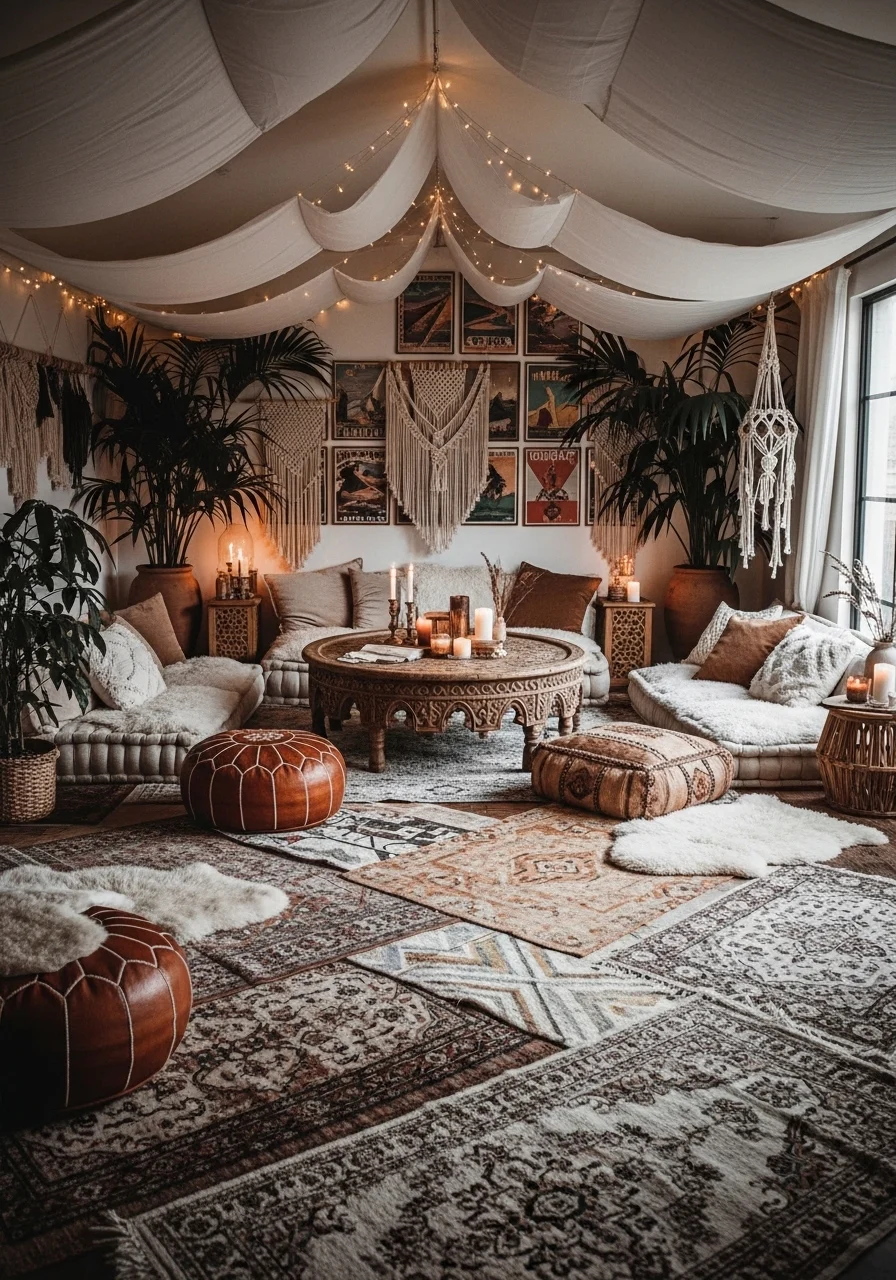
Fabric draping makes the ceiling feel soft and intimate. It’s ideal for renters or temporary styling. Use light, sheer fabrics to keep the look airy. The result is cozy and romantic.
Key Elements
- Sheer voile or linen fabric
- Ceiling hooks and drapery wire
- Tension rods or slim curtain tracks
- Concealed uplighting or string lights
- Soft neutral color palette
- Lightweight battens for support
- Clips or ties for neat gathers
- Fire-retardant fabric if required
How to Achieve This Look
- Choose light fabrics and clean them first.
- Plan drape pattern and mark hook locations.
- Install hooks or wire threaded across ceiling.
- Drape fabric in even scallops, securing with clips.
- Tuck or tie fabric at edges for tidy finish.
- Add soft string lights behind fabric for glow.
- Adjust gathers until symmetrical.
- Remove and wash fabric seasonally.
How to Style / Use It
Pair with low seating for a lounge feel. Use neutral fabric for year-round use. Wash fabric regularly to avoid dust build-up. For a temporary refresh, swap colors seasonally.
12. Geometric Panel Ceiling (living room ceiling design ideas)
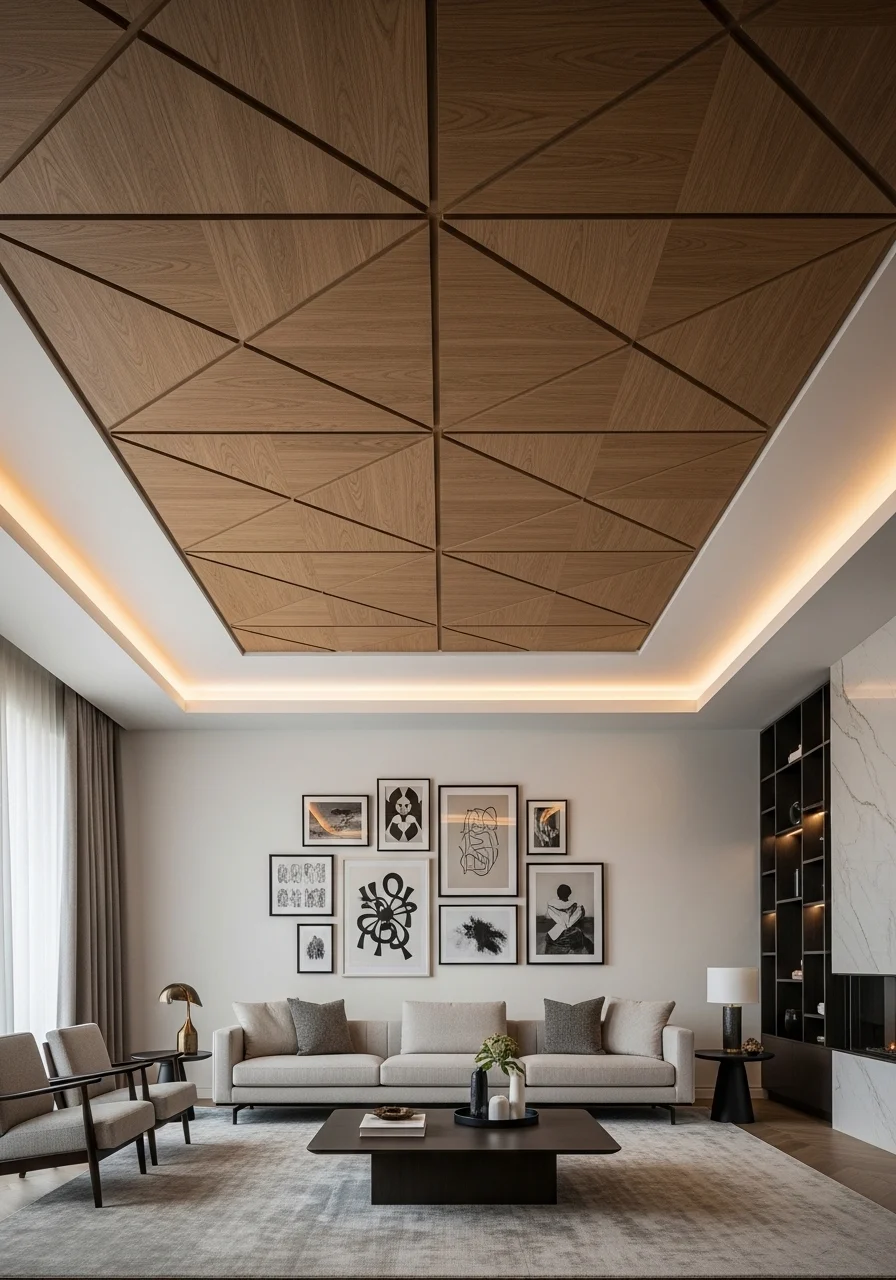
Geometric panels add modern sculptural interest. Use triangles, hexagons, or asymmetric shapes for a bespoke look. They create shadow and depth while remaining tidy and architectural.
Key Elements
- CNC-cut wood panels (plywood or veneer)
- Varied natural wood tones or painted finishes
- Acoustic foam backing optional
- Strong adhesive and screws
- Recessed lighting integrated in some panels
- Protective clear coat or oil finish
- Precise layout diagram
- Jigs for repeatable cuts
How to Achieve This Look
- Design geometric pattern to scale.
- Order CNC-cut wood panels or cut in workshop.
- Prime or seal panels if painting.
- Mark ceiling layout and attach adhesive spots.
- Secure panels with screws into studs or furring strips.
- Integrate lighting by cutting holes prior to mounting.
- Apply finish and touch up edges.
- Clean wood and enjoy the new texture.
How to Style / Use It
Repeat panel tones in furniture or frames for cohesion. Keep wall colors muted to spotlight ceiling. Use acoustic backing if the room echoes. Dust panels gently with a microfiber cloth.
13. Vaulted Ceiling with Rafters
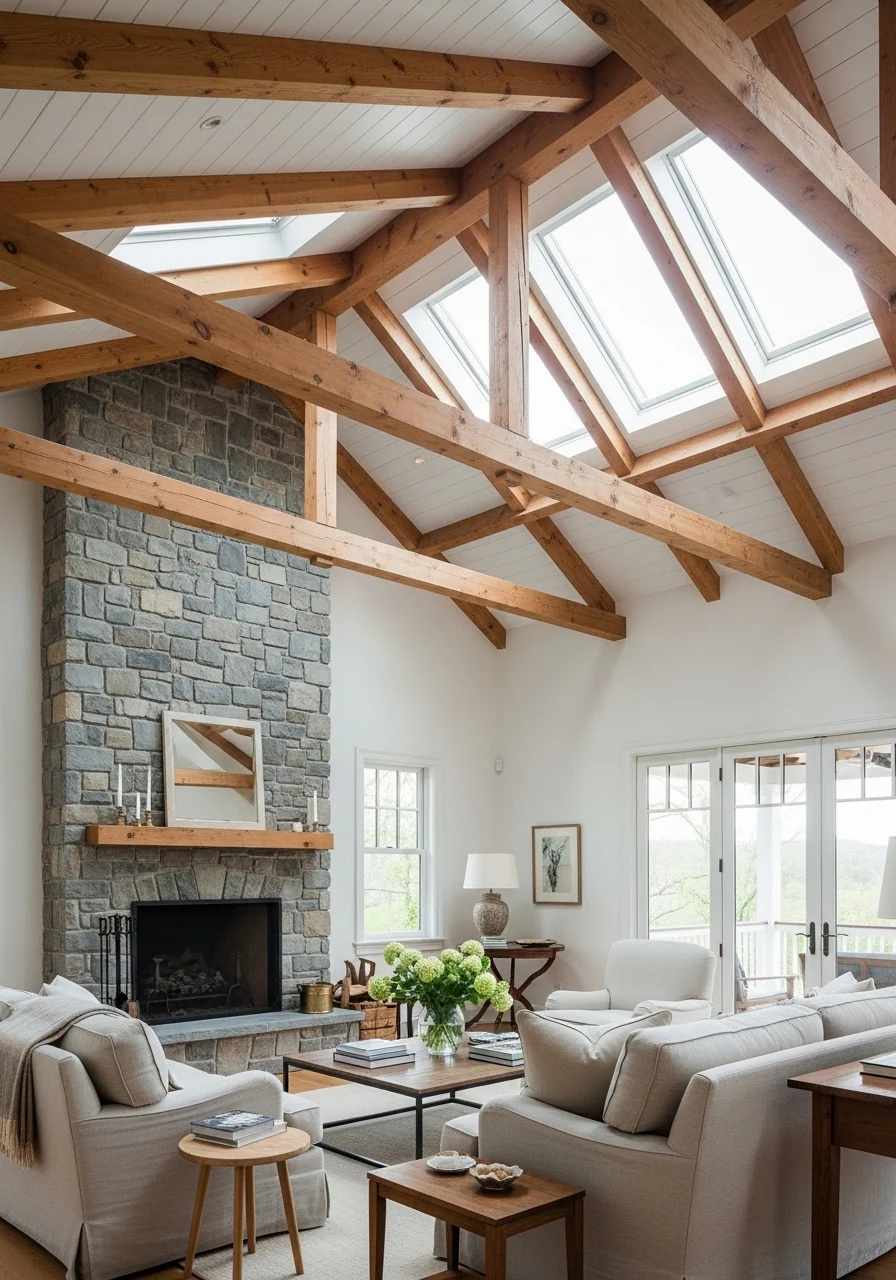
A vaulted ceiling opens the space dramatically. Rafters create strong lines and architectural interest. This suits large living rooms where you want to emphasize volume and light.
Key Elements
- Vaulted roof lines
- Exposed rafters or collar ties
- Skylights or clerestory windows
- Insulation and ventilation for roof cavity
- Plaster, shiplap, or drywall between rafters
- Structural beams sized correctly
- Warm wood stain or painted rafters
- Large scale lighting or pendant clusters
How to Achieve This Look
- Consult a structural engineer for roof modifications.
- Frame vault and rafters per engineer specs.
- Install insulation and ventilation baffles.
- Sheath with drywall or shiplap between rafters.
- Finish rafters in stain or paint.
- Add skylights or clerestory windows if planned.
- Install oversized light fixtures or pendant groups.
- Finish walls and floors to maintain scale.
How to Style / Use It
Anchor the room with a large rug and scaled furniture. Hang artwork higher on walls to follow roofline. Use warm finishes to keep the space welcoming. Maintain rafters by checking for dust and pests.
14. Plaster Medallion with Statement Chandelier
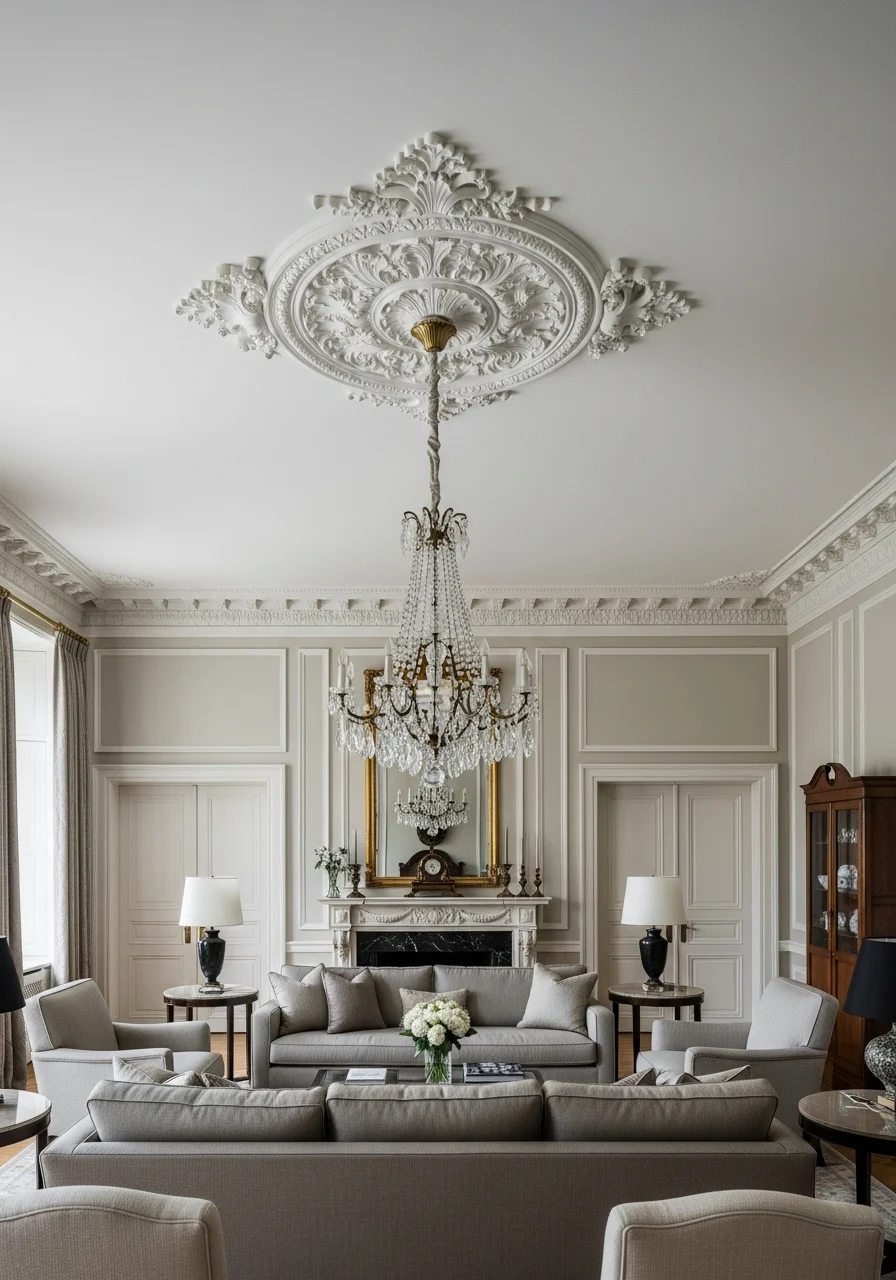
A plaster medallion draws the eye to your chandelier and adds classical charm. It’s a relatively small addition with big impact. Pair with modern fixtures for contrast.
Key Elements
- Plaster or lightweight polyurethane medallion
- Central electrical box reinforced for chandelier weight
- Complementary chandelier or pendant
- Crown molding to match style
- Paintable primer surface
- Screws or adhesive mounting kit
- Touch-up paint for seamless finish
- Scale proportionate to fixture size
How to Achieve This Look
- Choose medallion size proportional to fixture.
- Ensure ceiling box is rated for fixture weight.
- Mark center point and dry-fit medallion.
- Secure medallion with adhesive and finishing screws.
- Seal edges with caulk and sand if needed.
- Paint medallion to match ceiling or highlight it.
- Install chandelier following safety guidelines.
- Test for level and final adjustments.
How to Style / Use It
Match medallion styling with chandelier finish. Use a modern fixture in a classic medallion for eclectic flair. Dust medallion and polish the light fixture periodically. Choose dimmers to set the mood.
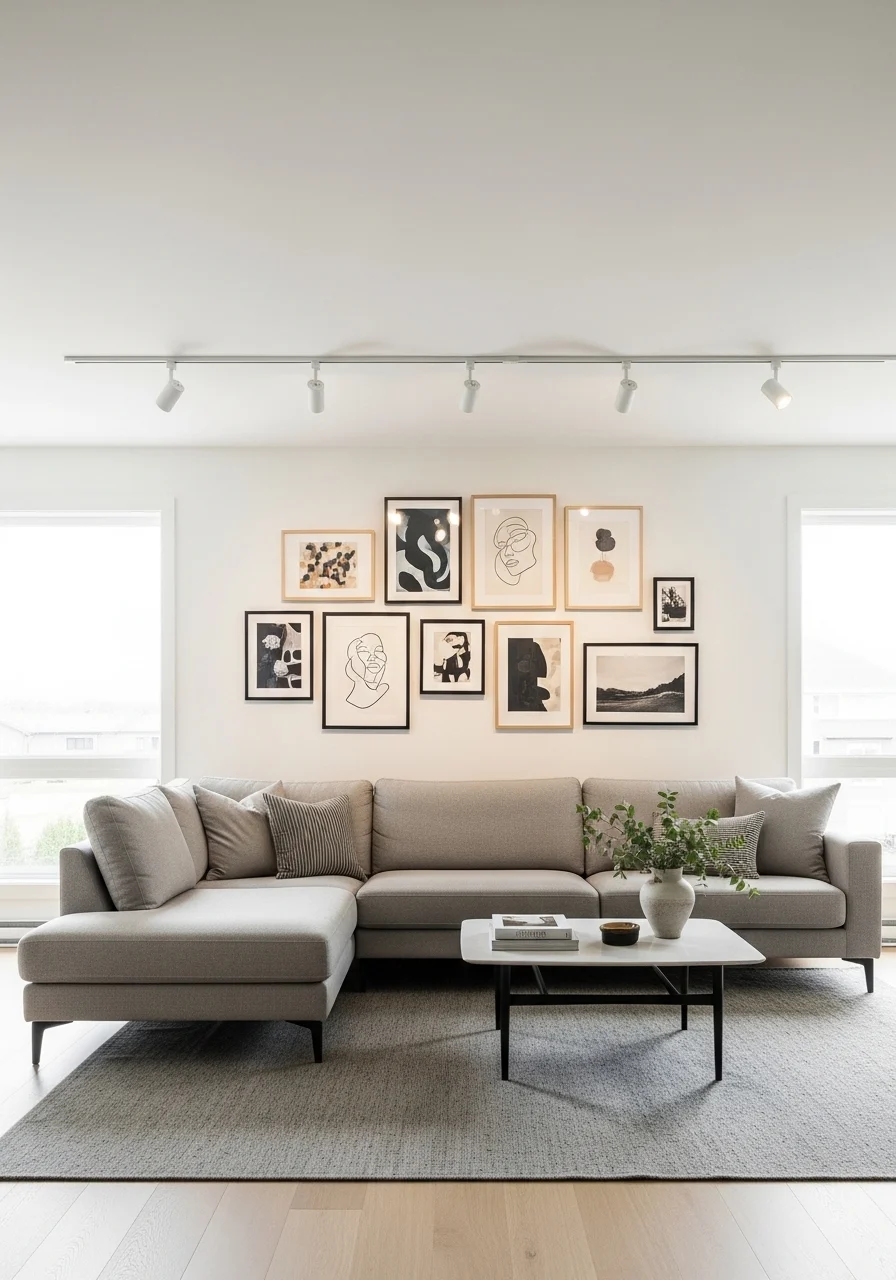
15. Minimalist Flat Ceiling with Hidden Fixtures
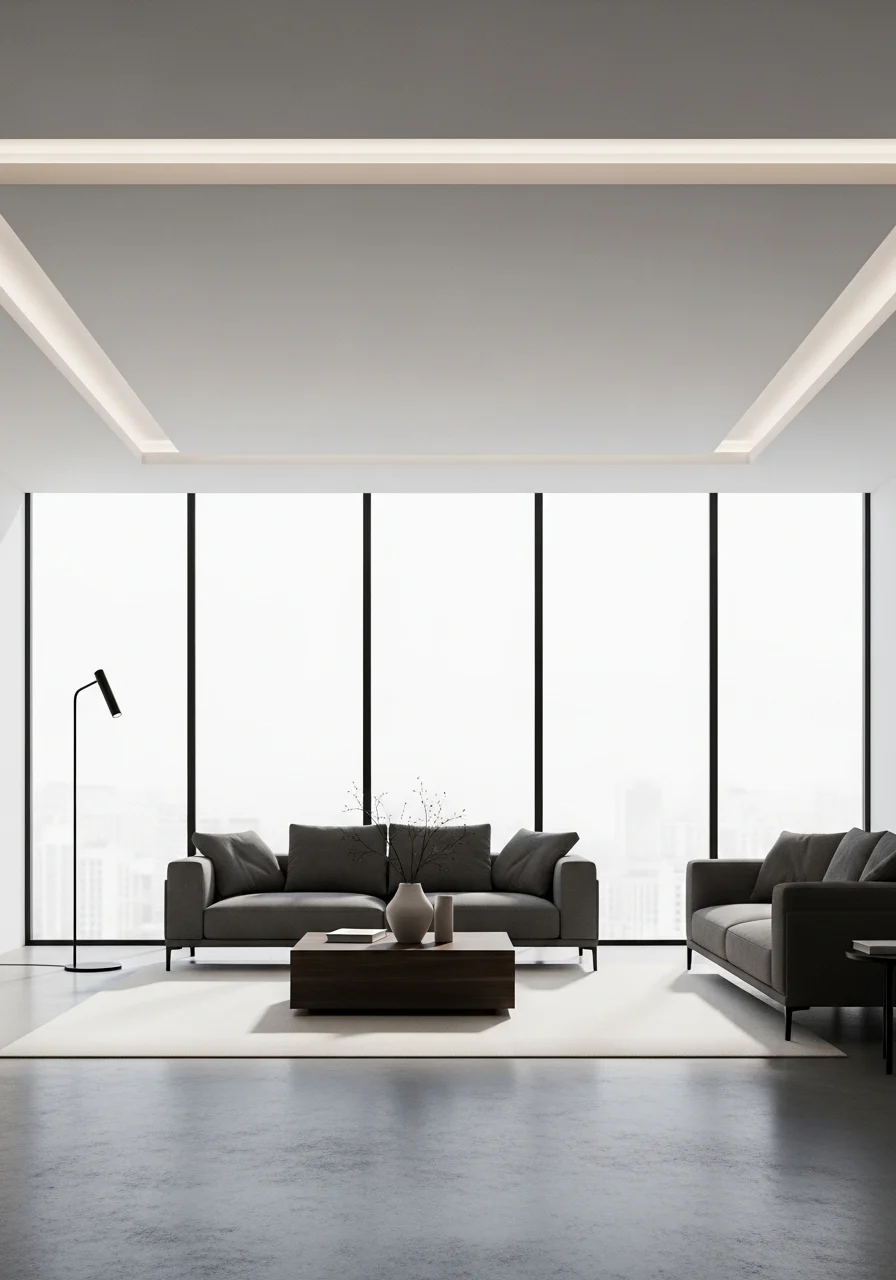
A minimalist flat ceiling keeps the room calm and modern. Conceal lights and speakers for a clean look. This approach makes other design elements pop without overhead distraction.
Key Elements
- Smooth drywall ceiling, seamless finish
- Flush recessed lighting
- Concealed speakers and HVAC grilles
- Paint-matched fixtures and diffusers
- Integrated dimmer switches
- High-quality joint compounds and sanding
- Low-VOC paint in flat or eggshell
- Professional drywall finishers for flawless look
How to Achieve This Look
- Install drywall with staggered joints for minimal seams.
- Tape and apply multiple thin coats of joint compound.
- Sand carefully between coats for a smooth surface.
- Install flush lighting and conceal speakers.
- Prime and paint the entire ceiling uniformly.
- Add dimmers and controls for hidden fixtures.
- Maintain by touching up paint as needed.
How to Style / Use It
Keep furniture lines clean and modern. Use artwork or textiles to add warmth. Ensure HVAC vents are subtle and unobtrusive. Repair hairline cracks quickly to preserve the flawless look.
16. Trompe-l'œil Sky Mural

A sky mural gives a playful, dreamy ceiling effect. Artists can paint clouds or hire a muralist. It opens the room visually and adds a unique personality.
Key Elements
- Latex paint in layered tones
- Faux cloud brushes and sponges
- Matte or satin clear coat for protection
- Reference photos or sketches
- Painter’s scaffold or ladder
- Sealant for longevity
- Soft blues, whites, and warm greys
How to Achieve This Look
- Prime the ceiling surface for even base color.
- Paint a flat sky base in gradient tones.
- Sketch cloud shapes lightly in chalk.
- Use round brushes and sponges to build cloud layers.
- Blend edges for soft realism.
- Apply a clear coat if desired for protection.
- Add subtle glaze for atmospheric depth.
- Coordinate room palette with mural tones.
How to Style / Use It
Pair mural with classic or eclectic furniture to match the whimsy. Keep lighting soft to preserve the illusion. Clean mural surface gently and retouch every few years.
17. Acoustic Panel Ceiling
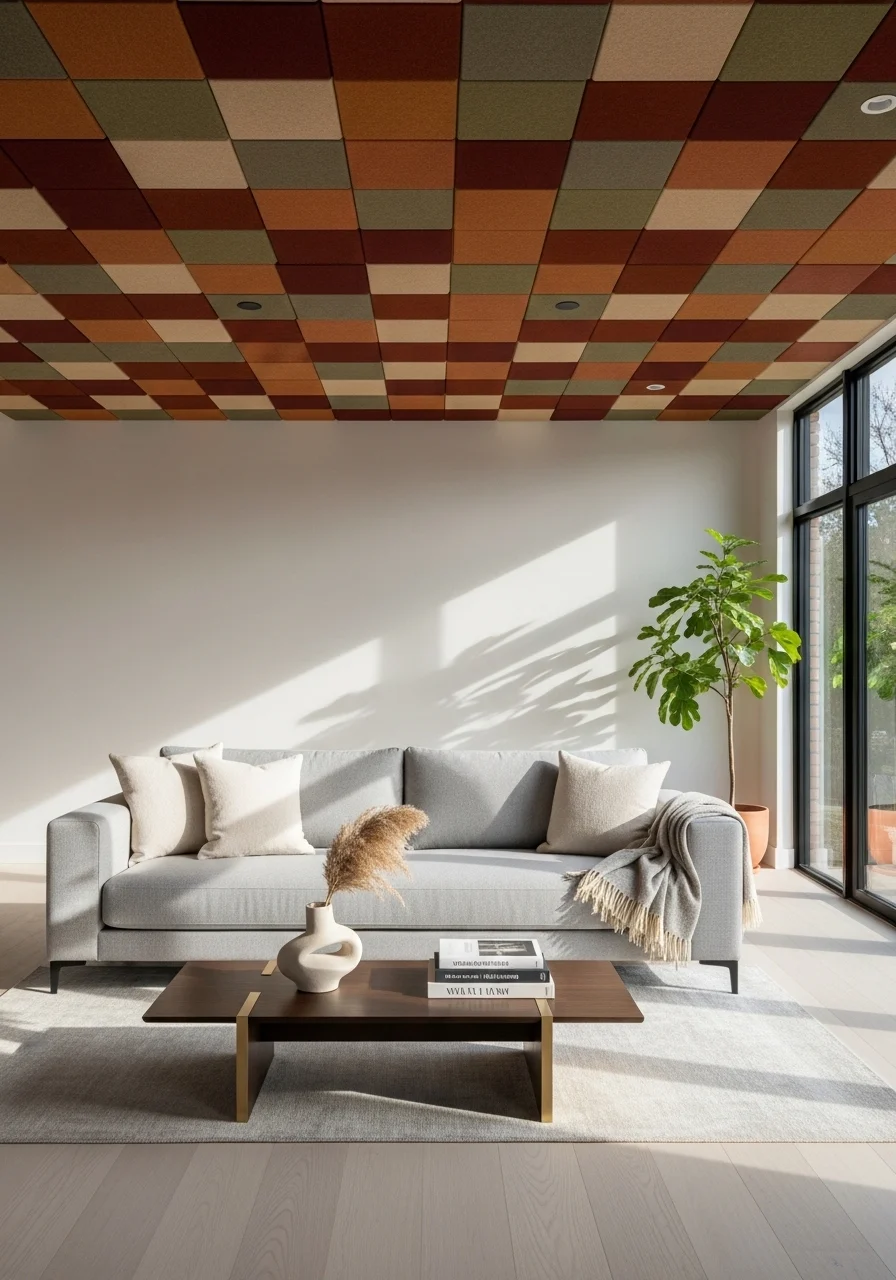
An acoustic ceiling softens sound and adds pattern. Felt or fabric-wrapped panels reduce echo in open living spaces. They’re functional and stylish.
Key Elements
- Felt or fabric-wrapped acoustic panels
- Adhesive or suspension system
- Color-coordinated palette
- Fire-retardant backing
- Sound-absorbing core (melamine or fiberglass)
- Clean, straight panel joins
- Ceiling grid or direct mount options
- Low-profile lighting integration
How to Achieve This Look
- Measure ceiling and plan panel layout.
- Choose panel size and fabric finish.
- Install adhesive pads or suspension clips.
- Mount panels securely, ensuring level placement.
- Integrate lighting by creating openings in panels.
- Seal panel edges for clean lines.
- Maintain by vacuuming gently.
How to Style / Use It
Match panel colors with rugs or cushions. Use acoustic panels near TV or speakers for improved sound. Replace panels that show wear. Arrange panels in patterns for visual interest.
18. Metallic Leaf Ceiling
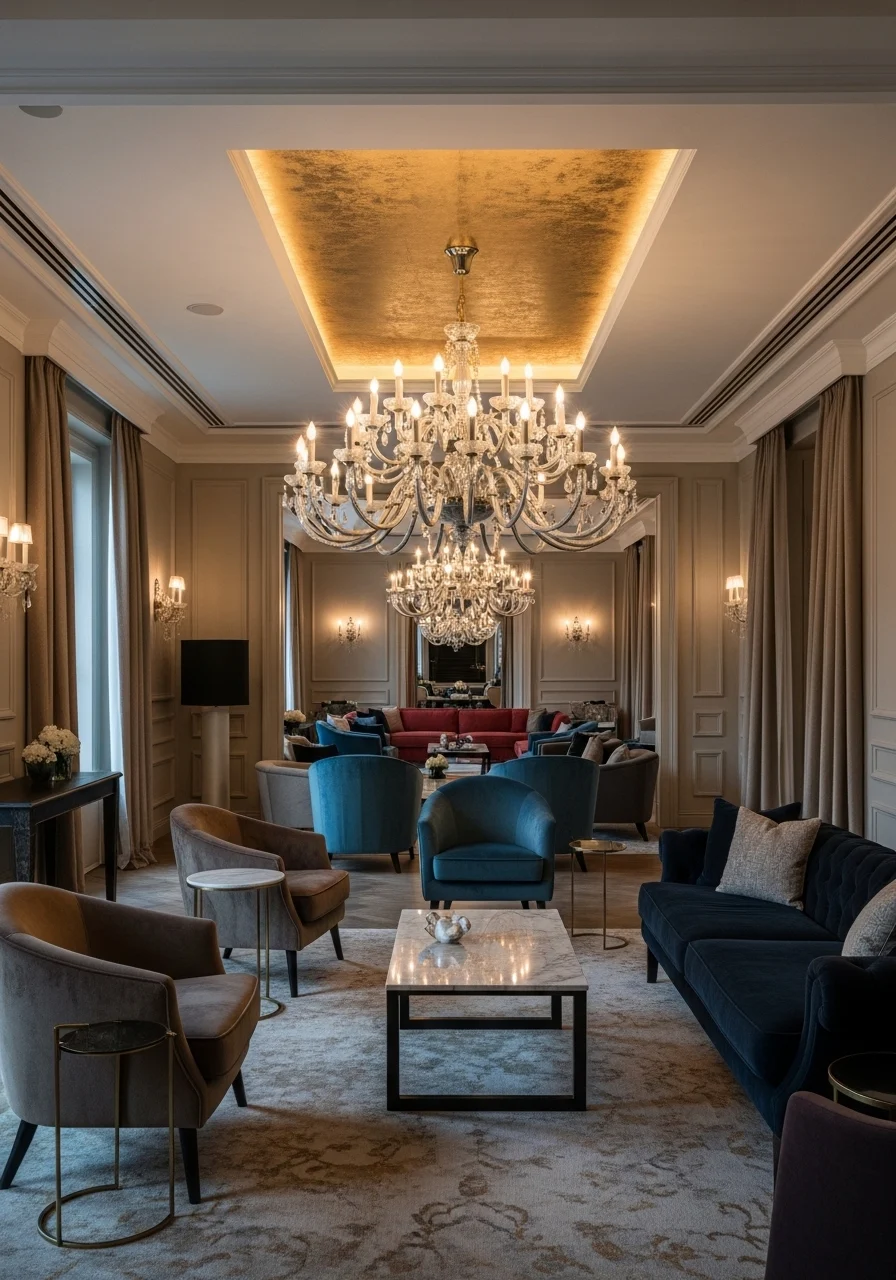
Metallic leaf adds a touch of glamour and warmth. Use gold, silver, or copper leaf sparingly for a luxe accent. It reflects light and adds texture.
Key Elements
- Metal leaf sheets (gold, silver, copper)
- Oil-based sizing or adhesive
- Soft brushes for pressing leaf
- Sealant or clear varnish
- Small accent area or whole ceiling
- Protective gloves and tack cloths
- Matte or semi-gloss background paint
- Professional installer for large areas
How to Achieve This Look
- Prime and paint ceiling in base color.
- Apply sizing in small workable sections.
- Lay metal leaf sheets gently and press with soft brush.
- Remove excess leaf with a dry brush.
- Seal with clear varnish if desired.
- Blend edges for organic finish.
- Keep ventilation on for fumes to dissipate.
How to Style / Use It
Use metallic leaf around the central fixture for subtle shimmer. Balance with matte furniture to avoid over-gloss. Dust gently with a soft brush. For a budget option, consider metallic paint accents.
19. Ceiling with Integrated Planter Boxes

Bring greenery overhead with shallow planter boxes or hanging troughs. Plants soften the ceiling line and add life. This idea is great for urban apartments with limited floor space.
Key Elements
- Lightweight planter troughs or boxes
- Waterproof liners and drainage trays
- Lightweight soil mixes
- Low-maintenance trailing plants (pothos, philodendron)
- Secure mounting brackets
- Grow lights if natural light is limited
- Regular watering access plan
- Hanging moss or preserved greenery option
How to Achieve This Look
- Choose shallow, lightweight planters.
- Install mounting brackets into ceiling joists.
- Add waterproof lining and drainage trays.
- Plant with lightweight soil and suitable plants.
- Route watering system or plan for manual watering.
- Add grow lights if necessary.
- Train plants to trail or hang as desired.
- Monitor for leaks and plant health.
How to Style / Use It
Use trailing plants to frame seating or windows. Rotate plants seasonally for health. Consider preserved greenery if maintenance is a concern. Clean trays and check mounts quarterly.
20. Patchwork Wood Ceiling
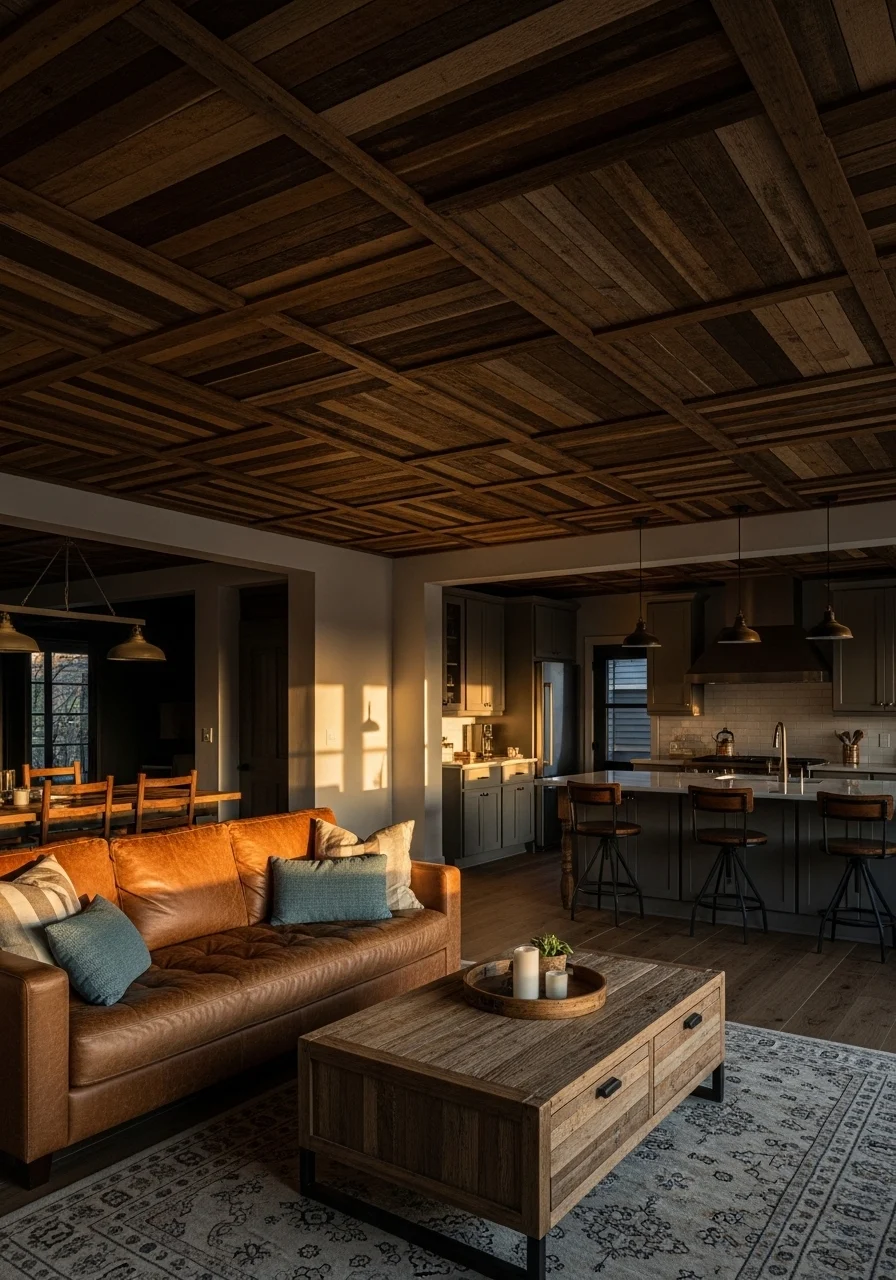
A patchwork wood ceiling brings a handcrafted, layered look. Use reclaimed boards of varying widths and tones for a warm, eclectic ceiling. It adds a unique, tactile overhead tapestry.
Key Elements
- Reclaimed wood boards in mixed species
- Planed and sealed boards
- Furring strips for nailing
- Randomized layout plan
- Matte polyurethane or oil finish
- Nail gun and finish nails
- Moisture acclimation before installation
- Dust sealing and yearly maintenance
How to Achieve This Look
- Source reclaimed boards and acclimate them.
- Sort boards by tone and width for a balanced look.
- Install furring strips on the ceiling.
- Attach boards in randomized sequence with finish nails.
- Cut and fit around lighting and fixtures.
- Fill small gaps or leave them for character.
- Seal boards with matte finish for protection.
- Maintain by dusting and occasional resealing.
How to Style / Use It
Match reclaimed tones in furniture or frames. Keep lighting warm to emphasize wood grain. Repair or replace damaged boards individually. This look pairs well with leather and woven textiles.
21. Integrated Skylight + Beam Mix
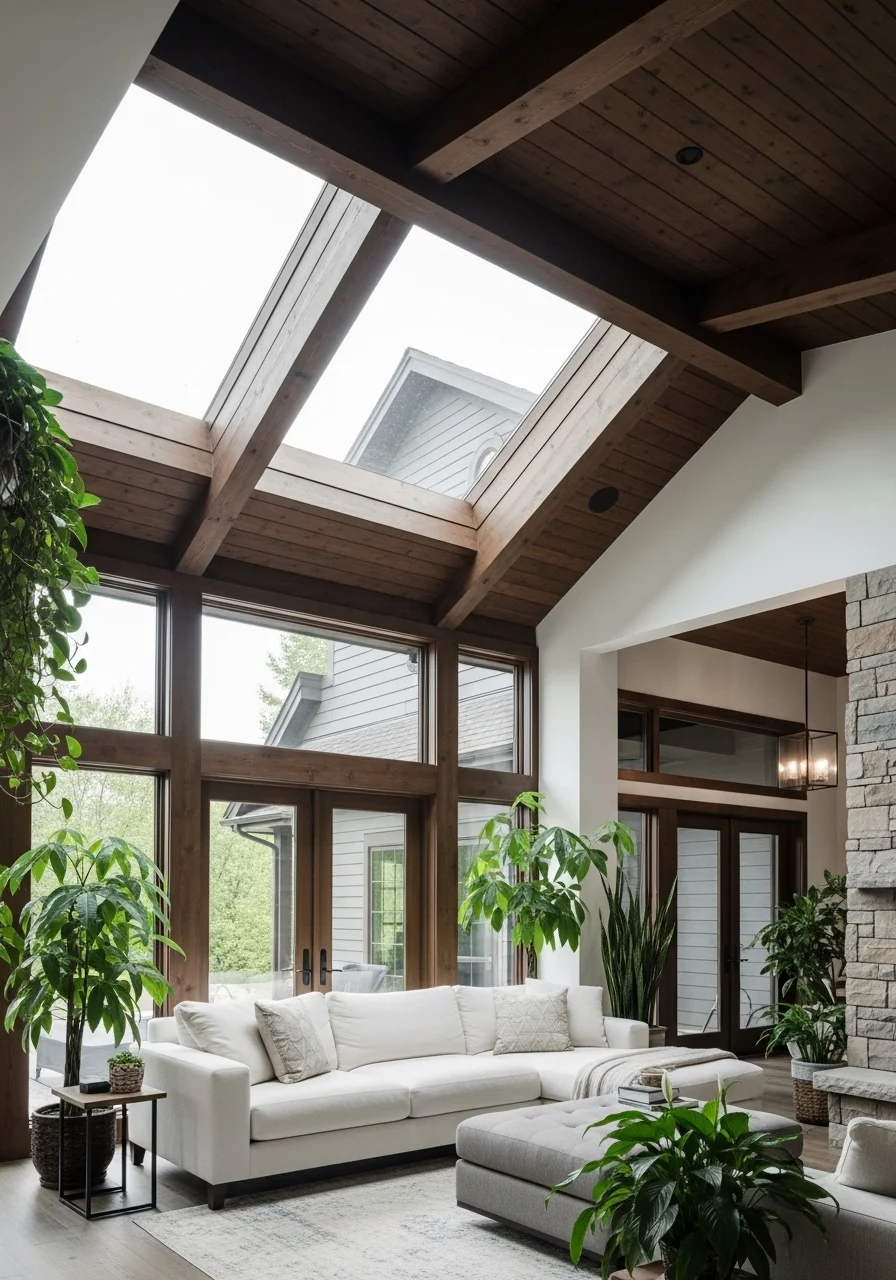
Combine skylights with beams for structural rhythm and daylight. The contrast between solid wood and sky openings is dramatic yet balanced. It gives both warmth and light to the living room.
Key Elements
- Multiple skylights sized to fit rafter bays
- Exposed beams or faux beams between skylights
- Flashing and waterproofing for skylights
- Insulation and vapor barrier
- Integrated shades for glare control
- Durable roofing materials around openings
- Professional install for flashing ties
- Coordinated interior trim finish
How to Achieve This Look
- Plan skylight placement between planned rafters.
- Frame skylight openings and install proper curbs.
- Install beams or beam covers between skylights.
- Flash skylights and test for leaks.
- Finish interior with trim and paint.
- Add blinds or shades for light control.
- Install lighting for evenings.
- Inspect seals seasonally.
How to Style / Use It
Place seating to benefit from sunlight. Use plants near skylights for natural growth. Keep beam finishes consistent with furniture. Clean skylights twice a year to maximize light.
22. Tray Ceiling with Wallpaper Inset
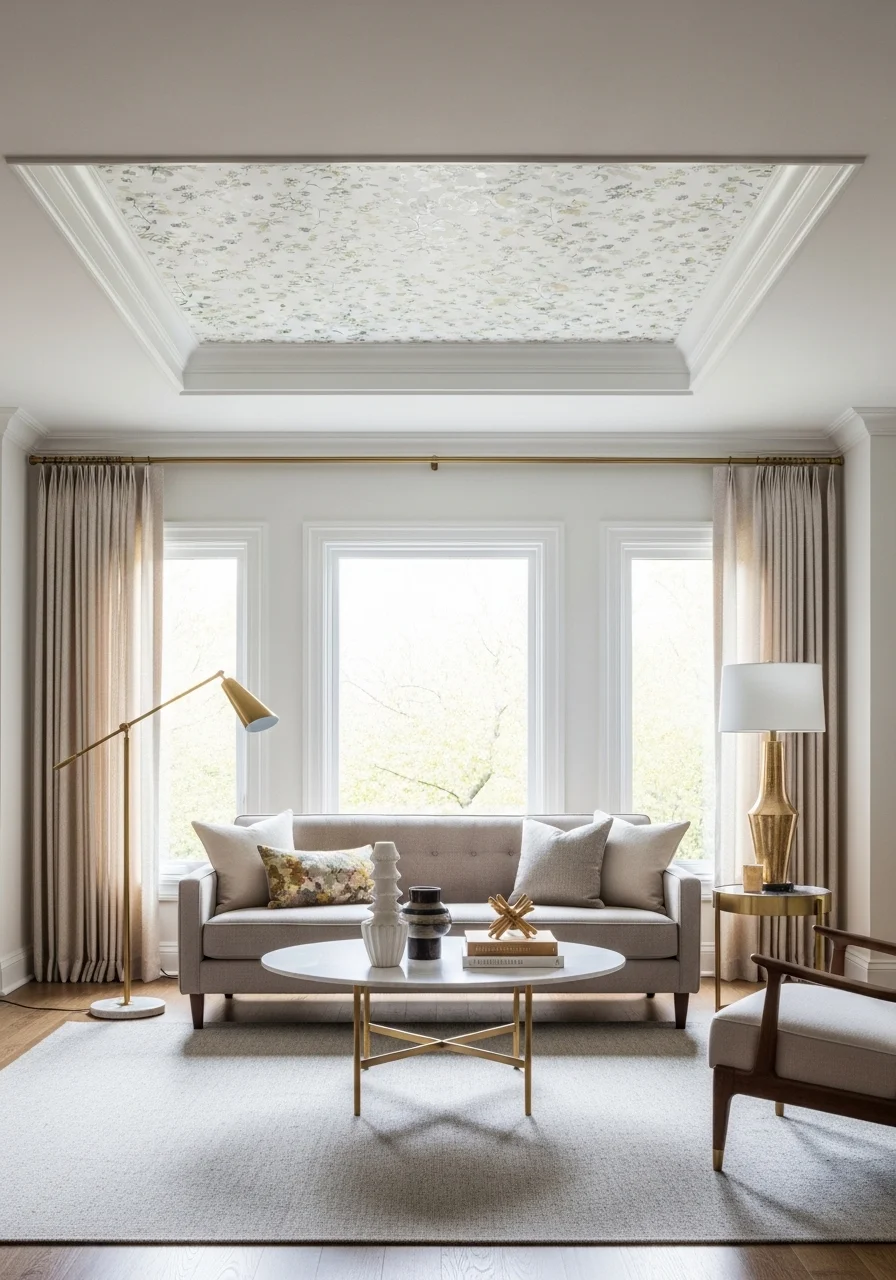
Wallpaper inside a tray adds graphic punch without overwhelming walls. Choose a small-scale pattern or a metallic design for subtle luxury. This technique frames the room with personality.
Key Elements
- Tray ceiling with adequate depth
- Wallpaper suitable for ceilings (lightweight)
- Seamless pattern alignment
- Wallpaper adhesive and smoothing tools
- Primer and paint for tray edges
- Crown molding or crisp reveal
- Wallpaper primer for better adhesion
- Trim to hide edges if needed
How to Achieve This Look
- Build tray soffit with drywall.
- Prime the recess and let dry fully.
- Measure and cut wallpaper panels to fit.
- Apply adhesive and smooth panels into place.
- Use a seam roller for invisible joins.
- Install trim or caulk edges for clean lines.
- Paint tray perimeter to complement wallpaper.
- Add a centered fixture for balance.
How to Style / Use It
Repeat wallpaper accent colors in pillows or art. Keep wall patterns minimal to avoid visual noise. Choose washable wallpaper for easy cleaning. Consider metallic wallpapers for a touch of glam.
23. Ceiling with Integrated Rail Lighting
Rail lighting offers flexibility for changing furniture arrangements. Adjustable heads let you spotlight art or create light zones. It’s practical and modern for living rooms where function matters.
Key Elements
- Recessed or surface-mounted light track
- Adjustable LED heads (warm dimmable)
- Track power feed and connectors
- Compatible dimmer switch
- Layout plan for light coverage
- Fixture finishes matching hardware
- Professional electrician for wiring
How to Achieve This Look
- Plan light paths and mounting points.
- Run wiring and install power feed per code.
- Mount track sections and secure connectors.
- Install LED heads and aim at focal points.
- Connect dimmer and test scenes.
- Adjust beam angles for even coverage.
- Label circuits and keep spare heads on hand.
How to Style / Use It
Use adjustable heads to highlight rotating art. Pair with ambient cove or recessed light for layered lighting. Replace heads with matching finishes to refresh the look. Clean heads and tracks occasionally.
24. Painted Coffered with Color Pop
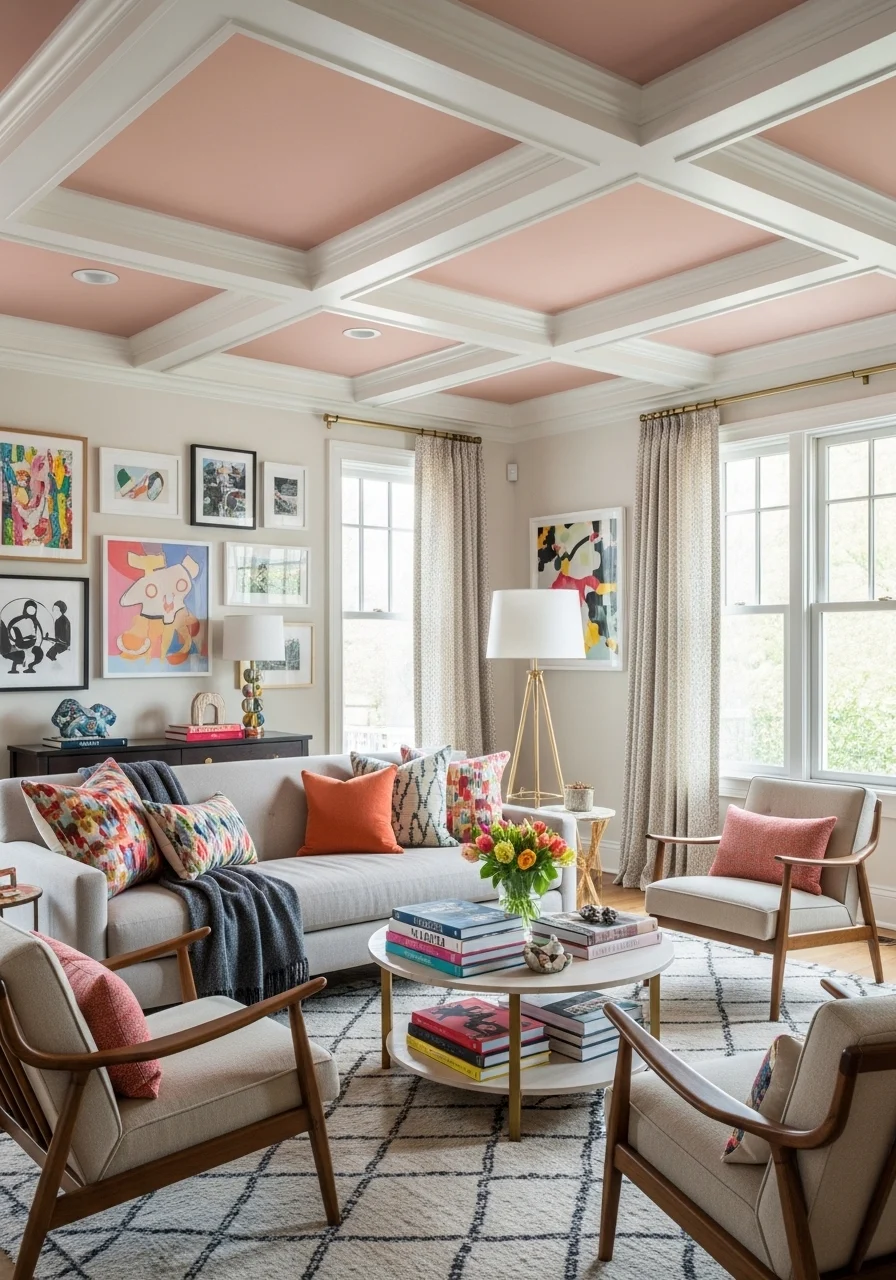
Painted coffers let you add color without overpowering the room. Keep beams neutral and paint the coffer recesses in bold or soft hues. It’s a smart way to introduce color to your living room ceiling design ideas.
Key Elements
- Coffered beam grid
- Color selection for recesses (accent tone)
- High-quality paint with even coverage
- Primer for wood or drywall surfaces
- Painter’s tape for crisp edges
- Matching accessories to tie color in
- Satin or matte finish depending on sheen preference
How to Achieve This Look
- Build or install coffered grid.
- Prime recesses and beams.
- Paint beams one neutral color first.
- Tape edges and paint recesses with accent color.
- Apply two coats for even pigment.
- Remove tape carefully for crisp reveals.
- Touch up edges and caulk small gaps.
- Accent the room with matching textiles.
How to Style / Use It
Echo coffer accent color in cushions, throws, or art. Use softer hues for subtlety or rich tones for drama. Repaint recesses affordably if you want seasonal changes. Keep beams clean to maintain contrast.
25. Modern Slatted Wood Ceiling

Slatted wood ceilings feel modern and rhythmic. Narrow slats with gaps create linear interest and can hide acoustics. They’re tidy and work well in contemporary living spaces.
Key Elements
- Wood slats (oak, walnut, or engineered veneer)
- Spacing strips or metal subframe
- Acoustic backing optional
- Stain or oil finish
- Integrated linear lighting between slats
- Precise mounting clips
- Vent and fixture cutouts planned
- Low-maintenance sealant
How to Achieve This Look
- Plan slat width and spacing for visual rhythm.
- Install subframe or furring strips for mounting.
- Pre-finish slats with stain or oil.
- Clip or screw slats to subframe in straight runs.
- Integrate linear LED lighting between select slats.
- Cut openings for fixtures and vents before mounting.
- Seal and touch up finish as needed.
- Inspect alignment and adjust slats for straight lines.
How to Style / Use It
Keep furnishings minimal to match the modern feel. Use warm LED tones to accent wood grain. Clean slats with a soft duster to avoid buildup. Replace damaged slats individually if needed.
You’ve just scrolled through 25 distinct living room ceiling design ideas. There’s a mix of small updates you can finish in a weekend and larger projects for a contractor. Pick one that suits your room scale, budget, and how you use the space.
Which ceiling made you want to try something new? Save a few pins and share your favorites with a friend who’s redecorating. When you pick a project, start with a plan and one clear decision — color, material, or light — and build from there. Have fun raising the style of your living room, and don’t forget to snap before-and-after photos.