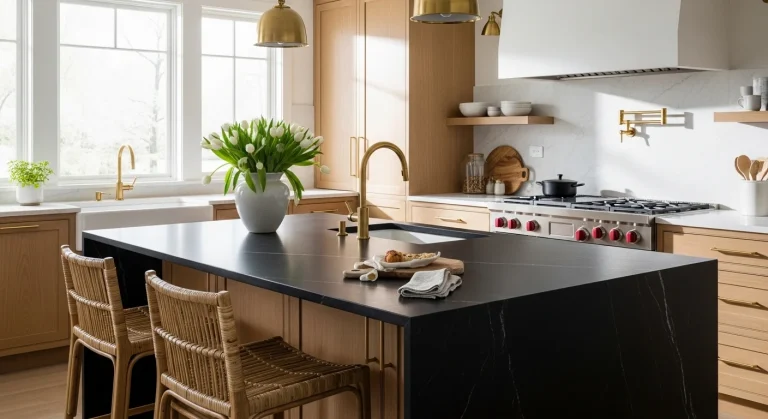
26 Small Kitchen Ideas That Maximize Every Inch
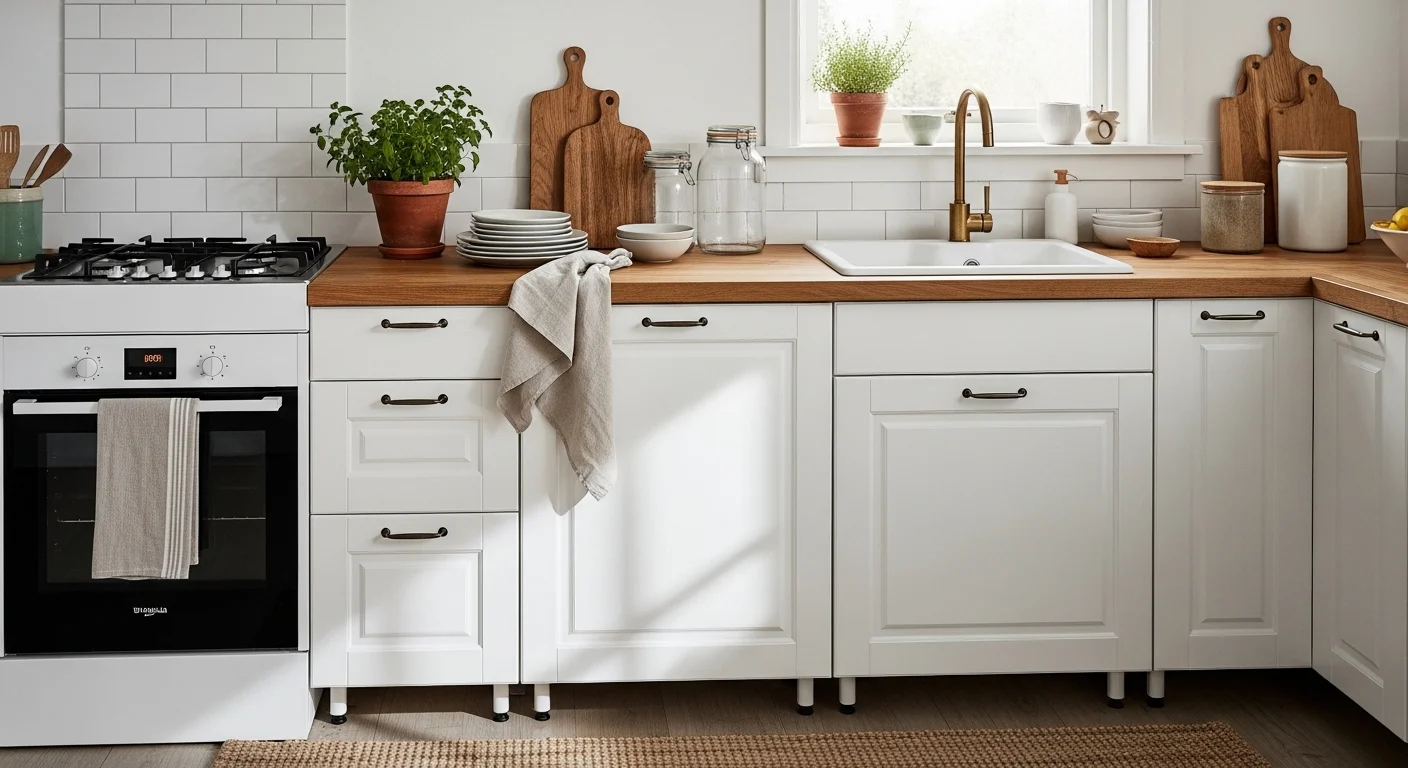
You love cooking, but your kitchen feels cramped. You want smart solutions that make the space feel larger and work harder. These 26 small kitchen ideas that maximize every inch are practical, pretty, and easy to try.
Inside you'll find small kitchen ideas that maximize every inch for storage, prep, and style. Each idea shows what to add, exact materials, and step-by-step setup. You’ll get shelf, cabinet, and appliance hacks plus styling tips that look magazine-ready.
Whether you rent a studio or plan a compact remodel, pick a handful of ideas and combine them. Pin the images, try one project at a time, and watch your small kitchen become a calmer, more functional room.
1. Floating Shelves + Rail Storage (Small Kitchen Ideas That Maximize Every Inch)
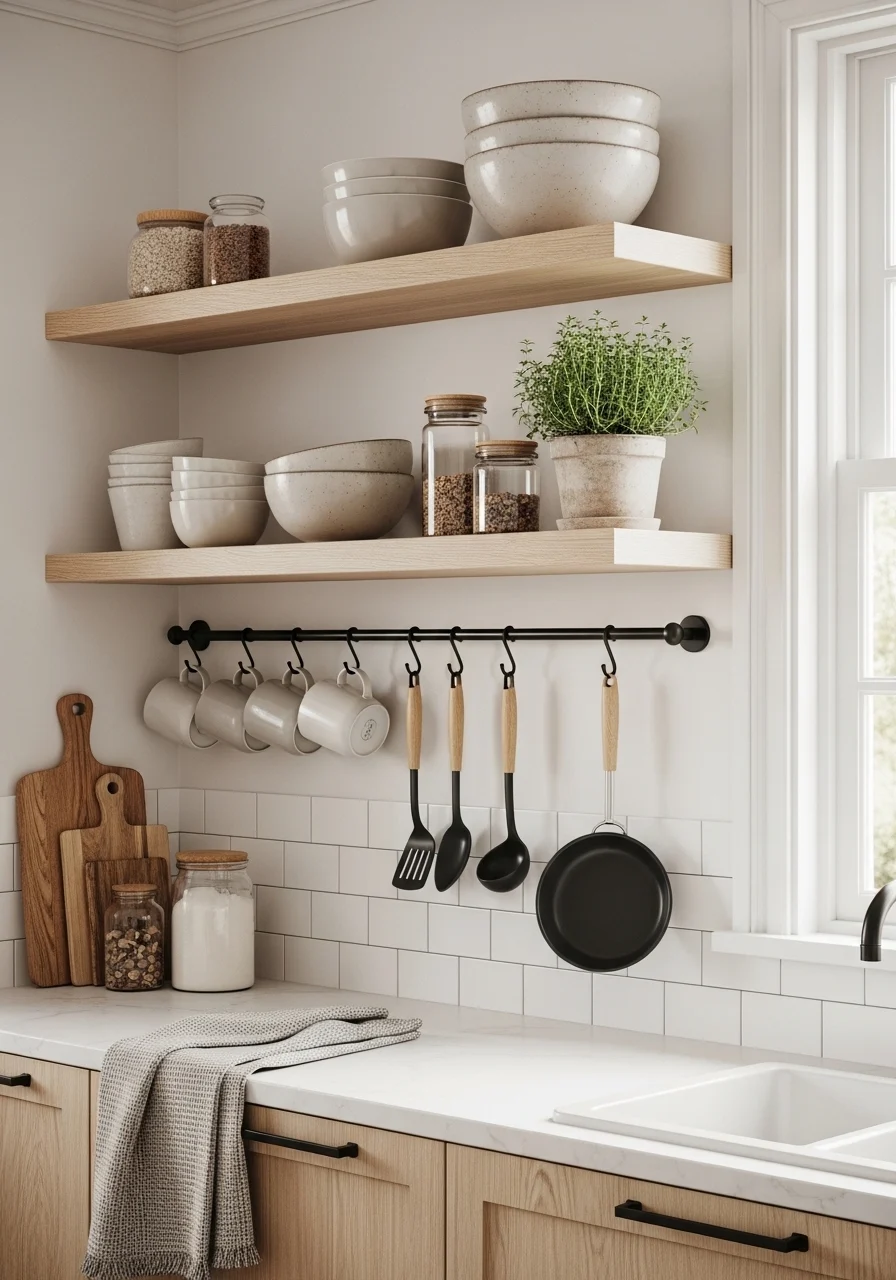
Open shelves feel airy and add storage without bulk. Floating wood shelves create vertical storage and a clean look. A slim rail underneath holds mugs and utensils, saving drawer space. This works in narrow galley kitchens and studio apartments. You’ll like the mix of wood, ceramic, and metal textures. The vibe is functional yet homey.
Key Elements
- 2–3 floating shelves, 8–12" deep, warm oak or walnut
- Matte black rail/rod with S-hooks
- Ceramic mugs and everyday plates stacked
- Glass canisters for dry goods
- Small potted herbs in terracotta pots
- Tile or white painted backsplash
- Brass or black shelf brackets (hidden for floating look)
- Soft linen tea towels folded on the shelf
- Minimal framed print or recipe card
- Under-shelf LED strip light (warm white)
How to Achieve This Look
- Measure wall height and mark studs for secure mounting.
- Install floating shelf brackets or hidden supports.
- Mount shelves at different heights for visual interest.
- Add a slim rail beneath the lowest shelf and attach S-hooks.
- Arrange dishes by size; stack plates and bowls vertically.
- Place glass canisters toward the back for pantry staples.
- Add two small herbs near the window for freshness.
- Install an LED strip under the bottom shelf for task light.
- Keep decorative items minimal to avoid clutter.
- Reorganize seasonally to maintain simplicity.
How to Style / Use It
Hang frequently used mugs and tools for easy reach. Pair wood shelves with matte black hardware for contrast. Rotate seasonal decor and swap herbs for fresh greenery. Dust and wipe shelves weekly to keep the area tidy. Use clear canisters so refills are simple.
2. Pull-Out Pantry Drawer Tower
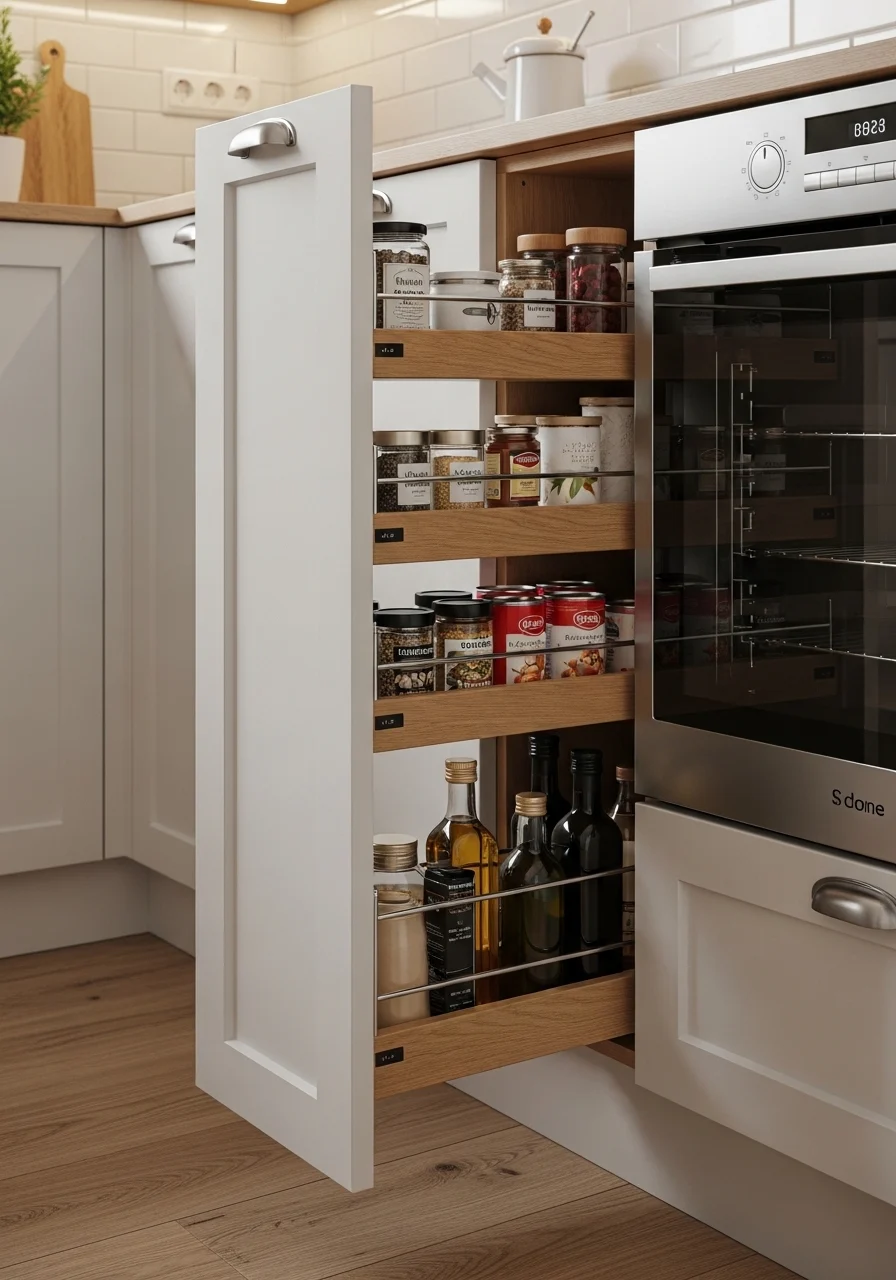
A tall pull-out pantry fits into a 6–12" gap for instant storage. It’s perfect for oils, tins, and spice bottles. The slim tower keeps items visible and reachable. The visual is neat rows of labeled jars and uniform containers. People who cook often will love the ease of grab-and-go access.
Key Elements
- Slim pull-out pantry unit (6–12" wide)
- Adjustable shelves or wire baskets
- Clear spice jars with labels
- Tall bottle holders for oils/vinegar
- Can risers for stacked cans
- Non-slip shelf liners
- Soft-close drawer slides
- Matte finish to match cabinets
- Small LED motion light inside
- Magnetic door latch
How to Achieve This Look
- Measure the gap between fridge and wall or cabinet.
- Choose a ready-made pull-out pantry or custom order.
- Install soft-close full-extension drawer slides.
- Add adjustable wire baskets or narrow shelves.
- Place heavy items lower and bottles upright.
- Use uniform clear jars and label them.
- Fit a small LED motion light inside.
- Add non-slip liners to prevent shifting.
- Test the slide and adjust for smooth operation.
- Keep frequently used items at eye level.
How to Style / Use It
Group items by category: oils, baking, canned goods. Use clear labels in the same font for a tidy look. Refill jars from bulk buys to cut waste. Check expiration dates monthly and rotate stock forward. This system makes meal prep faster in tight kitchens.
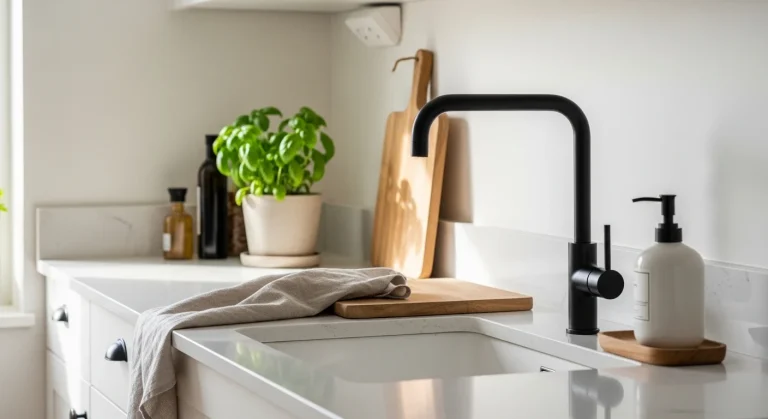
3. Magnetic Wall Storage and Knife Strip
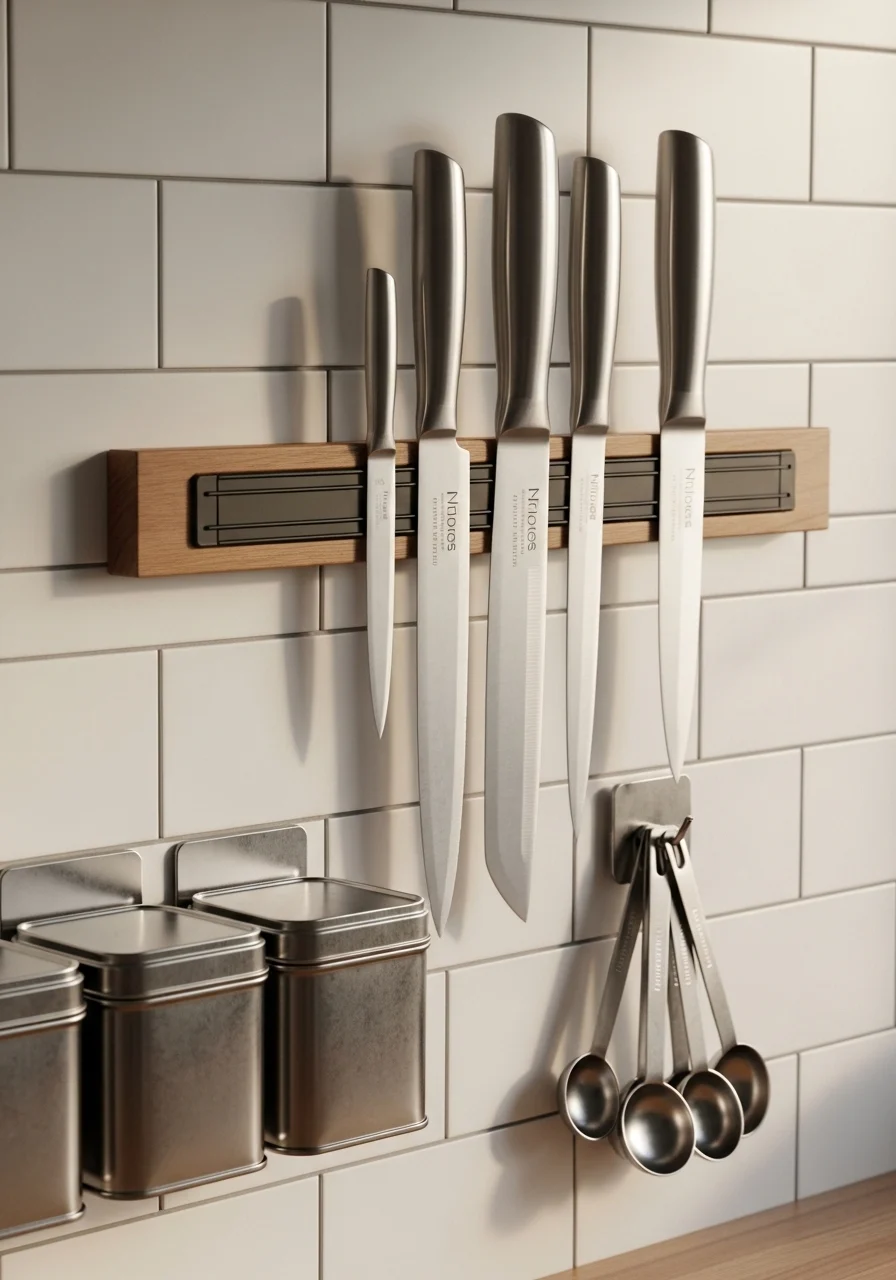
Putting knives and metal tools on a magnetic strip frees up counter and drawer space. It keeps blade edges visible and adds a visual focal point. Magnetic spice tins on the wall save shelf space and look modern. This is great if you like an organized, professional feel when cooking.
Key Elements
- Wooden magnetic knife strip (18–24")
- Stainless steel knives and metal tools
- Magnetic spice tins with clear lids
- White tile or painted backsplash
- Small wooden shelf under the strip
- Metal measuring spoons and small pans
- Decorative hook for aprons
- Minimal decorative plate or herb jar nearby
- Matte black screws and anchors
How to Achieve This Look
- Choose a wall above the counter with easy reach.
- Mount the magnetic strip securely into studs.
- Arrange knives from largest to smallest visually.
- Add magnetic spice tins in a grid nearby.
- Place metal tools like ladles on small magnets.
- Install a small shelf below for non-magnetic items.
- Keep counter space clear under the strip for prep.
- Clean the knives and dry them before mounting.
- Check magnets periodically for secure hold.
- Rotate spices so labels face outward.
How to Style / Use It
Keep frequently used knives at the center for quick access. Pair wood strip with stainless tools for contrast. Wipe knives immediately after use and dry fully to prevent rust. Use spice tins consistently and refill when low. This method reduces drawer clutter and speeds cooking.
4. Under-Cabinet Lighting and Slim Task Lights
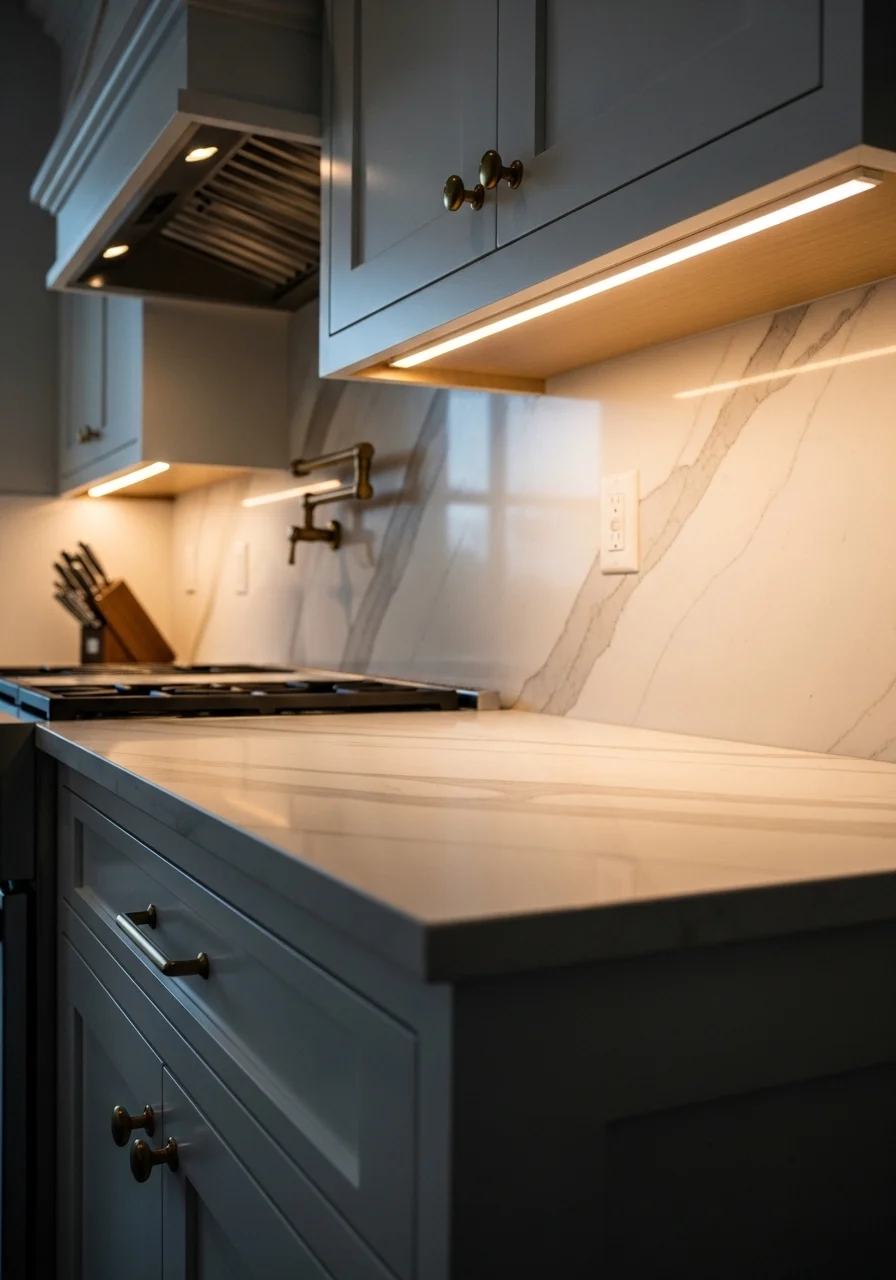
Lighting makes a small kitchen feel larger and more usable. Under-cabinet LEDs illuminate prep zones without bulky fixtures. Slim puck lights highlight worktops and make tasks safer. The warm glow softens surfaces and brings out textures. Ideal for anyone who cooks at night or wants a cozier atmosphere.
Key Elements
- Warm white LED strip lights (3000K)
- Slim puck lights for dim corners
- Adhesive cable covers (white)
- Dimmer switch or plug-in dimmable transformer
- Motion sensor option for under-sink cabinet
- Clean white cabinet bottoms
- Marble or butcher block countertop
- Low-profile power supply tucked away
- Small remote control or wall dimmer
How to Achieve This Look
- Measure under-cabinet length and choose LED strips.
- Clean cabinet undersides before stick-on installation.
- Run cables along cabinet seams using cable covers.
- Connect to a dimmable transformer or outlet.
- Install puck lights in shadowy corners.
- Use a motion sensor under the sink for convenience.
- Test the dimmer and set preferred brightness levels.
- Hide the power supply in a corner cabinet.
- Replace bulbs with same color temperature for consistency.
- Wipe the LEDs occasionally to remove dust.
How to Style / Use It
Use dim lighting for evening ambience and brighter settings for prep. Pair warm LEDs with wood tones to enhance warmth. Set motion sensor for quick light when hand reaches under cabinets. Keep wiring tidy to maintain a clean look.
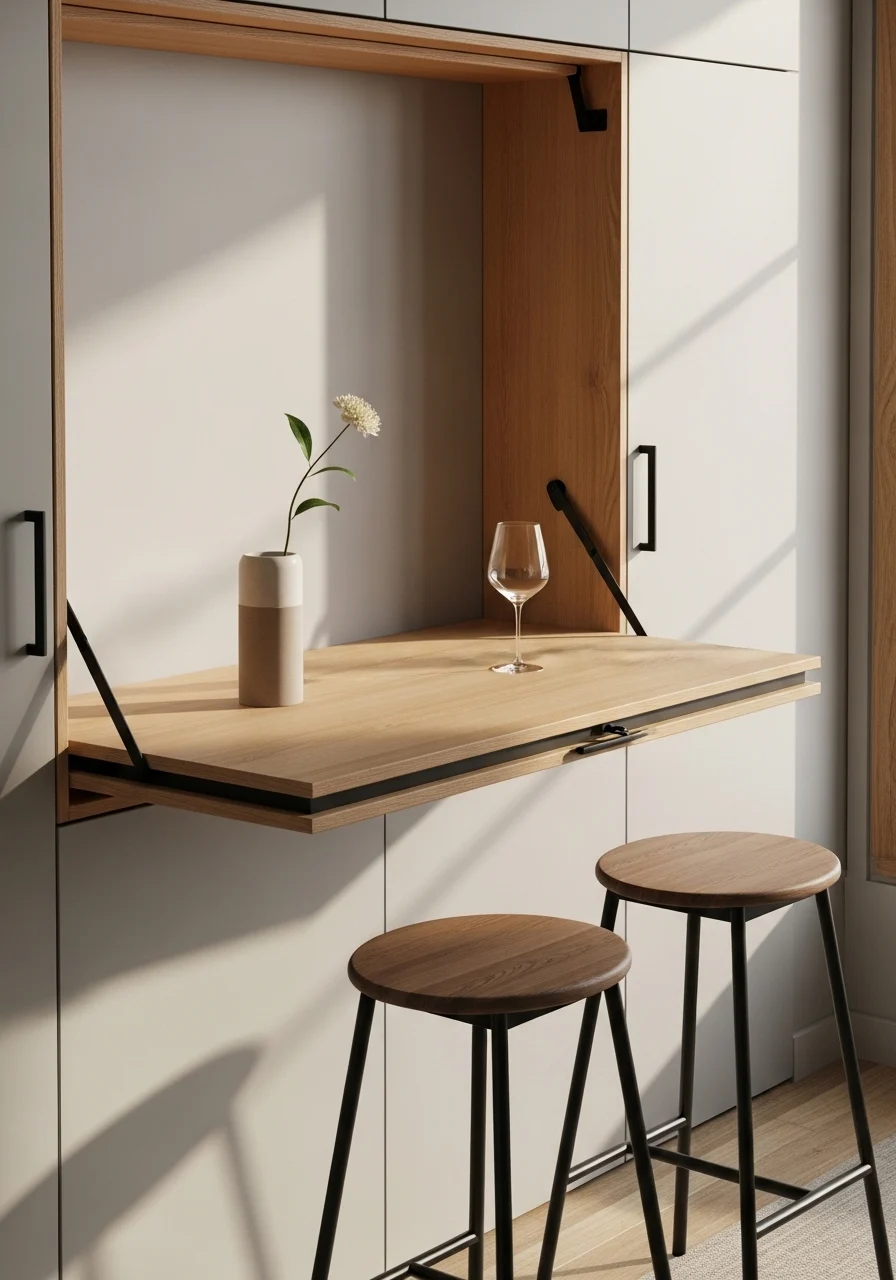
5. Fold-Down Drop-Leaf Table

A wall-mounted drop-leaf table gives you dining or prep space that disappears. Fold it up when not in use to free floor area. It suits narrow kitchens and studio apartments. The look is clean, functional, and slightly vintage. You'll love the extra surface without sacrificing flow.
Key Elements
- Solid wood drop-leaf table top (folds flat)
- Brass or black industrial hinges
- Two slim stools that tuck under
- Wall-mounted folding bracket or support arm
- Small vase or tray for center decor
- Matte paint on wall to match cabinets
- Minimal placemats or cutting board
- Mounting studs and heavy-duty screws
- Soft-close mechanism optional
How to Achieve This Look
- Choose a wall near prep area or window.
- Locate studs and mark mounting points.
- Attach folding bracket securely to studs.
- Mount the table top using the hinges.
- Fit stools that slide entirely beneath the table.
- Add a small, shallow tray for keys or essentials.
- Test the leaf for stable support and adjust screws.
- Sand and seal the wood top for easy cleaning.
- Use a cutting board when prepping to protect finish.
- Fold the leaf up when not in use.
How to Style / Use It
Use as a breakfast nook, extra prep station, or laptop desk. Pair with slim, cushionless stools to save space. Keep the top clear for quick folding. Clean spills quickly to maintain finish. For guests, add a runner and stackable plates.
6. Rolling Island Cart with Drop Leaves
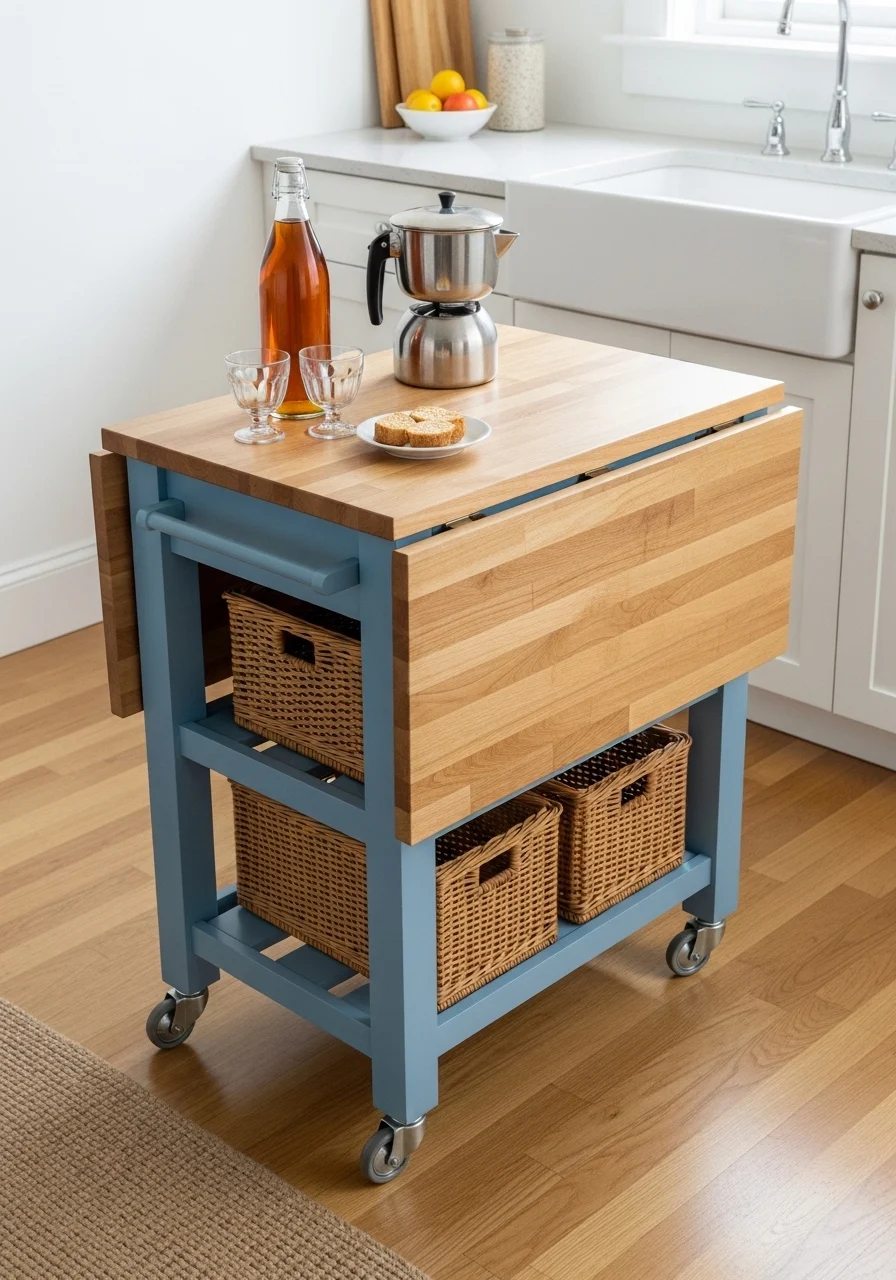
A narrow rolling island adds mobile prep and storage. Drop leaves expand surface only when needed. Locking casters keep it steady. Ideal for renters who want extra counter space without permanent changes. The mix of wood, paint, and wicker feels warm and intentional.
Key Elements
- Narrow island cart with butcher block top
- Drop leaves on both sides
- Locking swivel casters
- Open shelf with wicker baskets
- Lower towel rack or hooks
- Painted base in accent color
- Knife block and utensil jar on top
- Compact wine rack or basket storage
- Stainless steel trim or corner protectors
How to Achieve This Look
- Measure space and choose a cart width that fits aisles.
- Install drop leaves and check hinge movement.
- Attach locking casters and test mobility.
- Add wicker baskets for linens and pantry overflow.
- Mount hooks for tea towels on one side.
- Keep heavy items low to maintain stability.
- Use butcher block as a cutting surface with board on top.
- Lock wheels during use for safety.
- Position near sink or stove as prep helper.
- Wipe down wood and oil periodically.
How to Style / Use It
Keep the top clutter-free for quick rolling. Use baskets underneath for recycling or extra dishware. Match the painted base to a small accent wall or curtains. Use as buffet when entertaining and tuck away when done. Regularly oil butcher block to prevent drying.
7. Corner Carousel Lazy Susan (Small Kitchen Ideas That Maximize Every Inch)
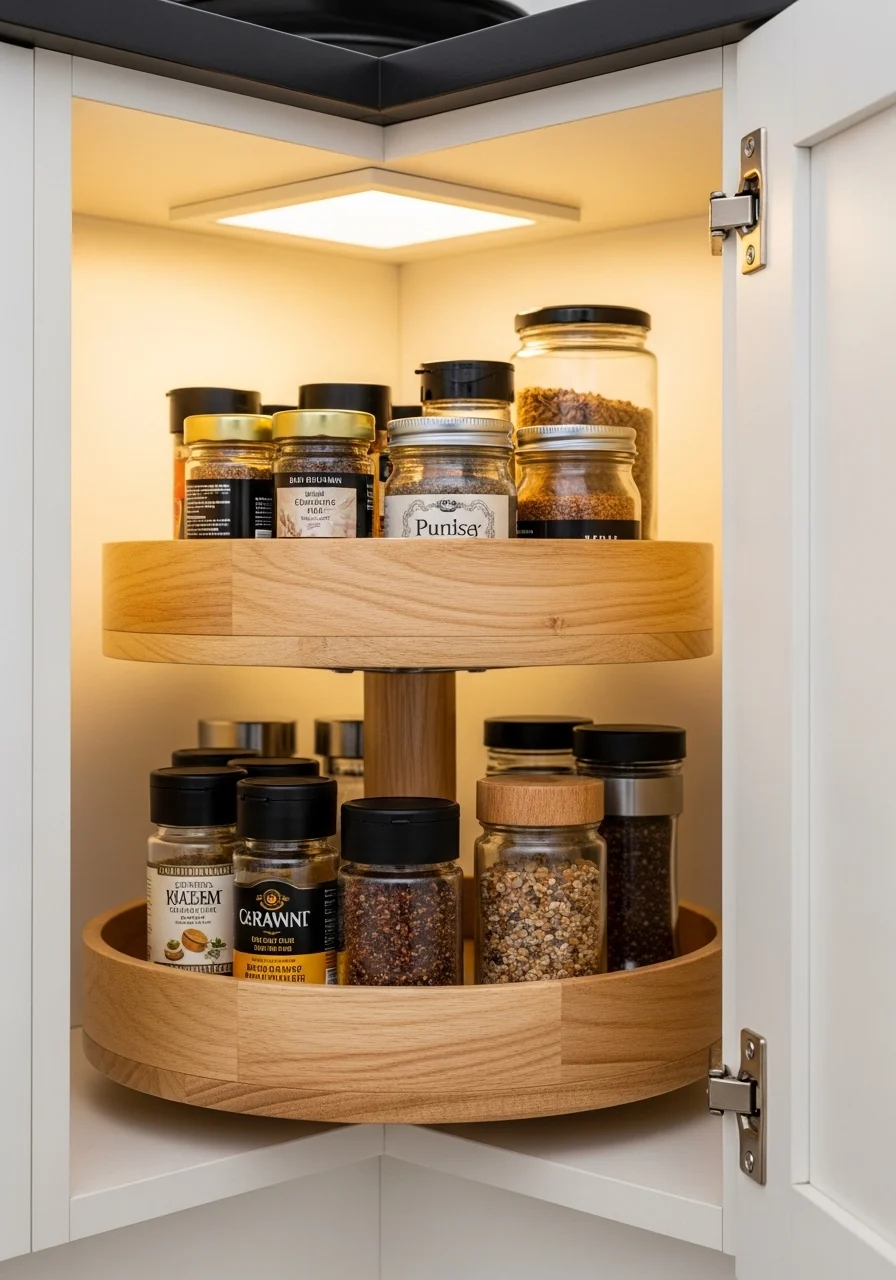
Corner cabinets often waste space. A two-tier carousel makes everything reachable and visible. It fits in rounded or square corner units and reduces the need to bend and reach. The look is orderly circles of jars and bottles, very satisfying to spin. Great for cooks who like to see all their tools at once.
Key Elements
- Two-tier wooden or melamine lazy susan
- Non-slip surfaces on each tier
- Spice jars and small bottles
- Tall bottle ring for oils at edge
- Smooth bearing mechanism
- Soft-close cabinet hinge
- Cabinet lighting for visibility
- Small storage trays for tiny items
- Labelled jars for quick ID
How to Achieve This Look
- Empty the corner cabinet and measure interior dimensions.
- Choose a lazy susan unit that fits snugly.
- Install the center pole and attach tiers per instructions.
- Place larger items on lower tier, small jars above.
- Use non-slip mats to prevent sliding.
- Add a small LED puck light inside the cabinet.
- Organize bottles by use: cooking, baking, sauces.
- Test spin and adjust spacing for smooth rotation.
- Keep frequently used condiments at the front.
- Wipe tiers periodically to remove crumbs.
How to Style / Use It
Rotate the carousel to grab spices while cooking. Group items by meal or cuisine for efficiency. Use uniform jars and labels for a cohesive look. Check for expired items when refilling. This turns awkward corner real estate into useful storage.
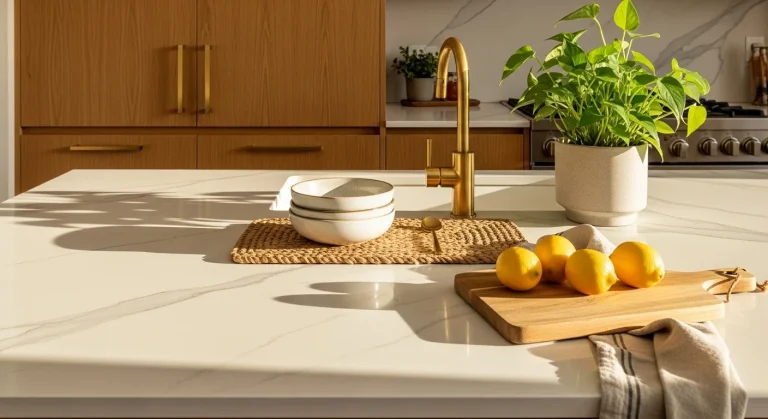
8. Over-the-Sink Cutting Board and Dish Rack
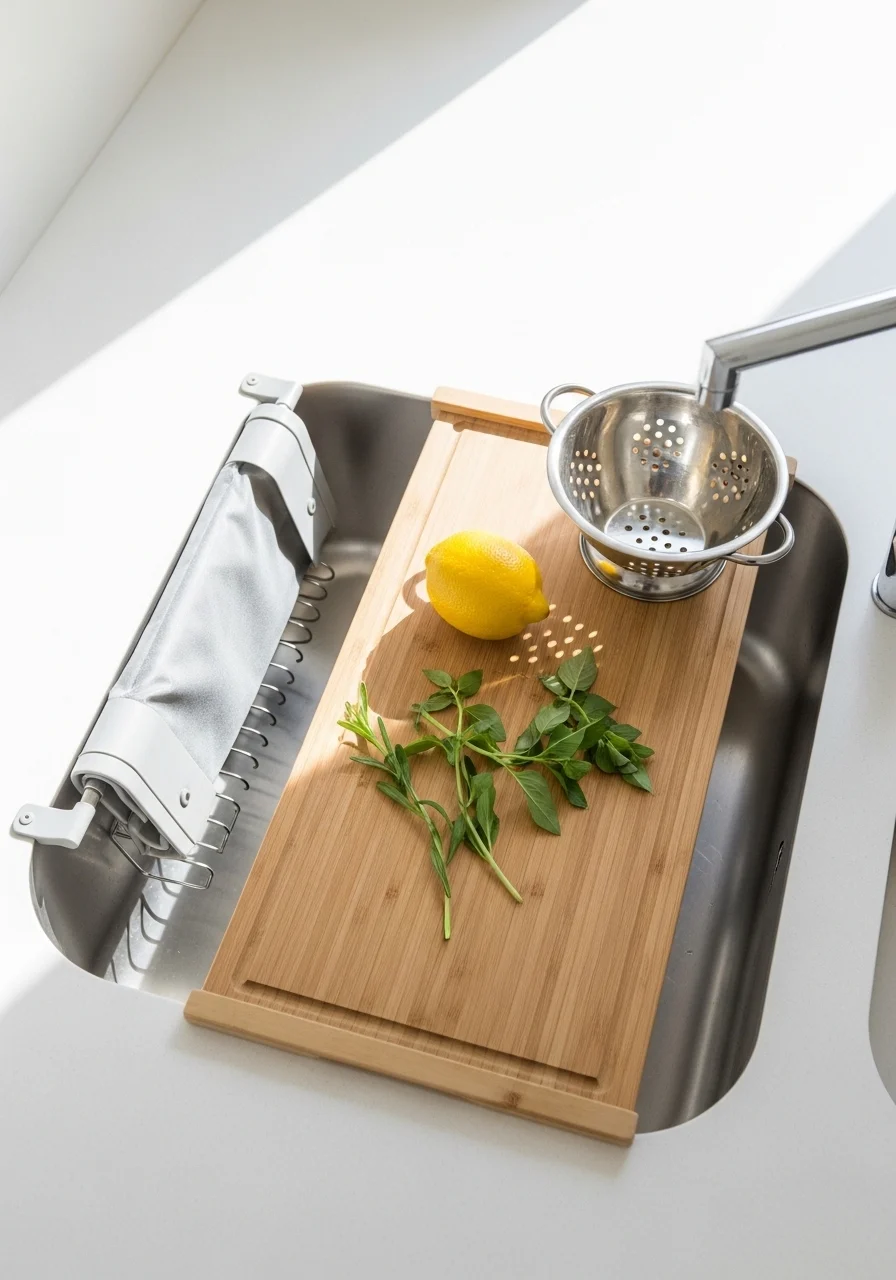
An over-the-sink cutting board expands prep space and keeps mess contained. Pair with a roll-up dish rack to air-dry dishes without taking counter room. The visual is tidy: wood board, gleaming sink, and fresh produce. This suits small kitchens where every inch counts.
Key Elements
- Bamboo or hardwood sink-top cutting board
- Roll-up silicone dish rack
- Stainless over-sink colander
- Sink-mounted faucet with pull-down sprayer
- Soft dish towel hung nearby
- Cutting board with juice groove
- Soap dispenser built into counter
- Compact vegetable brush and small bowl
- Sink grid to protect basin
How to Achieve This Look
- Measure sink width for a snug cutting board fit.
- Choose a board with a built-in juice groove.
- Place roll-up rack to one side for drying.
- Use over-sink colander for rinsing produce.
- Keep soap and towels within reach.
- Use the pull-down sprayer to rinse the board clean.
- Lift board to empty scraps into compost or trash.
- Wipe the board dry after use to prevent warping.
- Store board vertically when not in use.
- Replace silicone rack if mold appears.
How to Style / Use It
Use as a prep station that keeps counters free. Match wood tones to butcher block surfaces. Clean and oil wooden boards regularly. Choose a roll-up rack color that complements dishware. Great for meal prep or when you need extra workspace.
9. Vertical Plate Rack Inside Cabinets
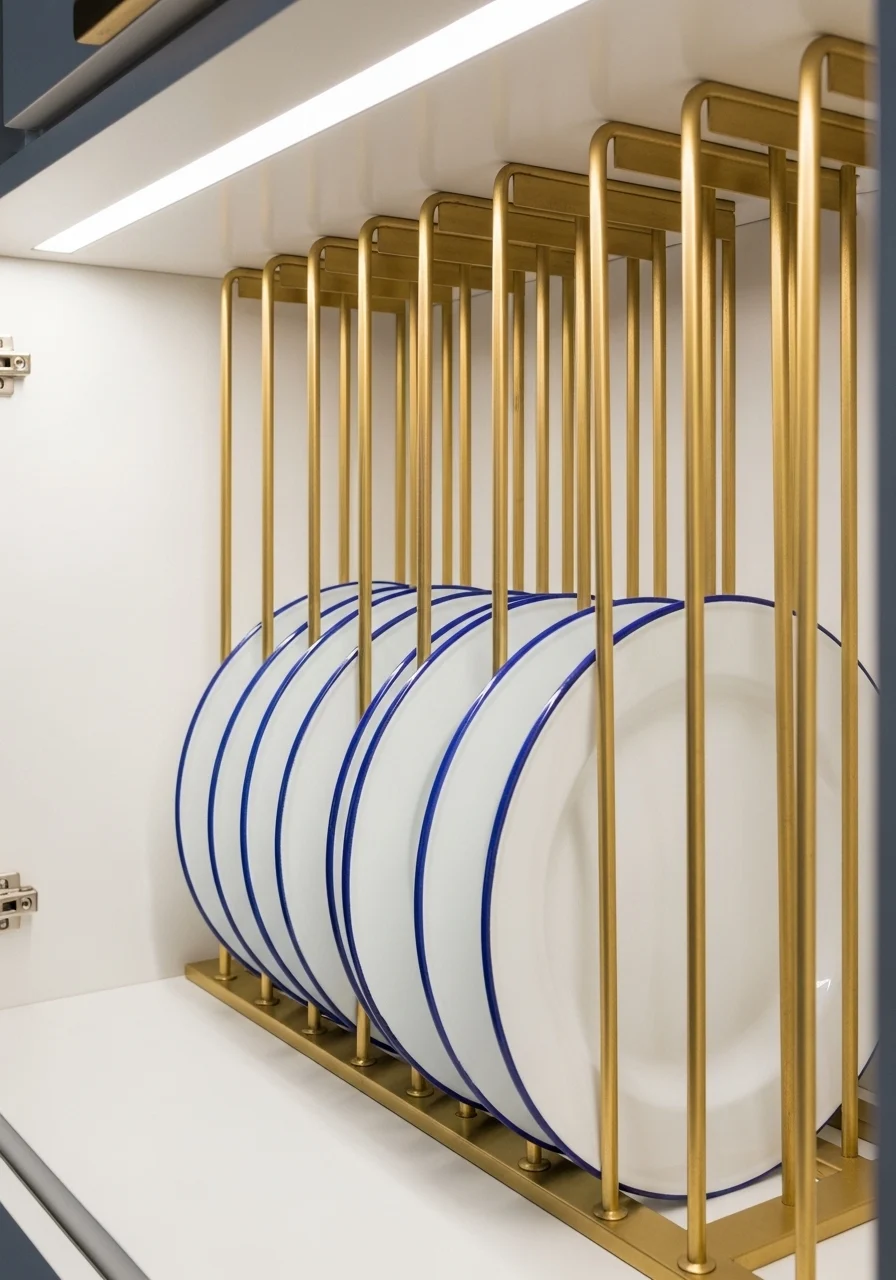
Storing plates vertically creates space for more items and faster access. A vertical rack keeps plates visible and reduces stacking weight. The scene shows neat rows of plates with brass dividers. This method suits shallow cabinets and makes dinner setup faster.
Key Elements
- Metal or wood vertical plate rack
- Rubber feet or liners to protect plates
- Shallow cabinet depth 10–12"
- Sorted plate sizes from front to back
- Small shelf above for bowls/flatware
- Non-scratch dividers
- Light-colored plates for airy look
- Soft cabinet lighting
- Small label for occasional items
How to Achieve This Look
- Measure cabinet depth and plate diameter.
- Choose a rack that fits comfortably with door closure.
- Insert non-scratch liners or felt pads.
- Place largest plates in back, smaller in front.
- Add cabinet lighting for visibility.
- Use small shelf space above for bowls.
- Avoid overpacking to prevent chipping.
- Check that the door closes without pressure.
- Add a thin rod to keep plates upright if needed.
- Clean rack periodically to remove dust.
How to Style / Use It
Group plates by color or meal type for quick setting. Use neutral plates to brighten cabinet interiors. Keep everyday plates in front and seasonal or special plates behind. Vertical storage makes unloading dishwasher faster.
10. Slim Dishwasher or Drawer Dishwasher
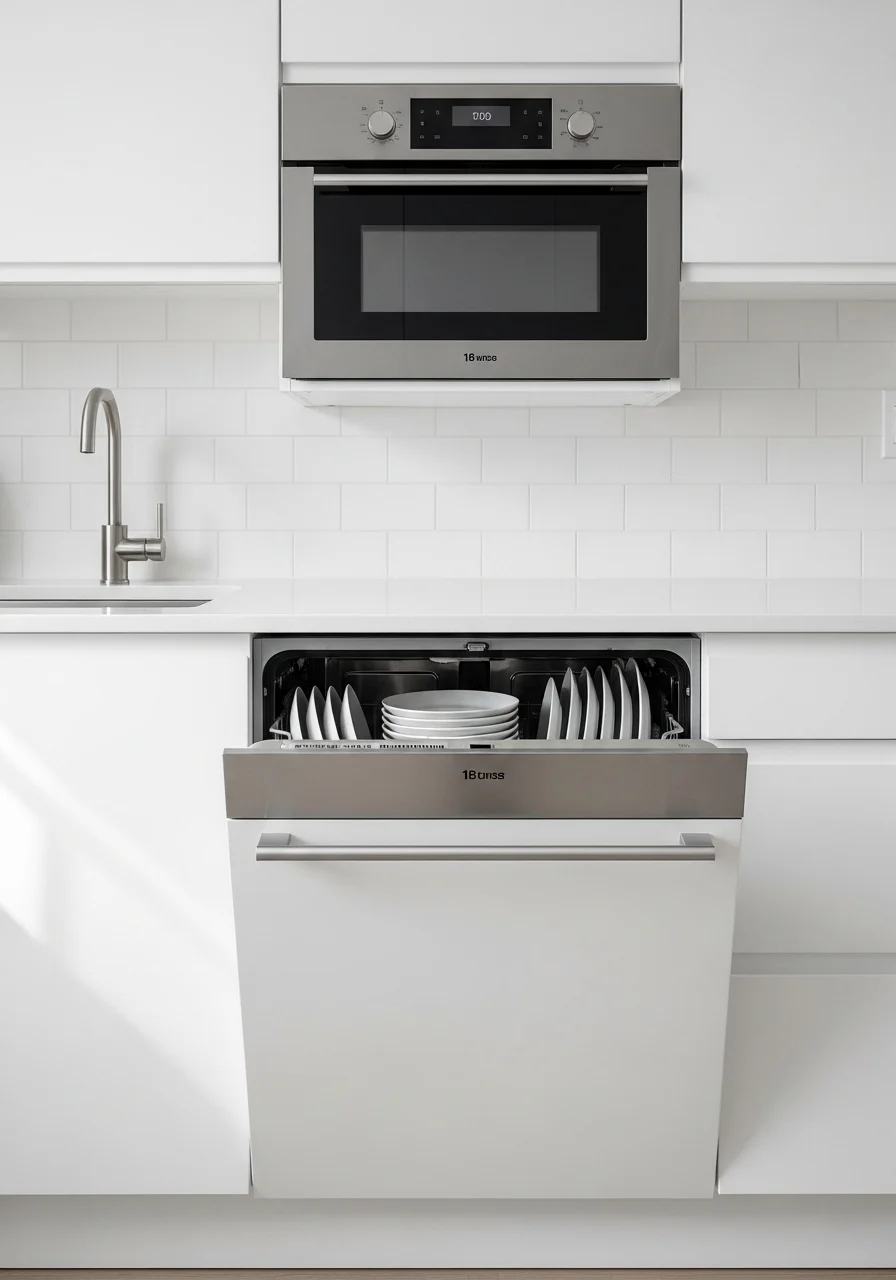
A slim or drawer-style dishwasher fits where a full unit won’t. It’s ideal for one to two people and saves water. The look is seamless when panel-ready. This appeals if you want clean counters without a big appliance footprint.
Key Elements
- 18-inch slim dishwasher or single-drawer model
- Panel-ready front to match cabinets
- Soft-close drawer mechanism
- Adjustable racks for plates and glasses
- Energy-efficient rating
- Quiet operation (<45 dB)
- Quick-wash cycle option
- Hidden controls for a sleek look
- Small detergent drawer
How to Achieve This Look
- Measure cabinet opening for a slim dishwasher kit.
- Choose panel-ready or stainless finish to match kitchen.
- Hire a pro for plumbing and electrical if needed.
- Install anti-flood devices per local codes.
- Test cycles and load patterns for best wash results.
- Use low-temp cycles for delicate items.
- Keep the door ajar after cycles to dry.
- Clean filter monthly to maintain performance.
- Use rinse aid to prevent spots on glass.
- Consider stacking dish racks to maximize capacity.
How to Style / Use It
Choose a model with matching cabinet panel for a built-in look. Run short cycles for small loads to save time. Keep frequently used plates in the top section for easy unloading. Maintain filters and seals for longevity.
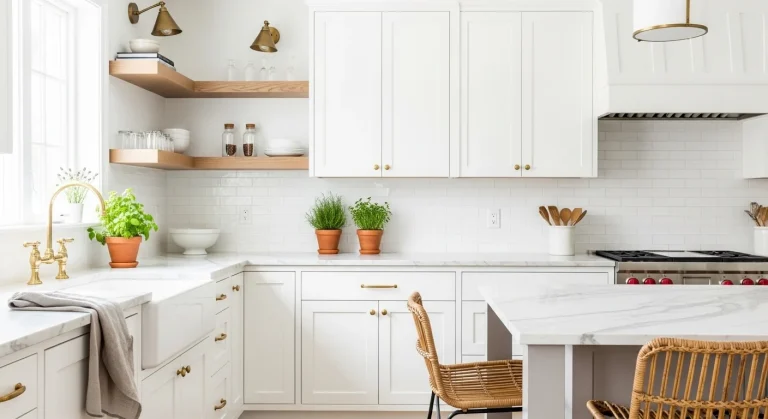
11. Glass-Front Cabinets to Open Up Space
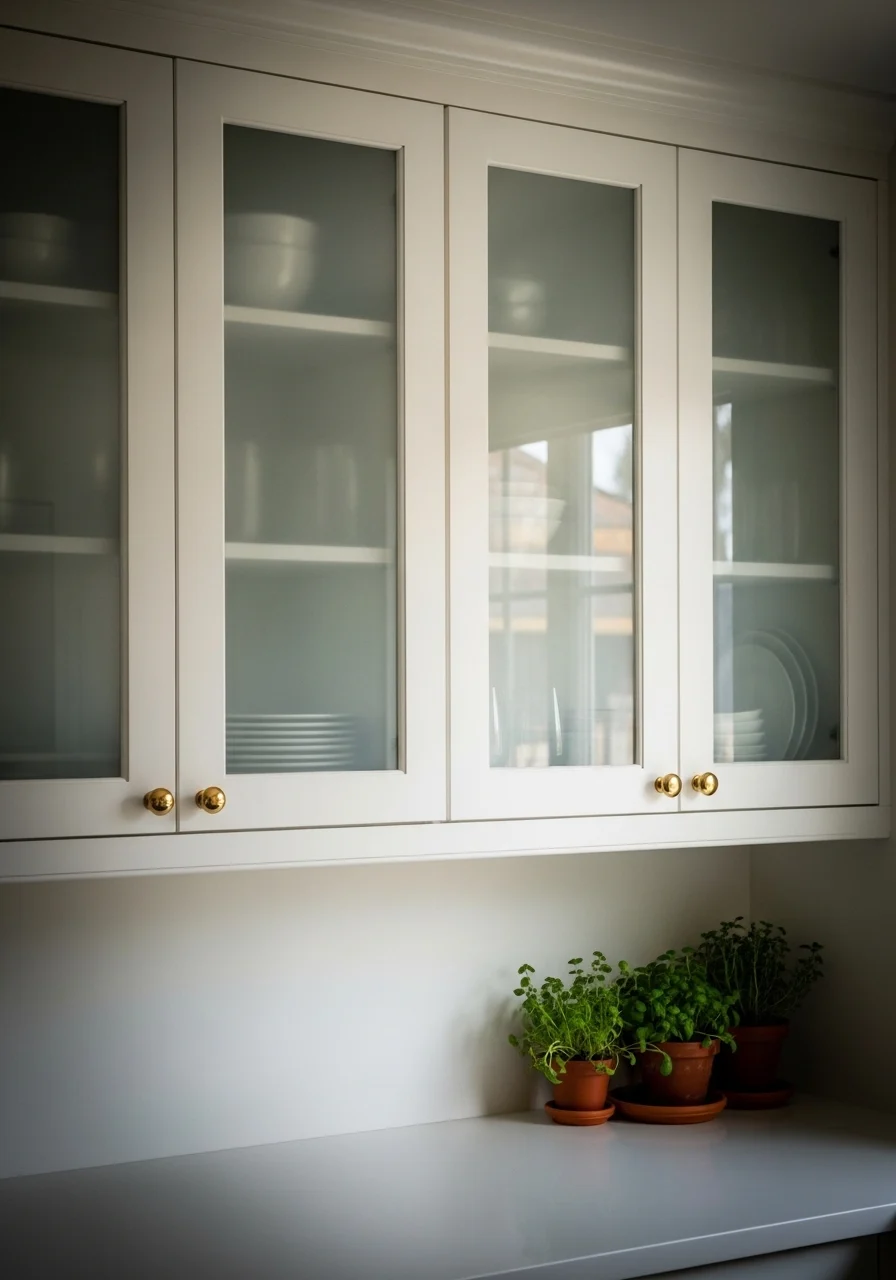
Glass-front cabinets make a small kitchen feel less closed-in. Frosted or clear glass reduces visual weight and displays pretty dishes. The result reads lighter and more open. This is perfect if you own a few attractive dish sets or want a more open feeling without open shelving dust.
Key Elements
- Frosted or clear glass cabinet doors
- Slim mullions for a modern look
- Interior cabinet lighting
- Coordinated dishware sets
- Matte brass or black hardware
- Painted cabinet frames in soft white
- Tinted glass option for subtle concealment
- Glass shelves or thin wood shelves
- Soft cloth liners for delicate items
How to Achieve This Look
- Decide which upper cabinets to convert to glass.
- Order glass inserts to fit door frames.
- Replace solid panels with glass, securing with new moulding.
- Add LED interior lights to highlight contents.
- Arrange dishware by color or shape for visual rhythm.
- Keep fewer items inside to avoid cluttered look.
- Use matching sets or coordinated bowls for cohesion.
- Clean glass regularly to avoid fingerprints.
- Add a thin shelf liner for delicate items.
- Consider frosted glass if you prefer some concealment.
How to Style / Use It
Display your favorite plates, glassware, or cookbooks. Use interior lighting for night-time ambience. Rotate displays seasonally for variety. Clean inside shelves periodically to keep items fresh and tidy.
12. Slim Rolling Pantry on Wheels
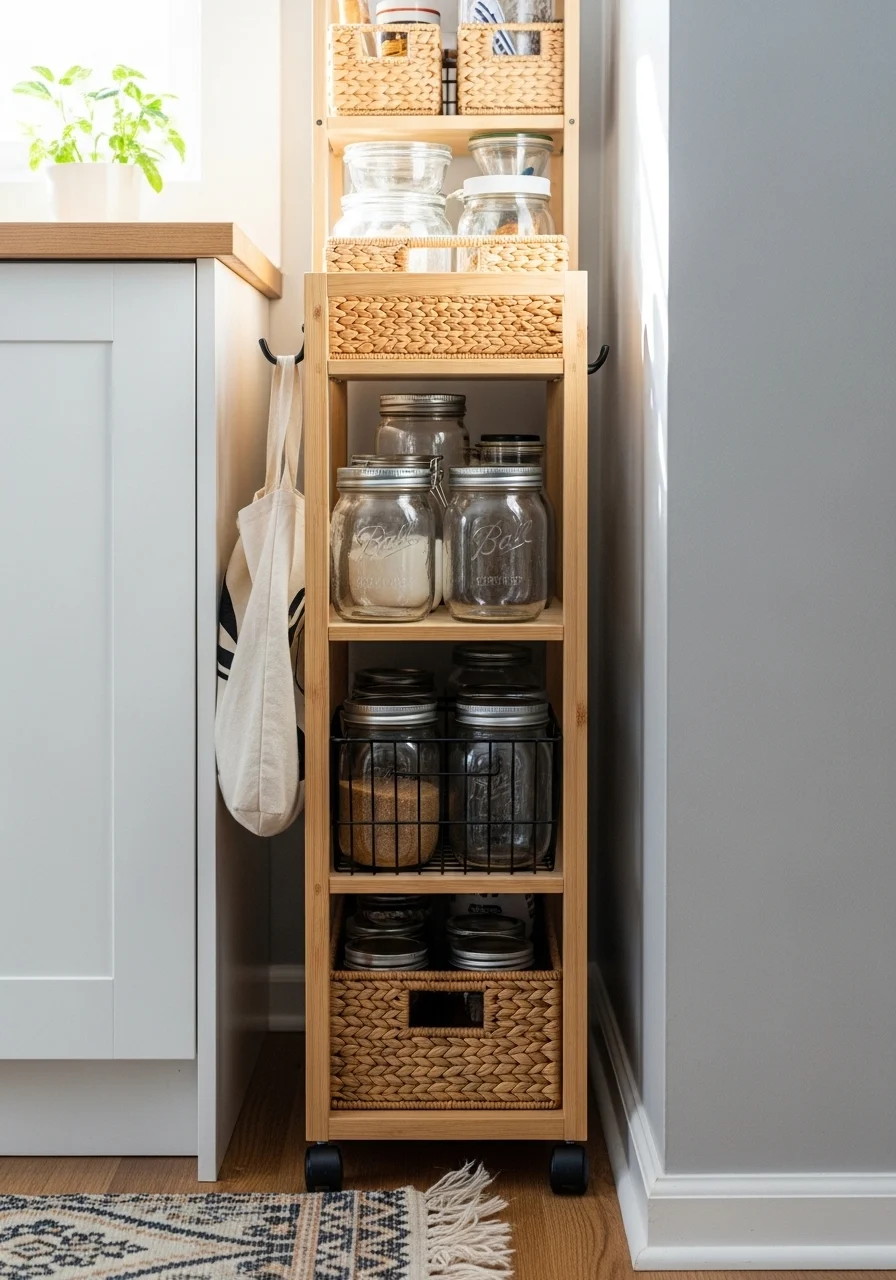
A slim rolling pantry slides into tiny gaps and pulls out when you need it. It’s perfect for snacks, baking supplies, or tea and coffee station. Wheels add mobility for cleaning. The look is practical and homey, with baskets and jars that add texture.
Key Elements
- Wheeled narrow pantry (4–10" wide)
- Multiple shallow shelves
- Wicker baskets and clear jars
- Chalkboard label tags
- Top shelf for coffee station
- Locking caster wheels
- Slim handle for easy pull-out
- Non-scratch shelf liners
- Compact spice rack attachment
How to Achieve This Look
- Measure the gap for a rolling pantry fit.
- Choose durable casters with locks.
- Fill baskets with grouped items: baking, snacks, coffee.
- Place heavy items lower for stability.
- Label jars for quick identification.
- Keep coffee or tea items on top for quick access.
- Roll out for deep cleaning behind it.
- Secure with a small stop to prevent over-rolling.
- Replace wicker baskets if they fray.
- Wipe down shelves monthly.
How to Style / Use It
Use as a mobile bar, coffee station, or pantry overflow. Match basket tones to kitchen warm or cool palette. Lock wheels when in use. Slide out during meal prep and tuck away between cooking sessions.
13. Fold-Down Murphy Bar or Desk (Small Kitchen Ideas That Maximize Every Inch)
A fold-down Murphy bar gives you a functional spot for eating, working, or serving drinks. It frees floor space when tucked away. The clean lines make the kitchen feel uncluttered. This suits small homes where a multi-use surface is valuable and stylish.
Key Elements
- Wall-mounted fold-down table with hinges
- Two compact stools that tuck flush
- Magnet or latch to secure when closed
- Durable wood or laminate top
- Matte black brackets for industrial look
- Small floating shelf above for glasses
- Corkboard or small pegboard for notes
- Soft-close hinges optional
- Slim drawer for coasters/napkins
How to Achieve This Look
- Mount the folding bracket into studs for strength.
- Attach the table top and check the level.
- Add a latch or magnet to secure closed.
- Choose stools that tuck fully beneath the folded table.
- Arrange a small shelf above for barware or organizers.
- Use the surface for work with a laptop mat.
- Fold away when you need open floor space.
- Seal the wood top to resist spills.
- Test hinges regularly and tighten screws as needed.
- Keep a slim drawer or basket nearby for essentials.
How to Style / Use It
Use for casual meals, laptop work, or a drink station while entertaining. Coordinate stool finishes with hardware for cohesion. Keep it clear between uses and clean spills immediately. Add a small tray when serving to protect the surface.
14. Toe-Kick Drawers for Hidden Storage
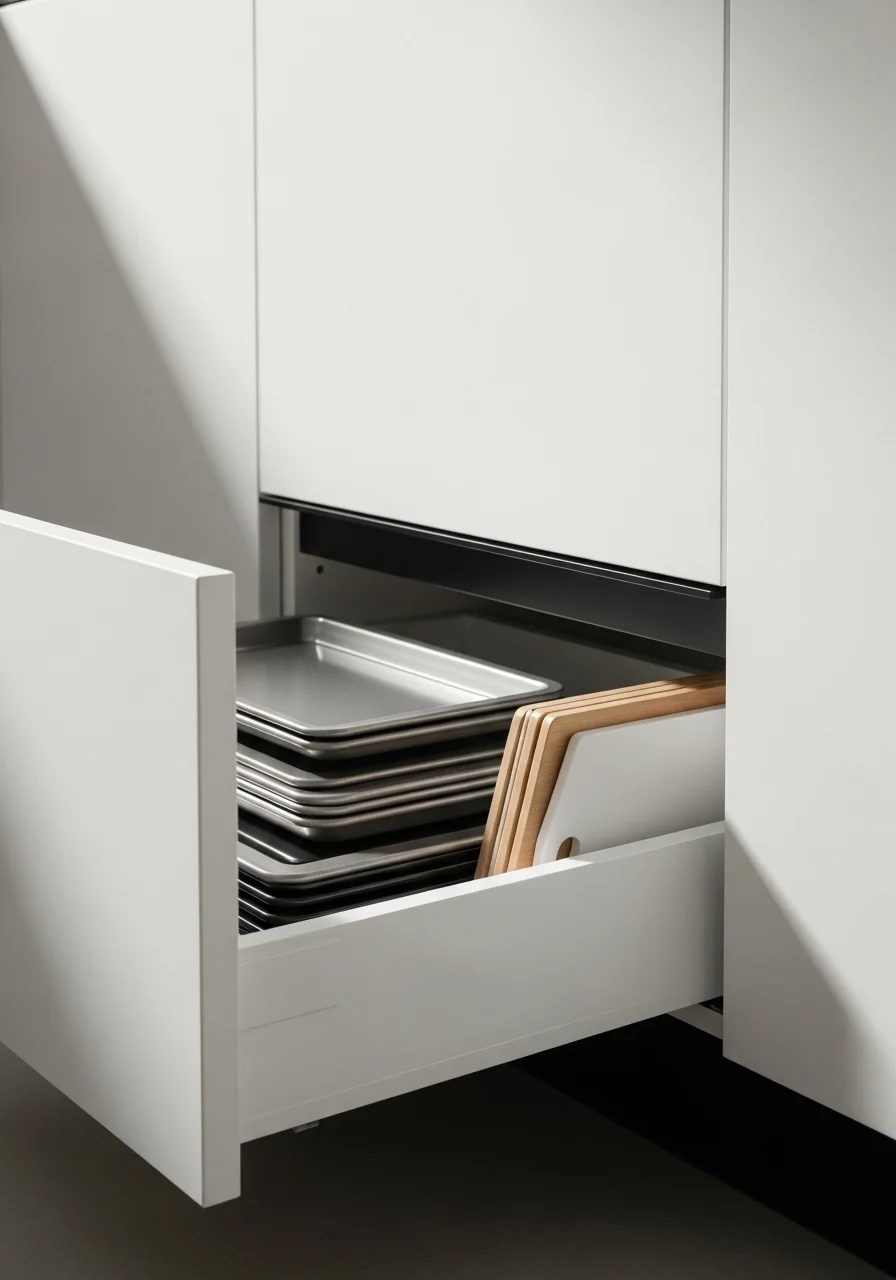
Toe-kick drawers use the otherwise wasted space under cabinets. They hold baking sheets, trays, or seldom-used items. This hidden storage feels like a small secret that keeps counters clearer. Home bakers love the quick access to sheet pans and cutting boards.
Key Elements
- Pull-out toe-kick drawer with full-extension slides
- Thin storage for baking sheets and trays
- Soft-close mechanism
- Decorative toe-kick face to match cabinets
- Organizers for lids or cutting boards
- Easy-grip handle or push-to-open
- Durable laminate interior
- Damp-proof seal for occasional spills
- Roller stops to prevent over-extension
How to Achieve This Look
- Measure toe-kick height and available depth.
- Choose a drawer kit designed for toe-kick use.
- Install full-extension slides and secure face panel.
- Add separators for sheet pans and trays.
- Test the drawer for smooth action and stopping.
- Store flat, lightweight items to avoid strain on slides.
- Keep only items you rarely need but want handy.
- Clean the drawer area occasionally to remove debris.
- Replace hardware if the drawer binds or sags.
- Avoid overloading to protect slides.
How to Style / Use It
Use for sheet pans, cutting boards, and serving trays. Keep the face flush with cabinetry for a seamless look. Use decorative hardware or push-to-open for a streamline finish. This keeps bulky, flat items out of tall cabinets and frees up shelf space.
15. Overhead Pot Rack and Ceiling Storage
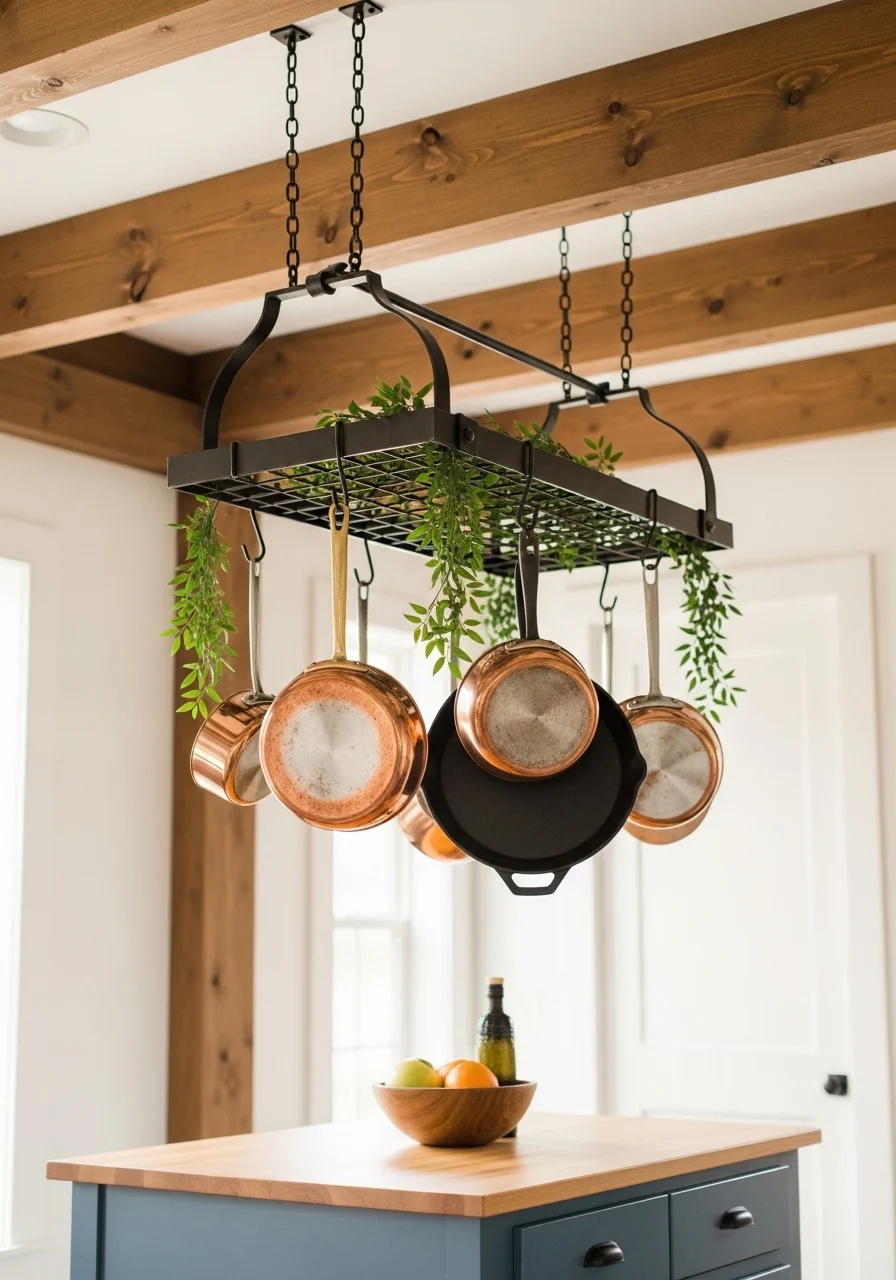
Hanging pots and pans frees cabinet real estate and becomes decor. An overhead rack is great if you have vertical space and sturdy ceiling anchors. The look is warm and slightly rustic, with metallic shine and cookware on display. This appeals if you like a kitchen that shows its tools.
Key Elements
- Sturdy ceiling-mounted pot rack with hooks
- Variety of hanging pots and pans
- Cast iron skillet and copper pots for visual interest
- Secure ceiling anchors into joists
- Hanging herb planter or string lights for softness
- Heat-safe finish on metal rack
- Matching hooks for consistency
- Balanced weight distribution
- Easy-to-reach height
How to Achieve This Look
- Locate ceiling joists for safe mounting.
- Choose a pot rack sized to your cookware volume.
- Install heavy-duty anchors per instructions.
- Hang pots by size, heaviest near center of the rack.
- Use S-hooks for flexible arrangement.
- Add herbs or string lights for softer look if desired.
- Ensure pots clear headspace and appliance heights.
- Periodically check hardware for tightness.
- Clean pots before hanging to avoid grease buildup.
- Rearrange seasonally to keep the rack visually appealing.
How to Style / Use It
Use as both storage and a focal point. Group metals for contrast — copper with cast iron. Keep frequently used pans within arm’s reach. Dust and wipe often to maintain shine. If building height is low, prefer wall-mounted racks instead.
16. Recessed Shelving in Narrow Walls
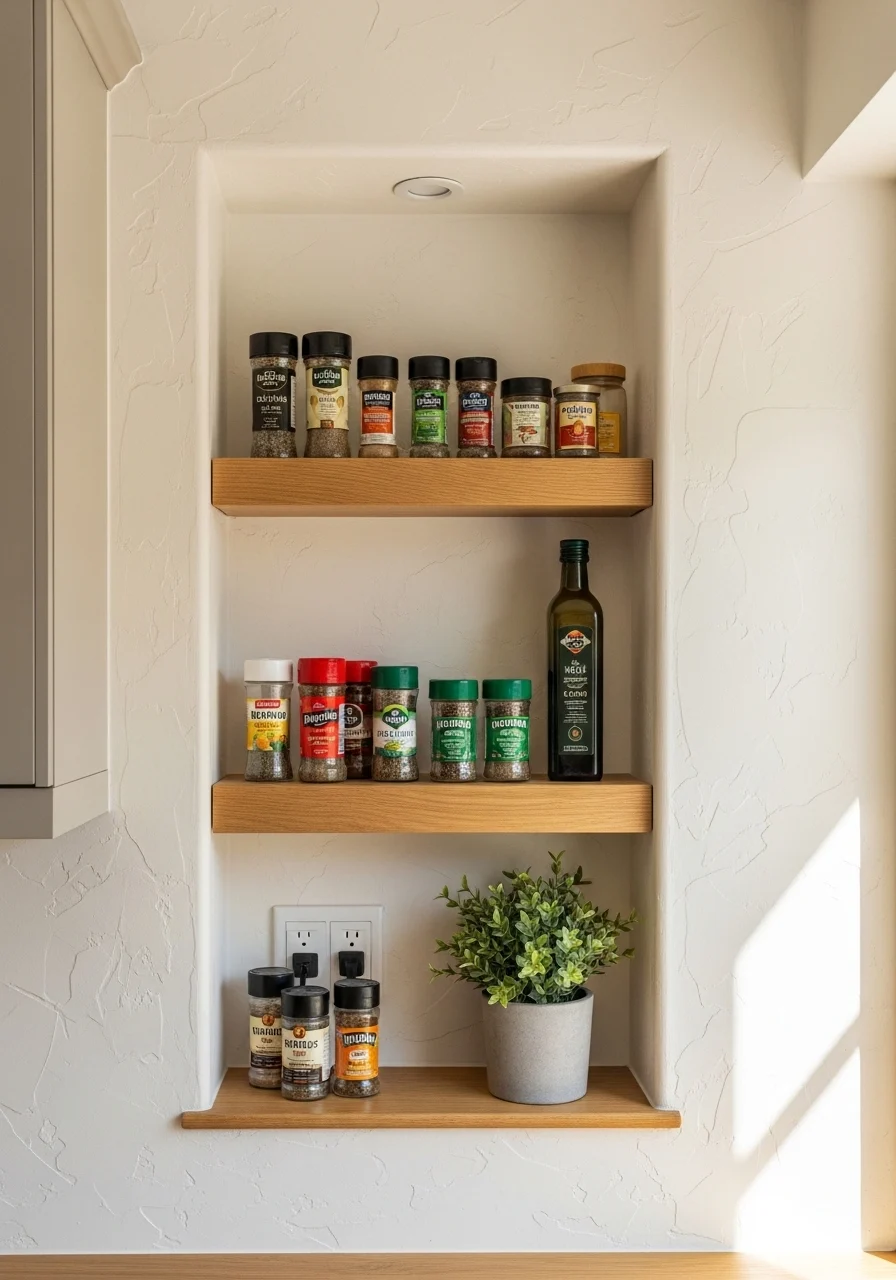
Thin recessed shelves add storage without protruding into walkways. They’re perfect for spices, oils, or display items. The built-in look keeps things streamlined and intentional. This suits narrow kitchen walls and makes small treasures part of the decor.
Key Elements
- Recessed shelving unit (3–6" depth)
- Oak or painted shelves to match trim
- Small glass spice jars and bottles
- Integrated LED strip lighting
- Plaster or drywall frame with crisp edges
- Small potted plant for freshness
- Minimal decorative items to avoid clutter
- Matte finish paint for subtle texture
- Shelf liners for easy cleaning
How to Achieve This Look
- Check behind the wall for piping or wiring.
- Frame out the recessed box between studs.
- Install backing and paint or tile inside.
- Fit thin shelves, preferably fixed for stability.
- Add LED strip lighting for visibility.
- Group items by size and use frequency.
- Use slim jars and bottles to keep the niche airy.
- Seal edges with caulk for a finished look.
- Dust and clean shelves as needed.
- Consider glass doors if you prefer protection.
How to Style / Use It
Use for spices, oils, frequently used condiments, or decorative items. Match shelf finishes to kitchen trim for cohesion. Keep only essentials in the niche to avoid a cramped feel. This built-in touch makes the kitchen feel custom.
17. Slim Pull-Out Trash & Recycling
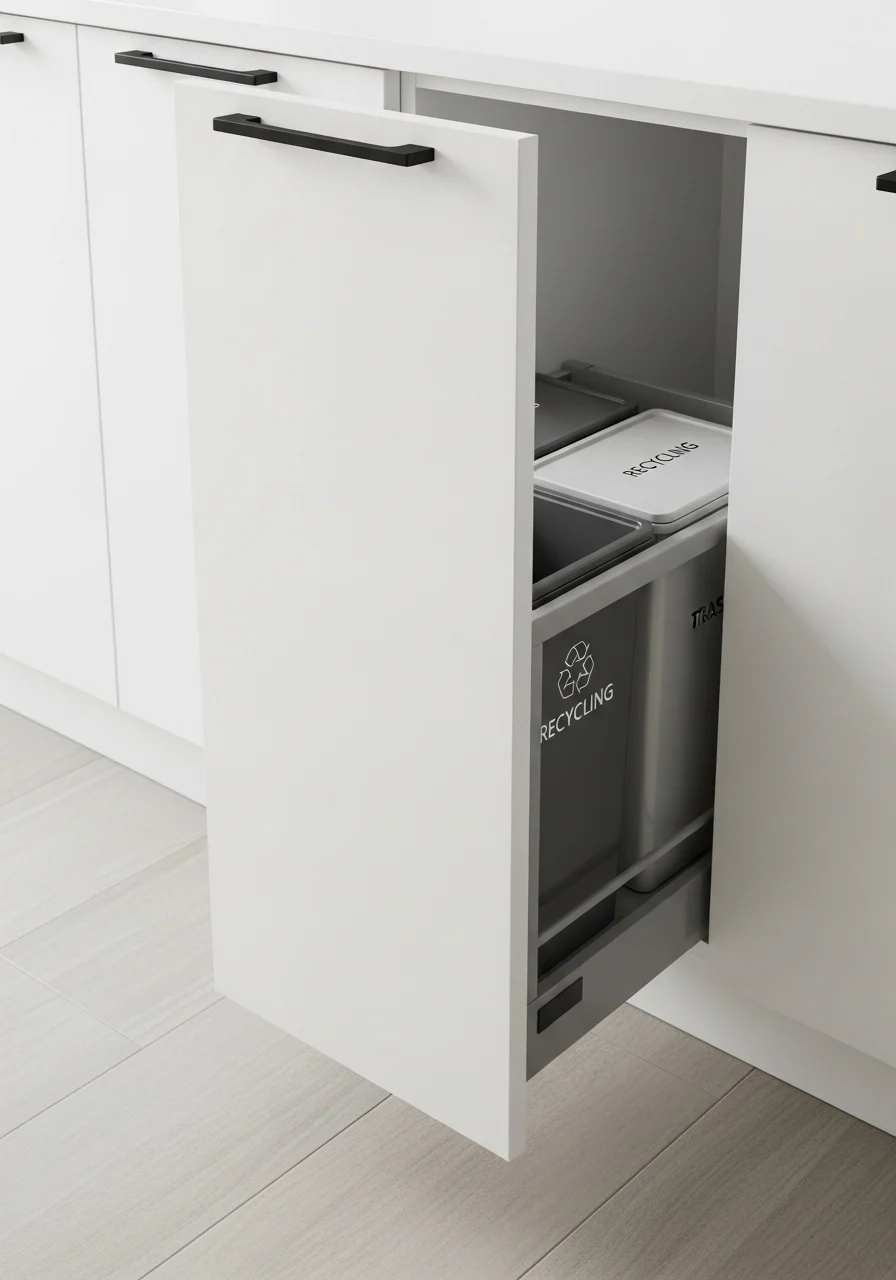
A slim pull-out bin keeps trash tucked away and saves floor space. Choose a model with multiple compartments for recycling. It keeps odors contained and provides a discreet spot for waste. This fits right beside prep zones for easy scraping and sorting.
Key Elements
- Pull-out cabinet waste unit (12–18" wide)
- Two or three compartment bins
- Odor-sealing lid or tight-fitting bins
- Soft-close slide mechanism
- Removable inner pails for easy emptying
- Ventilated panels to reduce smells
- Hidden deodorizer or charcoal filter
- Matching cabinet front panel
- Label or color-coded lids for sorting
How to Achieve This Look
- Measure the cabinet opening to choose right unit.
- Install full-extension runners for smooth pull-out.
- Position unit near prep area for convenience.
- Add removable liners for easy cleaning.
- Use a small charcoal filter to control odor.
- Label each compartment to encourage sorting.
- Empty bins regularly to prevent overflow.
- Wipe inner pails to prevent residue build-up.
- Replace filters per product recommendations.
- Keep compost or food waste in a separate small bin if needed.
How to Style / Use It
Position next to dishwasher for easy loading of scraps. Use color-coded lids for family recycling habits. Keep lids closed to reduce scent and sight lines. Maintain regular emptying and cleaning to keep kitchen fresh.
18. Built-In Appliance Garage
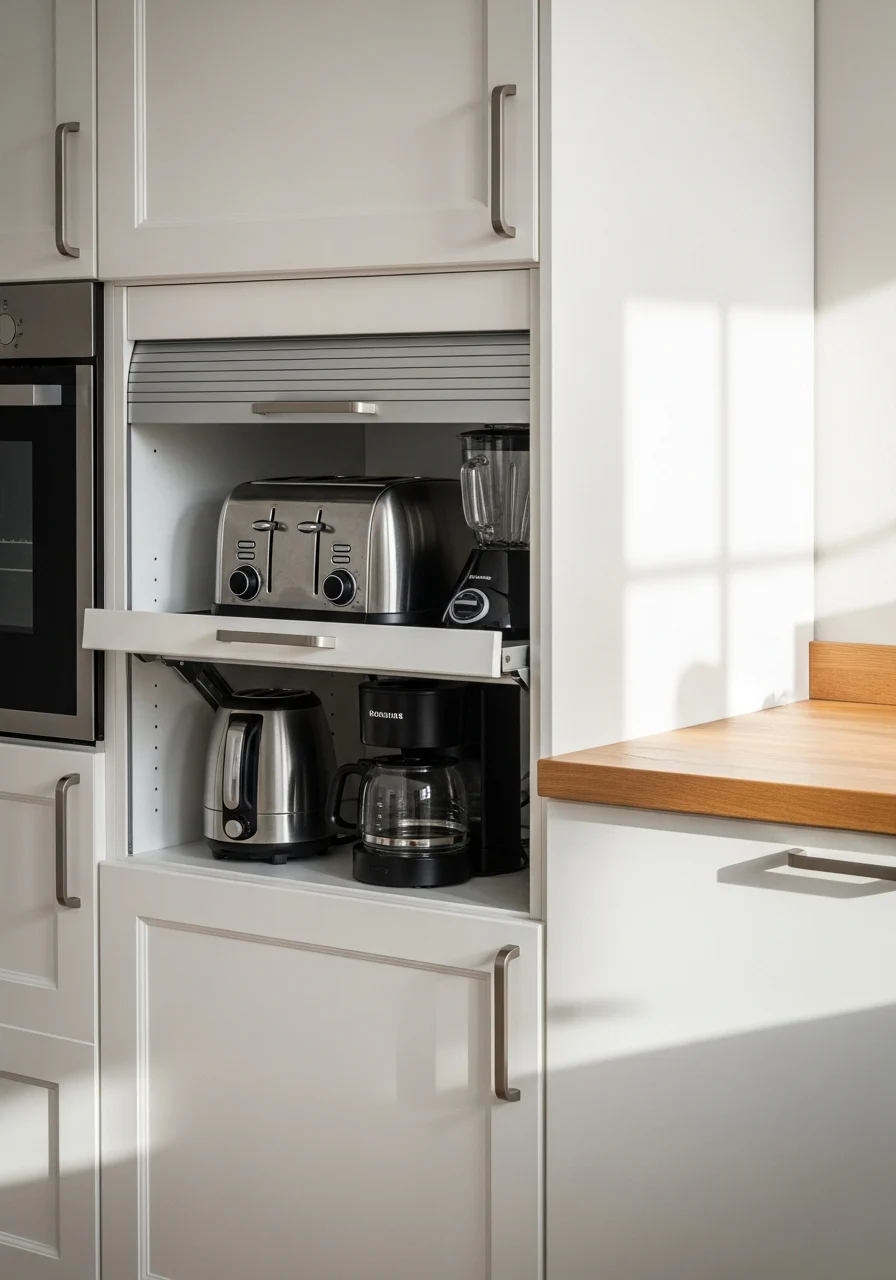
An appliance garage hides gadgets behind a tambour or lift-up door. You get both countertop space and quick access. The look is tidy and sleek, with reduced visual clutter. Great for coffee stations or small breakfast setups in tight kitchens.
Key Elements
- Tambour or lift-up cabinet door
- Roller mechanism or hinge hardware
- Cord pass-through hole to outlet
- Non-slip mat for appliances
- Small shelf for mugs and supplies
- Ventilation gap or perforated backing
- Matching cabinet finish
- Metal or wooden roll-up slats
- Easy-access outlet inside the garage
How to Achieve This Look
- Pick a countertop area near an outlet.
- Install tambour door hardware or lift hinge.
- Cut a small cord pass-through in the cabinet back.
- Place non-slip mats under appliances.
- Group appliances by daily use and size.
- Keep cords secured and out of the way.
- Add a small shelf for coffee mugs or accessories.
- Ensure ventilation for heat-producing devices.
- Test door action for smooth opening and closing.
- Clean inside periodically to remove crumbs or spills.
How to Style / Use It
Use for coffee maker, toaster, or blender to keep surfaces clear. Keep the garage tidy and only store items you use often. Use matching appliances in neutral finishes for a cohesive interior when opened. Close it when guests arrive to hide daily clutter.
19. Wall-Mounted Foldaway Drying Rack
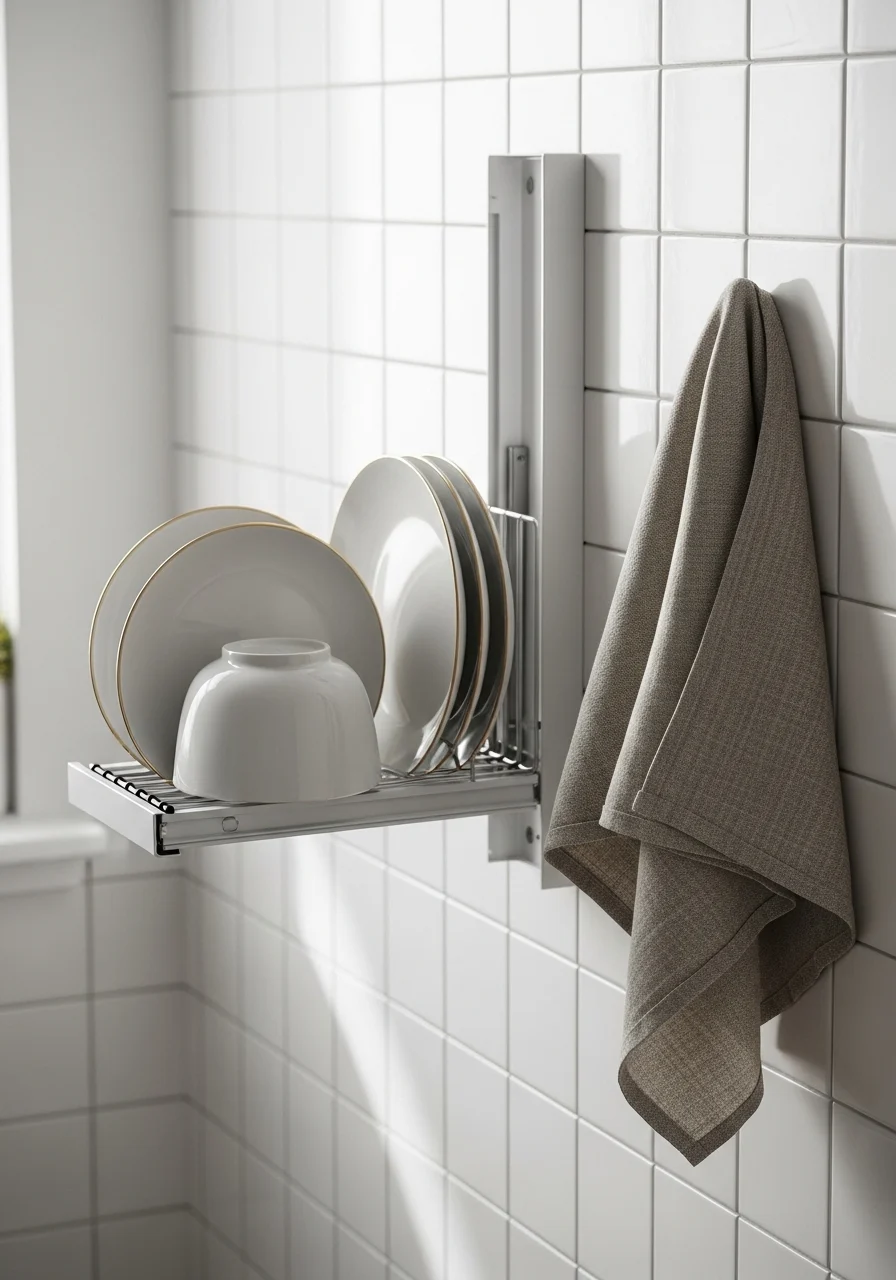
A foldaway drying rack saves counter space and folds flat when not needed. Wall-mounted models provide airflow and speed drying. The scene is airy with dishes drying against a clean tile wall. This is useful if you hand-wash dishes often and want a neat drying spot.
Key Elements
- Wall-mounted collapsible drying rack
- Stainless or powder-coated steel arms
- Fold-down rod for towels
- Drain board or tray option
- Hooks for cups and utensils
- Matte white or chrome finish
- Anchor hardware for secure mount
- Quick-release fold mechanism
- Small drip tray or sink contact point
How to Achieve This Look
- Mount into studs for secure installation.
- Ensure rack aligns above sink or drain area.
- Attach hooks for cups or small items.
- Set a drip tray or run it directly over sink.
- Fold flat when not drying to save space.
- Hang towels on the rod for quick drying.
- Use for delicate items that can’t go in dishwasher.
- Wipe any water spots to avoid mold.
- Check hinges for rust if near coastal areas.
- Replace rubber feet or drip trays as needed.
How to Style / Use It
Use for daily hand-wash items and air-drying delicate glassware. Match finish to sink faucet for a cohesive look. Keep it near the sink to prevent water on counters. Fold away between uses for tidy surfaces.
20. Multi-Functional Banquette Seating with Hidden Storage
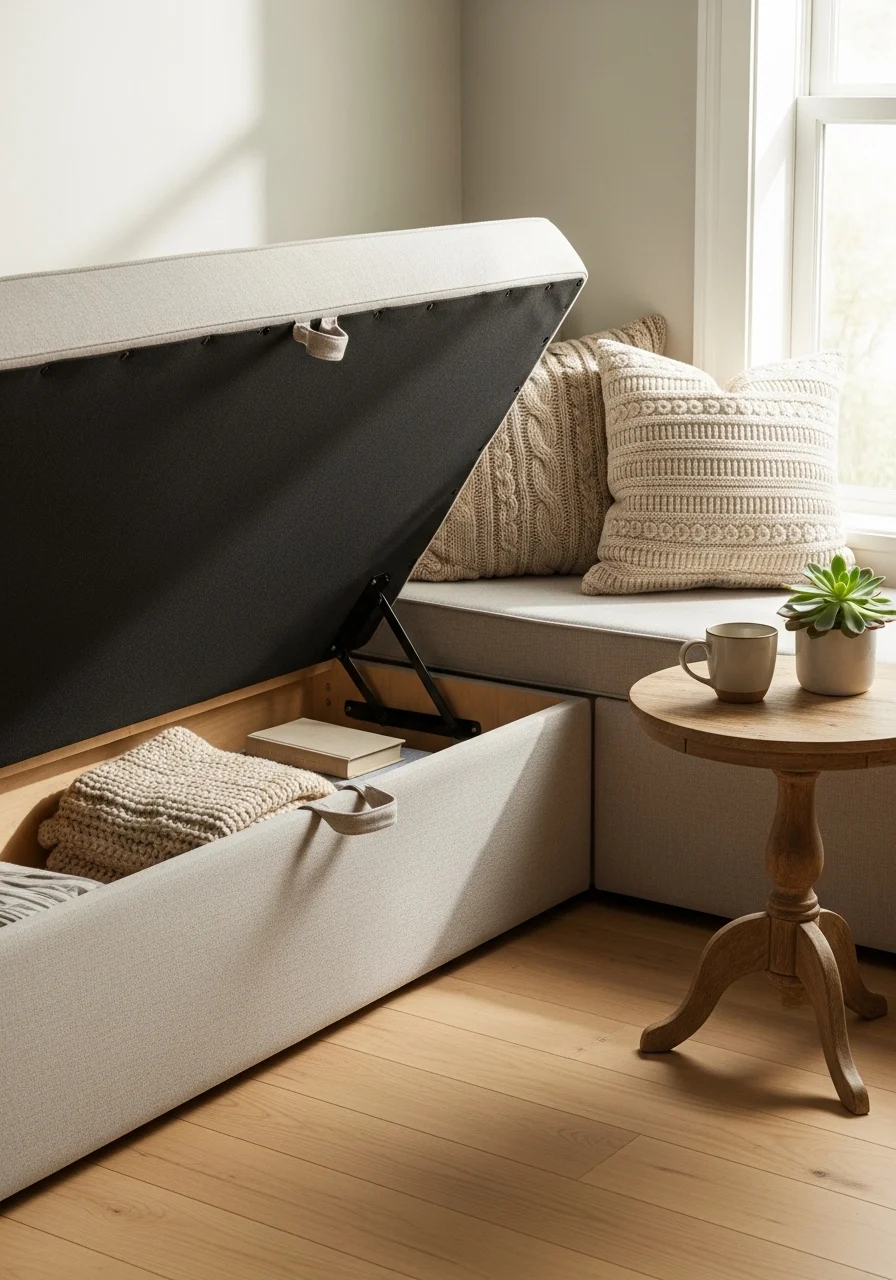
A built-in banquette uses corner space for seating and hidden storage. The hinged seat stores linens, small appliances, or pantry overflow. It creates a cozy breakfast nook while adding function. This suits kitchen-dining combos and apartment layouts.
Key Elements
- Hinged bench seat with lift storage
- Upholstered cushion in durable performance fabric
- Wooden or laminate table that fits the nook
- Decorative pillows in washable covers
- Pneumatic hinges for safe opening
- Internal dividers for organized storage
- Painted storage face to match cabinets
- Cushioned back with removable covers
- Rug to define the seating area
How to Achieve This Look
- Measure corner width and depth for bench fit.
- Build or buy a bench with hinged storage lid.
- Install pneumatic hinges for smooth lifting.
- Add internal dividers to separate items.
- Choose performance fabric that wipes clean.
- Fit a small table that allows easy slide-in chairs on opposite side.
- Add removable cushion covers for washing.
- Keep frequently used picnic or seasonal items inside.
- Use under-seat storage for bulky but light items.
- Check hinges periodically and tighten hardware.
How to Style / Use It
Use as a casual dining spot, homework station, or extra seating when guests arrive. Keep internal storage organized with labeled boxes. Rotate pillow covers seasonally for fresh color. This maximizes both seating and hidden storage in a corner footprint.
21. Pegboard Wall for Pots, Pans, and Utensils
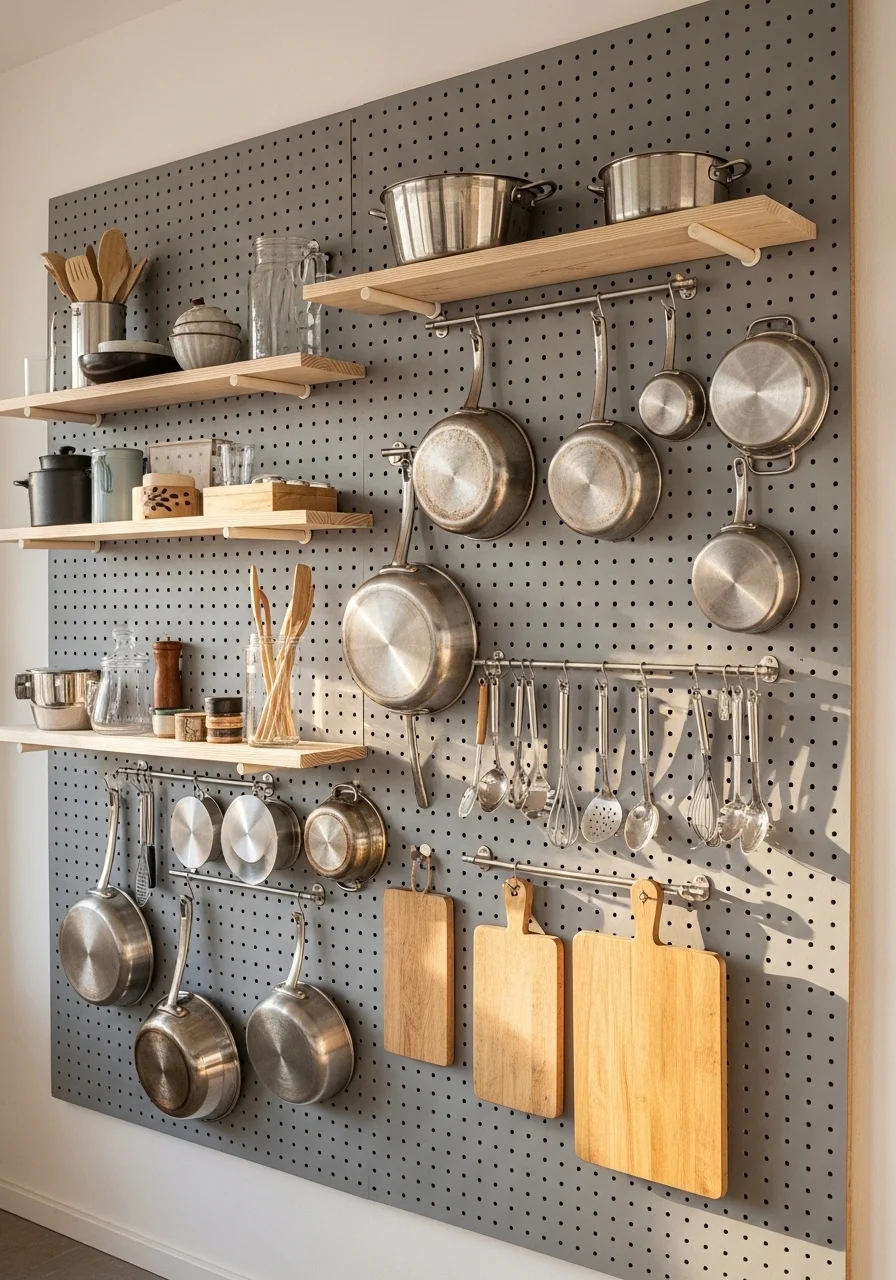
A painted pegboard is a flexible, visually pleasing storage wall. Pegs, shelves, and hooks can be rearranged for new tools. It’s perfect above counters or behind a stove. The look is creative and practical, showing off pots and favorite cookware.
Key Elements
- Painted wood or metal pegboard
- Assorted pegs, hooks, and small shelves
- Hanging pans and utensils
- Wooden cutting boards as decor and function
- Small herb pots on ledges
- Coordinated hook finishes (black or brass)
- Integrated rail for measuring spoons
- Magnetic knife bar nearby as option
- Clean background paint color
How to Achieve This Look
- Mount pegboard into studs with furring strips for depth.
- Paint the pegboard a color that complements room tones.
- Install pegs and shelves for your most-used tools.
- Hang pans by weight, keeping heavy items near studs.
- Add herb pots or small baskets for loose items.
- Rearrange pegs as your needs change.
- Test peg strengths under load before full use.
- Keep fire-safe items away from direct stove heat.
- Dust pegboard periodically to keep it fresh.
- Add a rail for measuring spoons or small cups.
How to Style / Use It
Use pegboard for a rotating display of seasonal cookware. Keep frequently used tools within arm’s reach. Use matching finishes to create cohesion. Make it a focal point by arranging items by shape and color.
22. Stackable Cookware and Nested Pots System
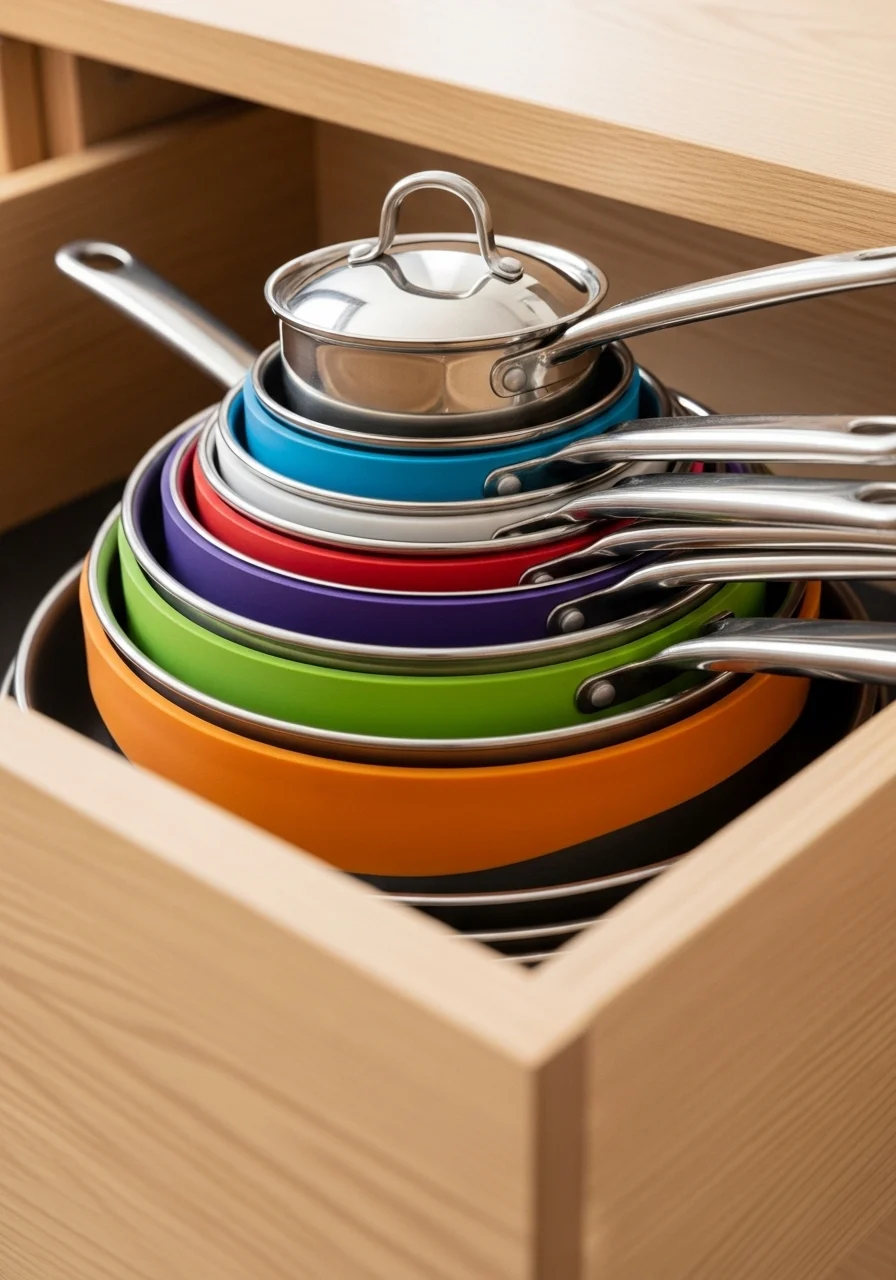
Nesting pots and pans saves large amounts of cabinet space. Use silicone protectors to prevent scratching and make sliding easy. The result is compact stacks that free up room for other kitchen items. This appeals if you have many pan sizes but little storage.
Key Elements
- Pots and pans that nest by size
- Silicone pan protectors or felt liners
- Tall cabinet or deep drawer for stacking
- Lids stored separately on a lid rack
- Compact skillet on top for daily use
- Durable nonstick or stainless interiors
- Drawer sliders rated for weight
- Small divider for lids or baking sheets
How to Achieve This Look
- Stack pans from largest to smallest in a deep drawer or cabinet.
- Place silicone protectors between each pan to prevent scratching.
- Store lids vertically in a nearby organizer.
- Keep frequently used pan on top for fast access.
- Use a tall pull-out drawer for better ergonomics.
- Avoid over-stacking to prevent warping or heavy strain.
- Clean pans and dry completely before stacking.
- Replace protectors when they show wear.
- Label or mark pans if sizes look similar.
- Reassess pan set annually to donate unused pieces.
How to Style / Use It
Nest cookware to free shelf space for small appliances. Keep the top pan as your daily go-to. Use lid organizers to avoid digging through stacks. This method keeps the kitchen efficient and reduces clutter.
23. Clear Canisters and Uniform Labels for Pantry
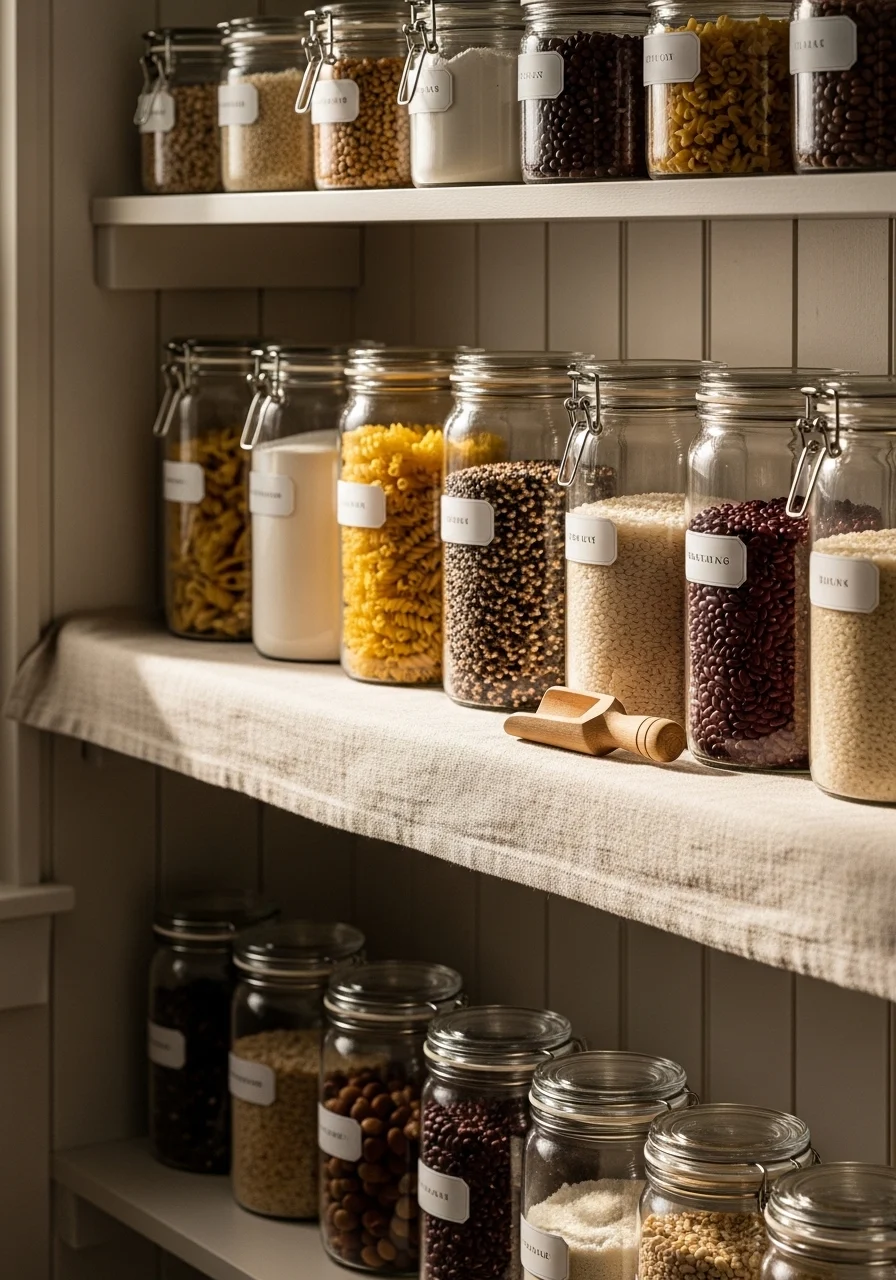
Clear canisters make pantry contents visible and tidy. Uniform labels create a calm, curated look. This small change helps you spot low supplies and creates a cohesive aesthetic. It’s ideal for anyone who shops in bulk and likes an organized pantry.
Key Elements
- Uniform glass or acrylic canisters with airtight lids
- Consistent label style (font and size)
- Wooden scoops for dry goods
- Shelf liners or thin trays
- Grouped by use: baking, grains, pasta
- Small tea and spice jars in front
- Minimal decorative item for softness
- Bamboo lids for warm texture
- Clean shelf dividers
How to Achieve This Look
- Transfer dry goods into airtight clear canisters.
- Use matching labels created with a consistent font.
- Group canisters by category and size.
- Place frequently used items at eye level.
- Use scoops or measuring cups stored with each canister.
- Keep a small inventory card or checklist inside the pantry.
- Wipe canisters and refill dates with a marker on the lid.
- Store heavier jars on lower shelves for safety.
- Replace any cracked or cloudy containers.
- Rotate stock and check expiration dates when refilling.
How to Style / Use It
Use canisters to create an attractive, functional pantry display. Keep labels neutral for a Pinterest-friendly aesthetic. Refill from bulk buys to save money and reduce packaging. Maintain an inventory list to prevent overbuying.
24. Compact Combo Washer-Dryer and Stackable Units
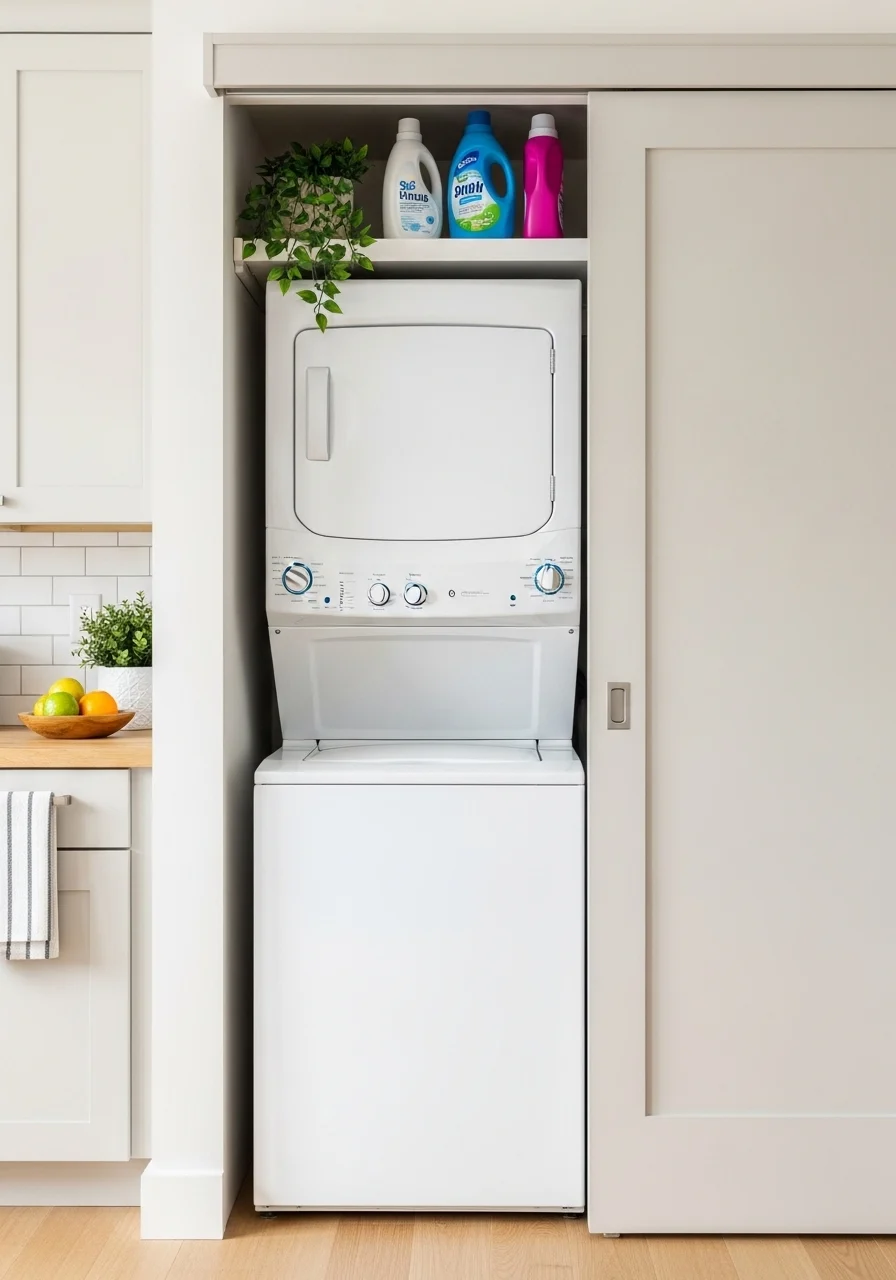
If your layout allows, a compact washer-dryer or stackable units can live in a kitchen nook. It saves a separate laundry room and uses vertical space. The visual is tidy when doors match cabinetry. This idea suits apartment-living or homes with limited utility space.
Key Elements
- Compact washer-dryer combo or stackable units
- Ventless or condenser dryer if no external vent
- Sliding barn or pocket door to conceal when not in use
- Shelf above for detergents and baskets
- Sound-dampening pads to reduce vibration
- Matching cabinet doors for an integrated look
- Small laundry hamper that fits nearby
- Hook for drying delicates
- Easy-access water shut-off valves
How to Achieve This Look
- Choose a compact combo that fits your alcove dimensions.
- Ensure electrical, water, and drainage requirements are met.
- Install sound-dampening pads under the unit.
- Add shelving above for supplies and baskets.
- Use a pocket or sliding door to hide the unit when not in use.
- Keep quick-access detergent and stain treatments nearby.
- Run a short maintenance cycle to check for leaks.
- Leave door slightly ajar after cycles to prevent mildew.
- Clean filters and seals regularly.
- Consider professional installation for hookups.
How to Style / Use It
Conceal the unit with matching cabinet doors for a seamless kitchen look. Use baskets and labels to keep laundry supplies organized. Run small loads to fit the unit’s capacity. Keep the area ventilated to reduce humidity build-up.
25. Integrated Lighting Under Upper Cabinets and Inside Drawers
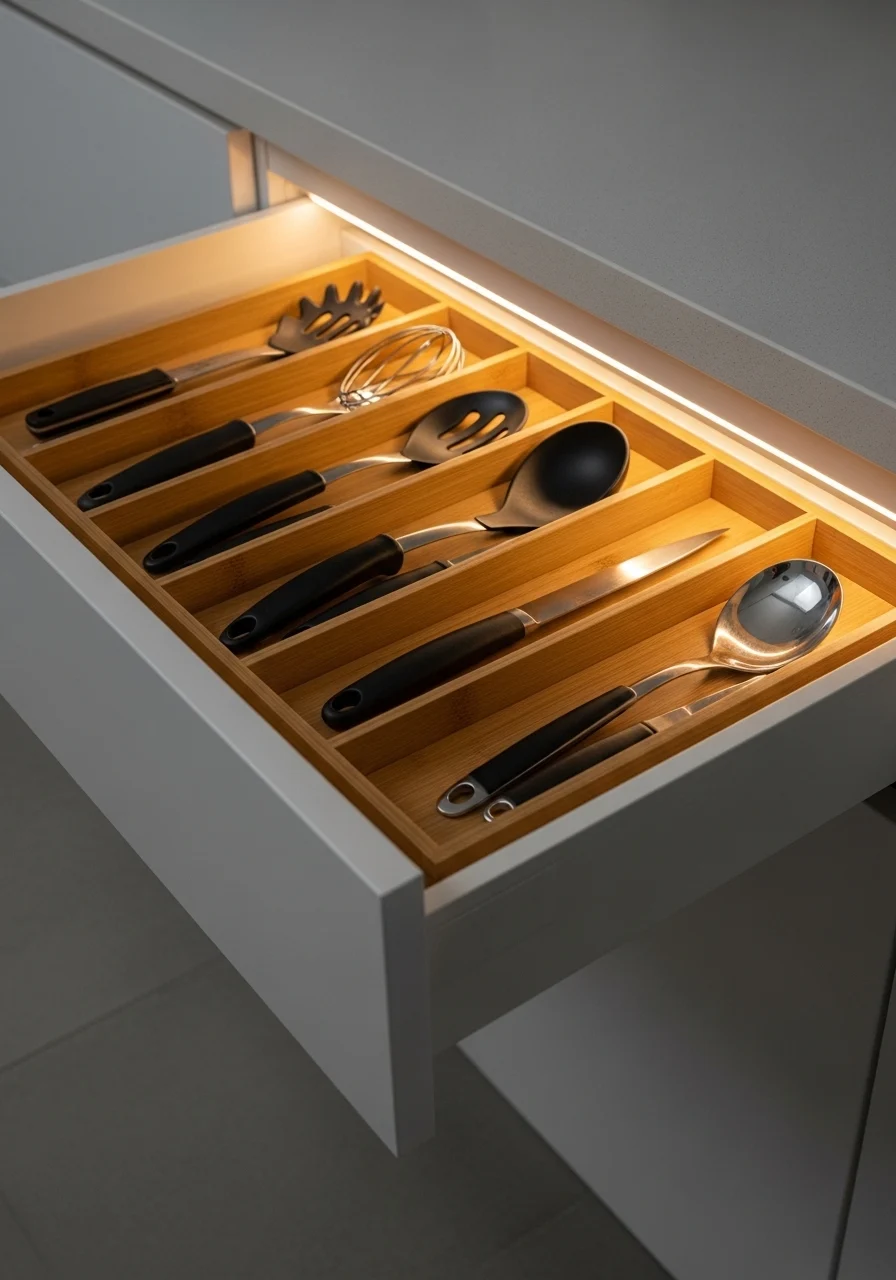
Lighting inside drawers and cabinets improves visibility and elevates function. Strip lights in deep drawers make forks and spatulas easy to find. A soft glow inside upper cabinets turns them into displays. It’s a refined touch that increases daily ease.
Key Elements
- Thin LED strips for drawers and cabinets
- Battery or low-voltage wired options
- Motion-sensor modules for auto-on
- Wooden drawer organizers for utensils
- Warm white color temperature (~3000K)
- Hidden wiring routed to nearest outlet
- Dimmable controller or remote
- Adhesive mounts with good hold
- Rechargeable battery pack if needed
How to Achieve This Look
- Measure drawer length and choose appropriate LED strip.
- Install adhesive strips along drawer sides or bottoms.
- Use motion sensors to activate lights on opening.
- Route wiring discreetly to a power source or use battery packs.
- Install wooden organizers for neat utensil layout.
- Test sensors to ensure reliable activation.
- Use dimmable strips to avoid glare.
- Recharge or replace batteries as required.
- Keep LEDs away from moisture or high-heat surfaces.
- Replace strips with the same color temperature for consistency.
How to Style / Use It
Use lighting to make low drawers and deep cabinets feel accessible. Combine with drawer organizers for a tidy appearance. Use warm light to keep the kitchen cozy. Replace batteries before long trips or heavy entertaining.
26. Narrow Appliance Niche for Coffee & Toaster
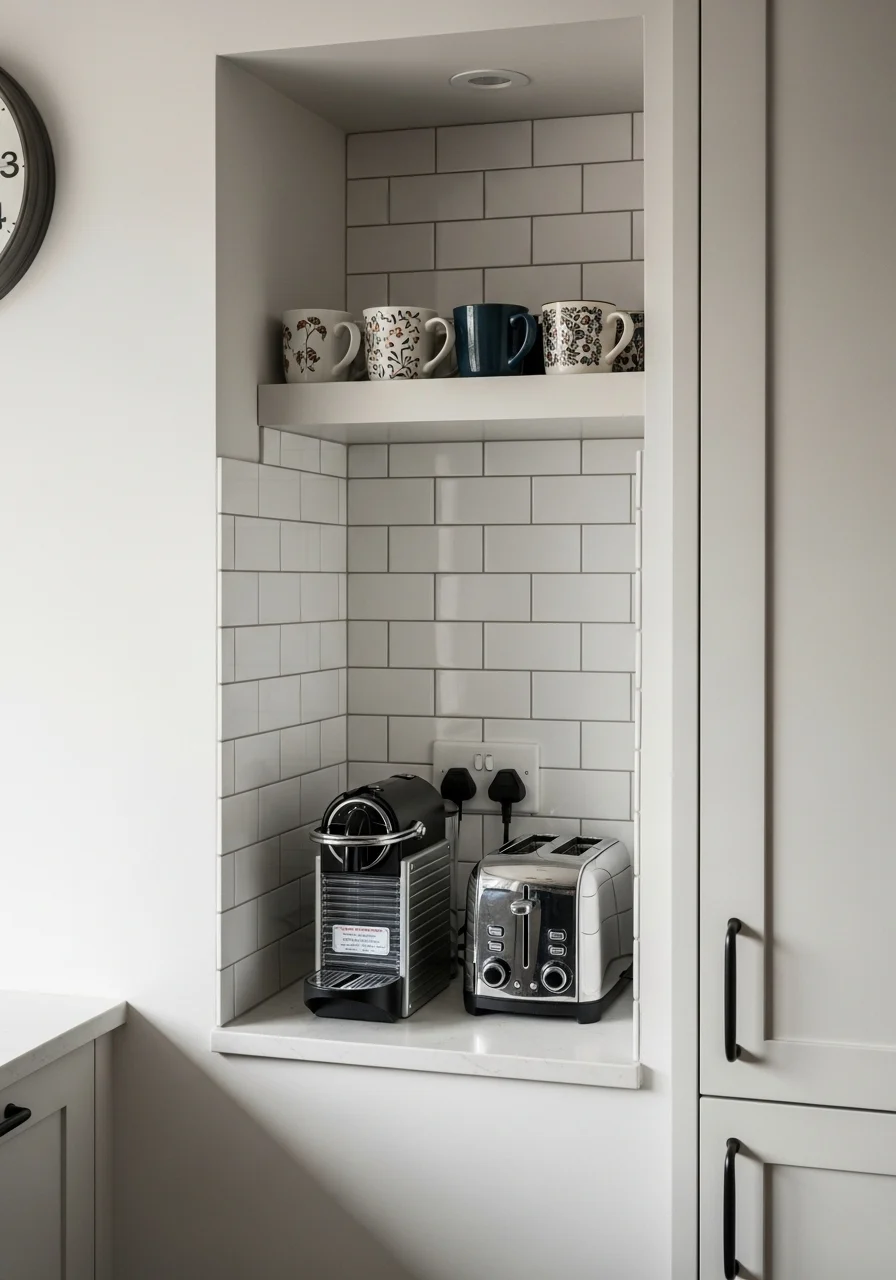
A narrow appliance niche consolidates small appliances in one accessible spot. Built-in outlets and a small shelf keep cords hidden and counters uncluttered. The finished look is intentional and tidy, like a café corner in your kitchen. Great for daily coffee routines.
Key Elements
- Recessed niche sized for espresso machine and toaster
- Built-in outlet with USB and plug options
- Small upper shelf for mugs and sugar
- Tile or paint finish inside the niche
- Cord management clips
- Heat-resistant surface on bottom
- Small mat or tray to catch crumbs
- Hook for towel or tamping spoon
- Lighting for ambience
How to Achieve This Look
- Choose a spot near plumbing-free wall space and an outlet.
- Frame and finish the niche with tile or paint.
- Install a dedicated outlet if needed by a pro.
- Add a small shelf above for mugs or jars.
- Use cord clips to keep cables organized.
- Place a small heat-resistant mat under appliances.
- Keep frequently used supplies in labeled jars.
- Wipe surfaces after each use to avoid stains.
- Test appliance placement for ventilation and clearance.
- Add small, low-wattage lighting for mood.
How to Style / Use It
Use the niche as a coffee or breakfast station to keep counters open. Match mug colors and labels for a cohesive look. Keep the niche tidy and wipe splashes immediately. This makes routines faster and keeps the kitchen streamlined.
You now have 26 workable, stylish small kitchen ideas that maximize every inch. Mix a few approaches — built-ins, slim appliances, vertical storage, and lighting — to create a kitchen that looks calm and works hard. Try one project this weekend and pin your favorites for future updates.
Which idea will you try first? Save or share this list with a friend who’s tight on kitchen space and wants a practical refresh.