22 Small Hallway Ideas That Feel Bigger Instantly
You know that tiny moment when you step into a narrow hallway and it feels cramped before you even reach the next room? Small hallways can make homes feel boxed in, but the right touches make them breathe. These small hallway ideas help you make narrow spaces feel bigger instantly, without a full remodel.
I pulled together 22 practical, Pinterest-ready small hallway ideas that feel bigger instantly. You'll find quick styling tricks, storage-smart solutions, lighting upgrades, and paint and mirror strategies that work for rental or owned spaces. Each idea includes a short how-to, exact elements to gather, and styling tips so you can try it today. Pick one or mix several to stretch your hallway visually and functionally. Ready to make that corridor feel open, welcoming, and effortless?
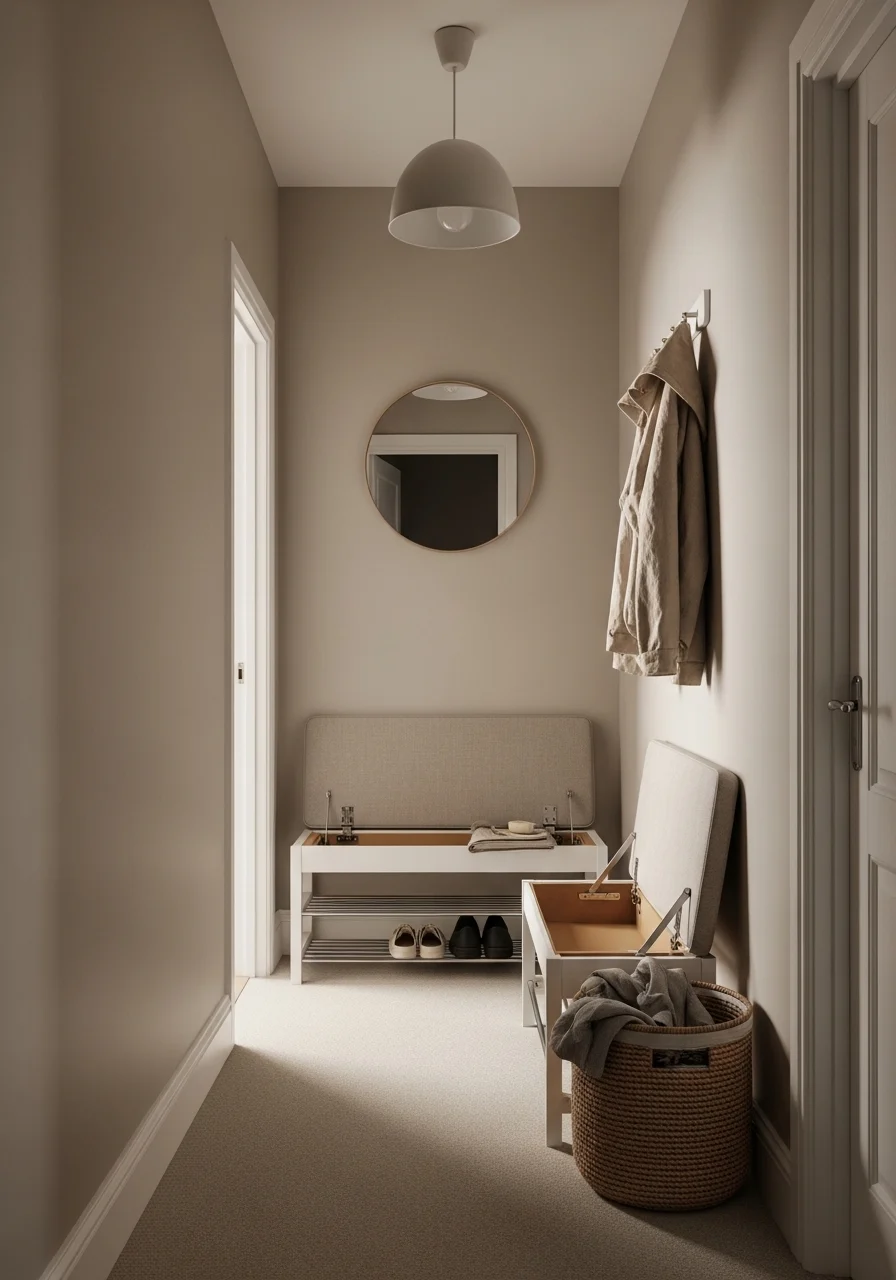
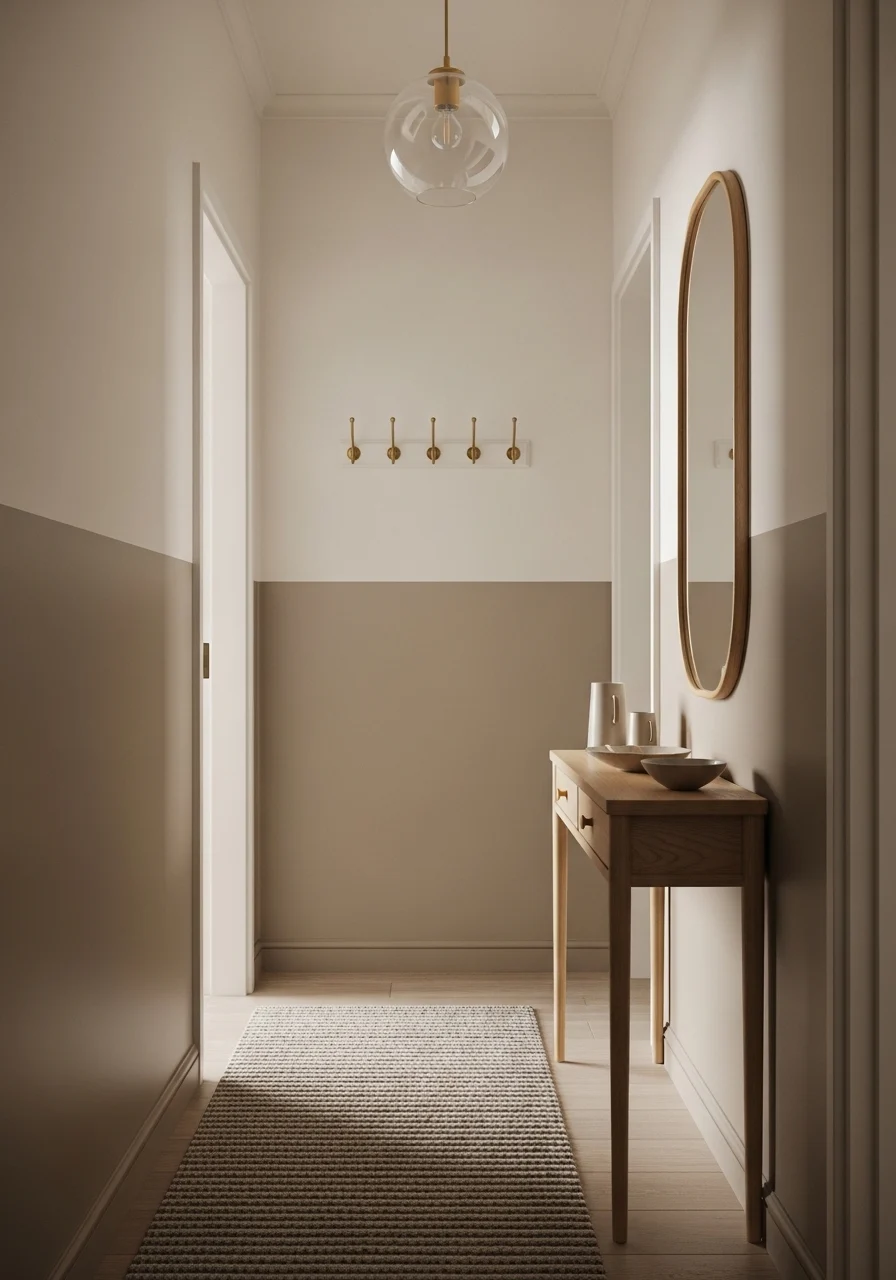
1. Bright Monochrome Entry — small hallway ideas
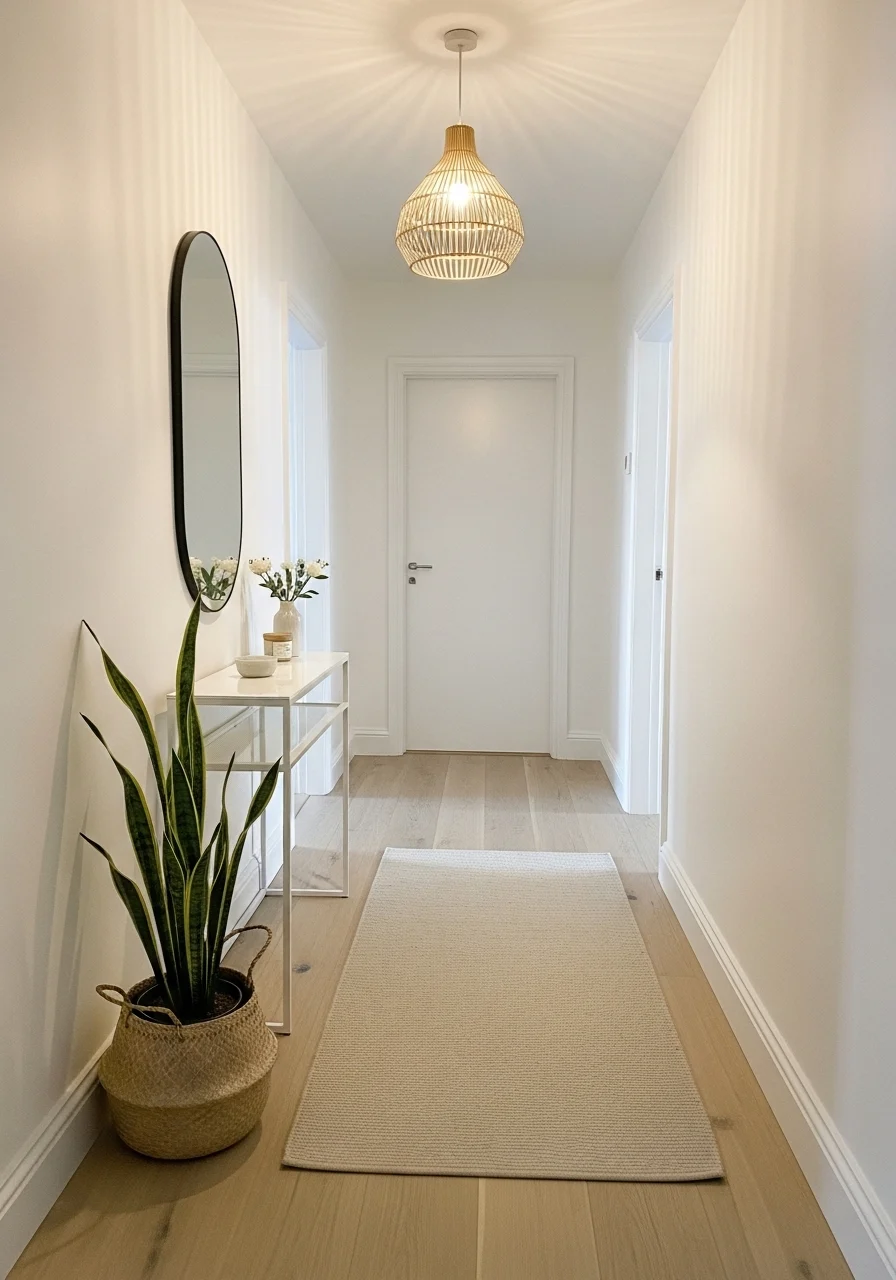
This clean white-on-white look amplifies light and creates a sense of continuous space. The monochrome palette reduces visual breaks, so your eye travels down the corridor. It's minimalist and calming, perfect if you love Scandinavian or modern styles. You’ll feel the hallway open up and stay fresh with low-contrast textures.
Key Elements
- Matte warm white paint on walls and trim
- Light ash or whitewashed oak flooring
- Narrow white console table (12–18" depth)
- Frameless oval mirror, vertical
- Soft beige or light gray thin runner (low pile)
- Woven seagrass basket for shoes
- Slim wall-mounted sconce with warm bulb
- Ceramic tray for keys in matte white
- Greenery: tall snake plant or philodendron
- Minimal art: one small black-and-white photo
How to Achieve This Look
- Paint walls and trim the same warm white. Use satin trim finish.
- Lay light wood or pale laminate flooring for continuity.
- Place a slim console at waist height to keep sightlines clear.
- Hang an oval frameless mirror above the console to reflect light.
- Add a thin runner aligned with the floor planks to draw the eye.
- Install a single wall sconce for soft, layered light.
- Tuck a woven basket beneath the console for concealed storage.
- Add a tall potted plant at the far end to give vertical focus.
- Keep accessories to three items: vase, tray, and a small stack of books.
- Wipe surfaces weekly to keep the white crisp and bright.
How to Style / Use It
Face the console toward the entry for quick drop-off. Pair with brass or chrome hardware depending on your fixtures. Swap the runner for a chevron or soft stripe in winter for texture. Choose faux plants if you have low light. For rentals, use peel-and-stick runners and an over-the-door hook for coats.
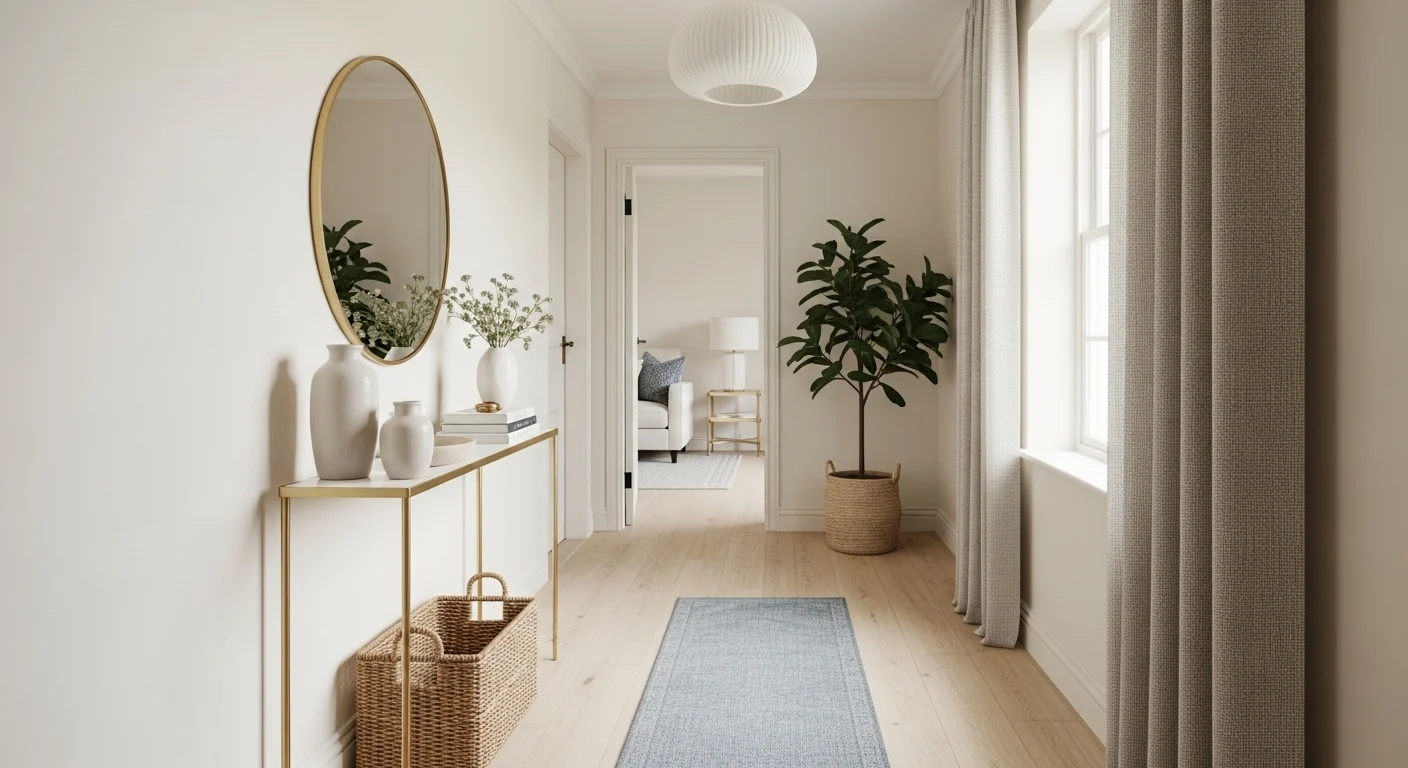
2. Large Mirror Gallery for Depth
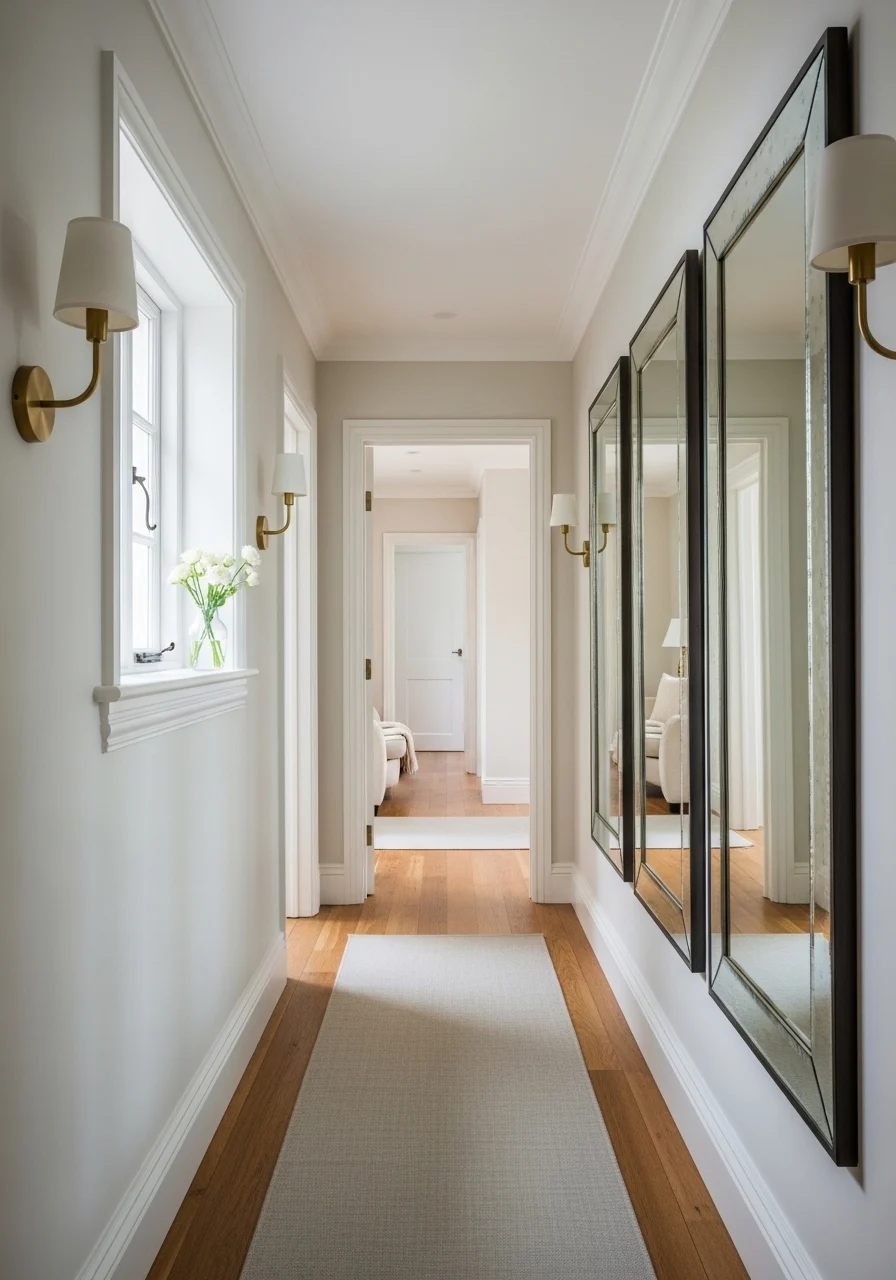
Multiple mirrors visually double depth and bounce light down the corridor. A mirror gallery is decorative and functional. It's a dramatic, budget-friendly trick that suits modern, eclectic, or classic homes. You’ll notice immediate brightness and a feeling of openness.
Key Elements
- Three to five mirrors (mix of shapes)
- Thin frames in black, brass, or natural wood
- Soft runner that doesn’t compete with reflections
- Warm LED wall sconces between mirrors
- Small console or floating shelf (optional)
- Minimal decorative objects: single vase, small tray
- Light-reflective paint (soft eggshell sheen)
- Concealed shoe storage or narrow bench
- Rug gripper to keep runner flat
- Plant or sculptural object at the far end
How to Achieve This Look
- Choose mirrors of varied sizes and shapes but similar scale.
- Map the mirror layout on the floor to balance spacing.
- Hang mirrors at eye level; leave consistent gaps (3–6 inches).
- Paint walls in a soft reflective tone like cream or pale gray.
- Install sconces between mirrors for even illumination.
- Place a narrow shelf or floating console under one mirror.
- Add a runner to create a clear path.
- Position a plant or tall object at the end to anchor the view.
- Secure mirrors well with anchors for safety.
- Dust mirrors weekly to keep reflections crisp.
How to Style / Use It
Use mirrors near entryways for last-minute checks. Mix frame finishes for a collected look. Keep decor slim on consoles to avoid clutter in reflections. Swap mirror arrangements seasonally to refresh the space.
3. Vertical Stripes to Stretch the Walls
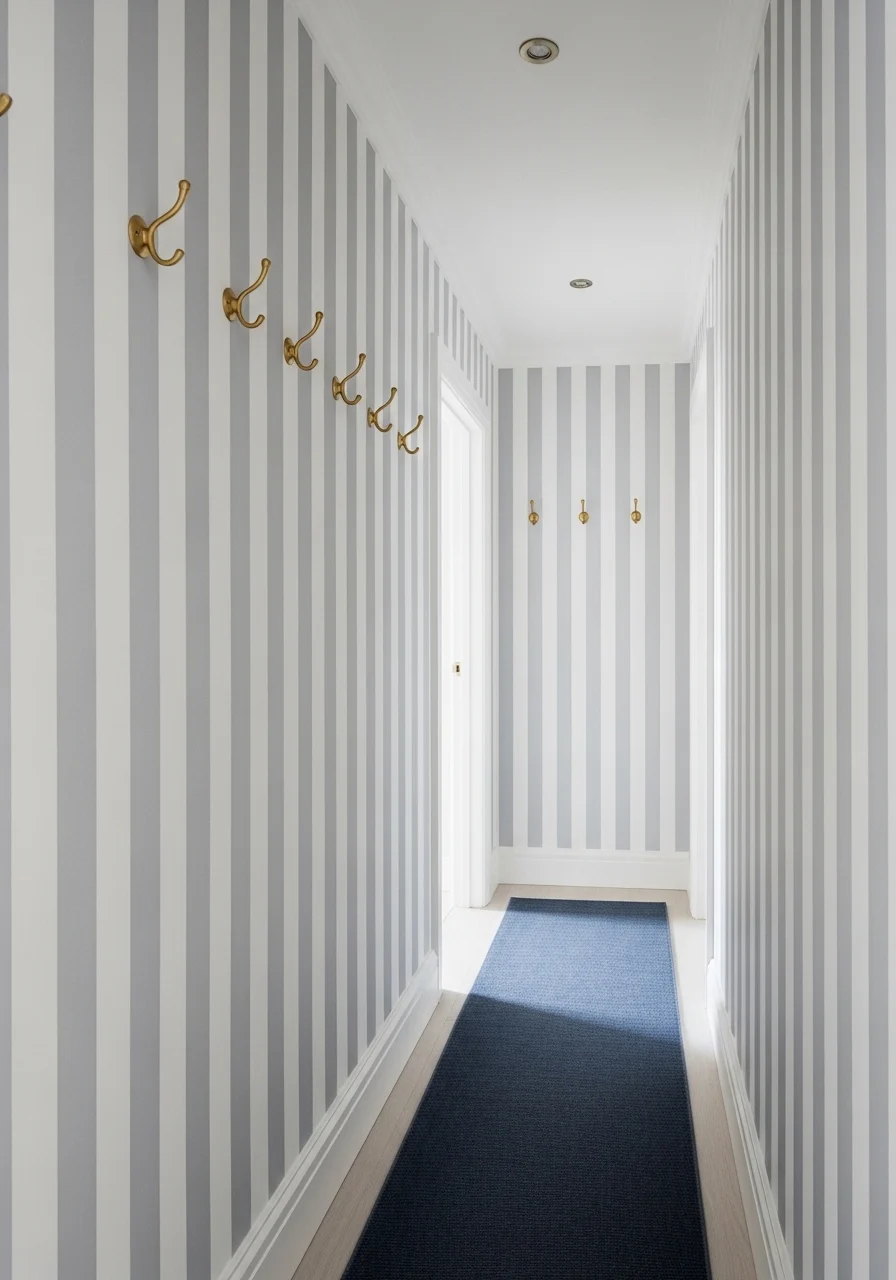
Vertical stripes trick the eye to see higher ceilings and taller walls. A subtle stripe pattern adds texture without overwhelming the narrow space. This idea suits classic, coastal, or modern interiors. You’ll sense more height and a lighter mood.
Key Elements
- Vertical stripe wallpaper in pale contrast
- Smooth white crown molding and baseboard
- Low-profile runner in a complementary color
- Slim brass or matte black hooks
- Recessed or cove ceiling lighting
- Narrow console or floating shelf
- Matte finish paint on trims
- Simple wall mirror with thin frame
- Lightweight woven storage basket
- Soft linen or cotton textiles in neutrals
How to Achieve This Look
- Measure walls and select a low-contrast vertical stripe wallpaper.
- Prep walls: patch, sand, and prime for even adhesion.
- Apply wallpaper carefully; align stripes perfectly.
- Paint trims in matching soft white.
- Lay a runner parallel to stripes to reinforce verticality.
- Mount thin hooks for coats or bags, spaced evenly.
- Install recessed or cove lighting to wash walls upward.
- Add a small mirror to bounce light.
- Place concealed storage under the console for shoes.
- Keep accessories simple to avoid visual clutter.
How to Style / Use It
Pair with warm wood furniture to soften the stripe. Use vertical art or tall plants to echo the lines. Switch the runner to a solid color for a calmer look. Keep hooks at reachable height for family use.
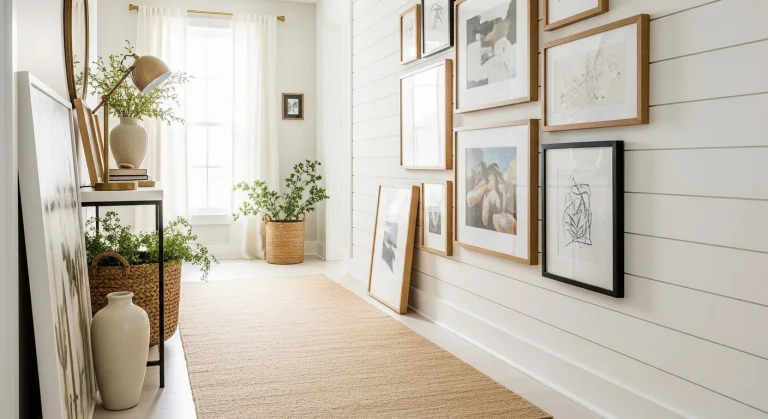
4. Gallery Lighting and Art Ledge
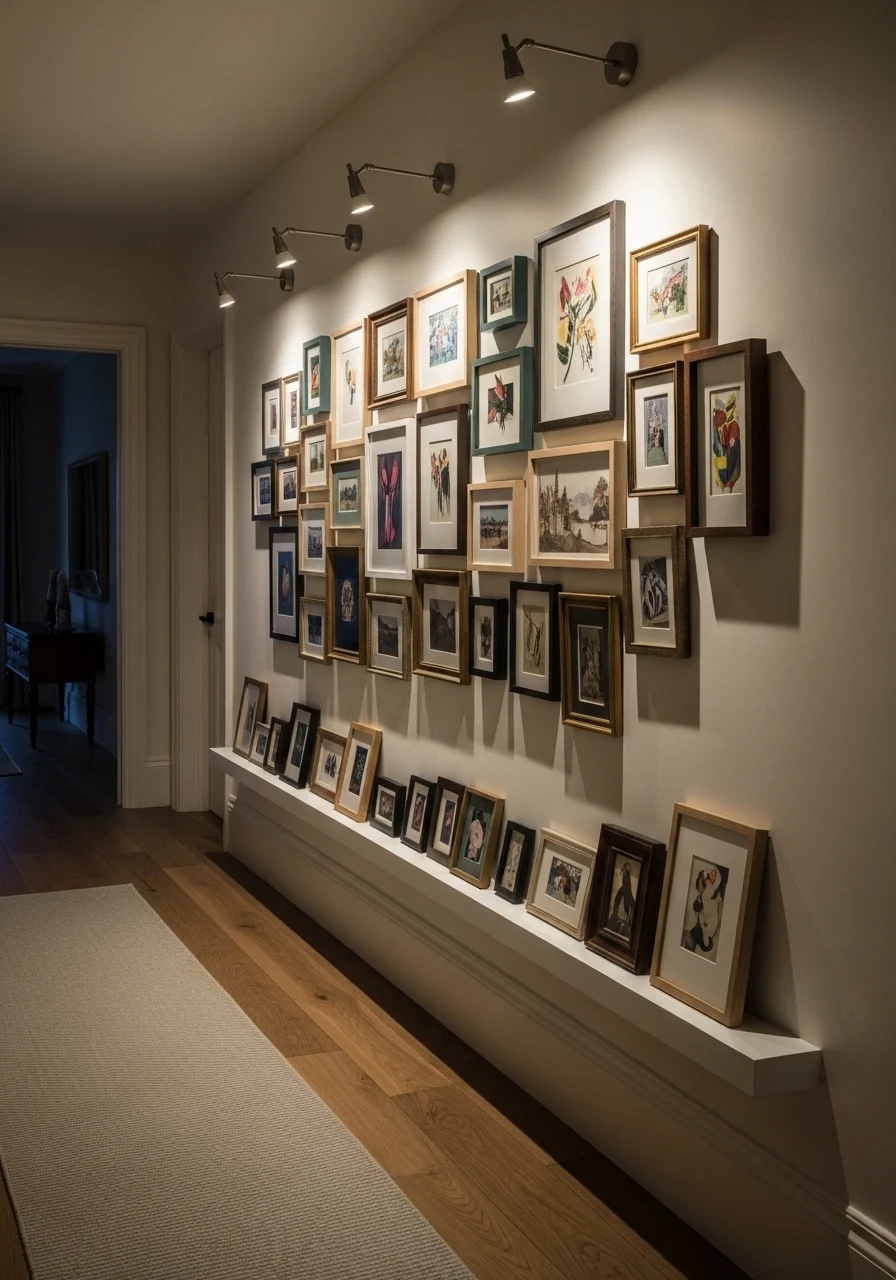
A curated gallery wall with a thin ledge keeps art personal and the floor clear. Directional lights highlight pieces and add warmth. This creates a museum-like depth and personality. It’s perfect if you love art or family photos.
Key Elements
- Floating picture ledge (3–6" depth)
- Mixed small frames in similar color
- Adjustable picture lights or track lighting
- Neutral runner to avoid busy pattern clash
- Mid-toned oak flooring
- Small bench or stool under ledge
- Minimal decorative items on ledge
- Low-profile coat hooks near entry
- Painter’s tape for mock layout
- Soft warm bulbs (2700–3000K)
How to Achieve This Look
- Paint the wall a neutral tone that complements frames.
- Install a slim floating ledge at chest height.
- Arrange frames on the ledge; layer smaller pieces in front.
- Mount directional lights above each significant piece.
- Keep the lower wall clear for an airy feel.
- Add a narrow bench beneath the ledge for seating/storage.
- Use painter's tape to trial frame positions first.
- Replace light bulbs with warm LEDs for flattering color.
- Rotate art seasonally for fresh interest.
- Dust picture ledge regularly to avoid dust buildup.
How to Style / Use It
Swap prints and photos without rehanging by using the ledge. Use similar-tone matting for cohesion. Keep the bench clear of clutter to preserve open floor space. Use gallery lighting for evening ambiance during gatherings.
5. Slim Floating Storage — small hallway ideas
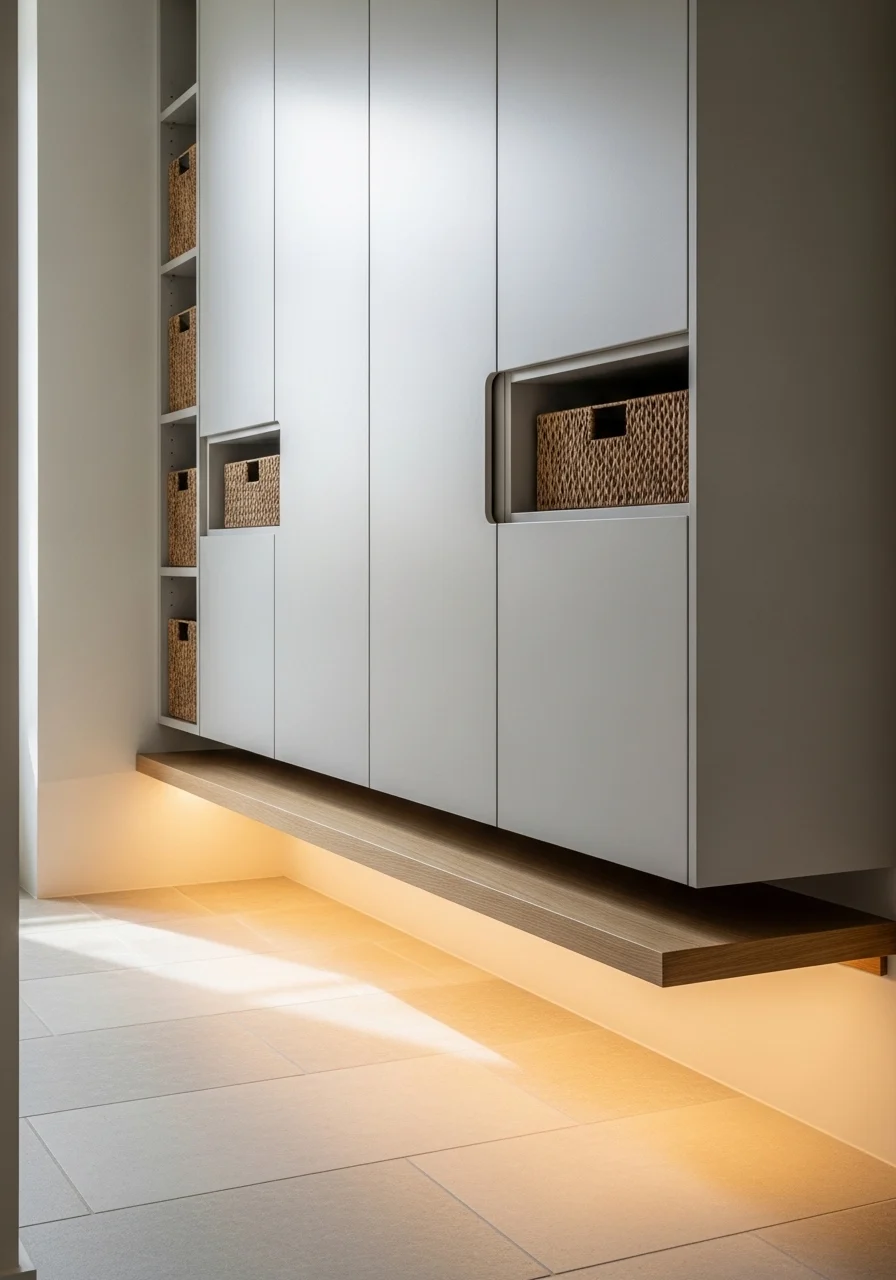
Floating storage keeps the floor visible and the hallway airy. Slim cabinets hide shoes, umbrellas, and mail while looking sleek. This works for families who want tidy, functional small hallway ideas that feel bigger instantly. You’ll free floor space and calm the entry.
Key Elements
- Wall-mounted floating cabinets (6–10" depth)
- Push-to-open or recessed handles
- Under-cabinet LED strip lighting
- Narrow wood bench or fold-down seat
- Woven storage baskets inside cabinets
- Matte paint finish on cabinets
- Concealed shoe racks or slatted shelves
- Mounted slim coat rail above cabinets
- Neutral runner aligned to cabinet length
- Entry tray for keys and mail
How to Achieve This Look
- Measure hallway depth and choose 6–10" deep cabinets for clearance.
- Mount cabinets at hip height to allow legroom underneath.
- Install under-cabinet LED strips for soft floor illumination.
- Fit interior baskets and slatted shoe shelves inside.
- Add a slim bench to one side for sitting when needed.
- Mount a narrow coat rail above cabinets for jackets.
- Paint cabinets a pale neutral to recede visually.
- Use concealed fasteners and anchors for safety.
- Place a tray on top for keys and mail.
- Keep cabinet tops clutter-free with one decorative piece.
How to Style / Use It
Use cabinets to store seasonal shoes and accessories. Swap baskets for labeled bins for family organization. Use under-cabinet lighting as a night guide. For renters, consider standalone wall-mounted shelving instead of built-ins.
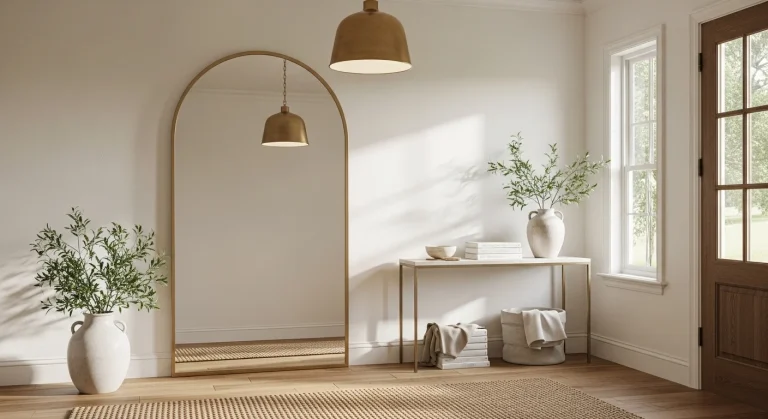
6. Light Wood Floor Runners for Flow
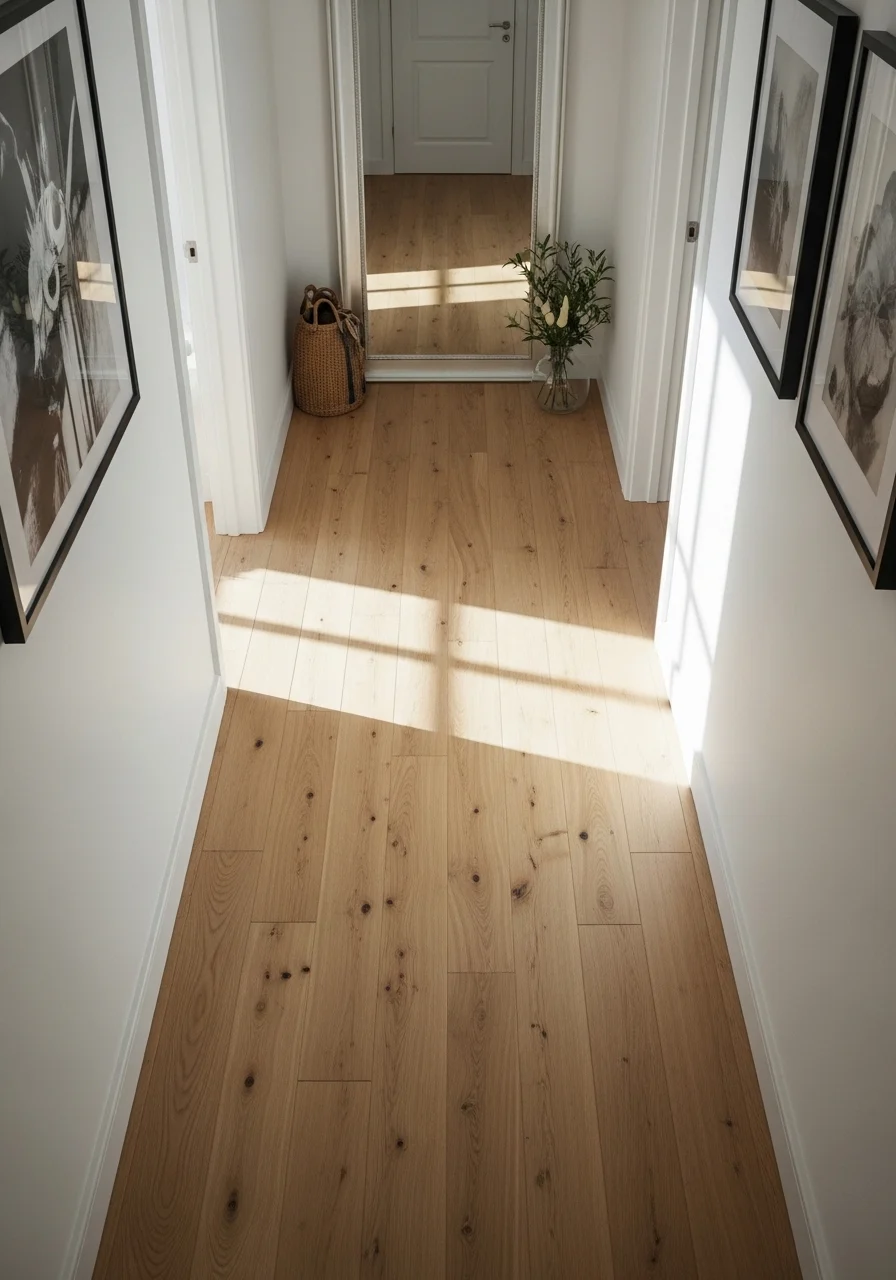
Exposing continuous light wood floor planks visually lengthens the hallway. A runner-less approach creates an uninterrupted path. This is simple and warm, perfect for modern rustic or Scandinavian homes. You’ll feel a seamless flow from room to room.
Key Elements
- Light oak or ash plank flooring installed lengthwise
- Minimal wall color in warm off-white
- Tall mirror at the far end
- Slim baseboards in matching tone
- Subtle recessed lighting
- Minimal wall hooks or none at all
- Neutral doorway trims
- Soft textures in adjacent rooms to balance warmth
- Protective runner for high-traffic zones (optional)
- Floor polishing for a gentle sheen
How to Achieve This Look
- Decide to run planks lengthwise for maximum visual stretch.
- Remove small floor rugs to create continuity.
- Refinish existing floor to a pale, consistent tone.
- Install recessed ceiling lights spaced evenly.
- Place a tall mirror at the far end to double the depth.
- Keep wall decor minimal to maintain flow.
- Polish floor for subtle reflection but avoid high gloss.
- Use felt pads on furniture to prevent scratches.
- Add a small protective runner only near the door if needed.
- Maintain regular sweeping and occasional deep cleaning.
How to Style / Use It
Let the floor be the star and keep wall accessories minimal. Add warmth with adjacent room textiles like throws or curtains. Use a clear runner near entries to protect the floor from wet shoes. Light wood works year-round and pairs with both warm and cool tones.
7. Recessed Shelving and Nooks — small hallway ideas
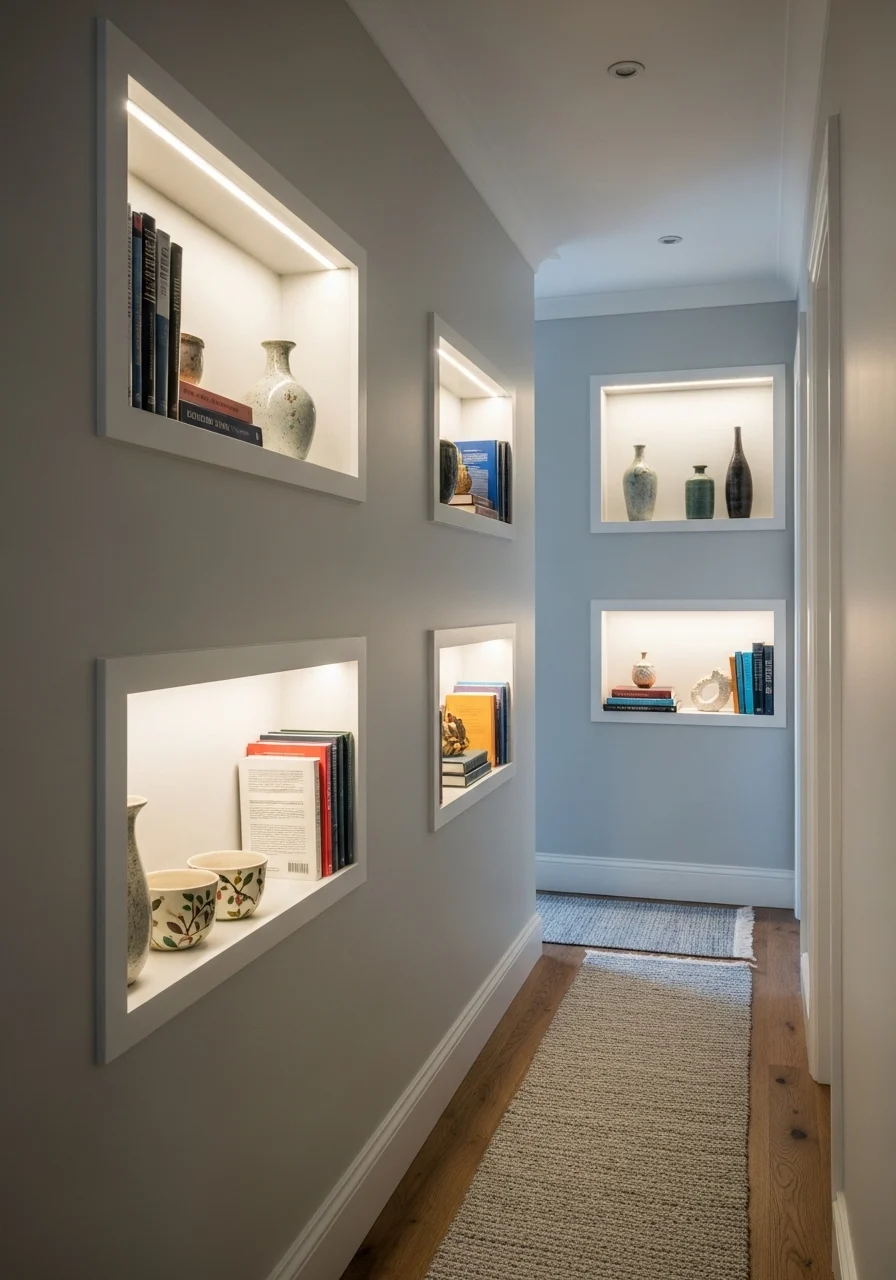
Recessed shelving uses wall depth, not floor width, so the hallway keeps walking space. Nooks display art and store small items without crowding. This approach is great for historic homes with thick walls or modern renovations. You’ll get storage plus a museum-like look.
Key Elements
- Built-in wall niches or recessed shelves
- Soft contrasting paint in niche interiors
- Slim LED strip lighting inside niches
- Neutral runner that doesn’t block niches
- Ceramic bowls and curated books
- Small framed photos or sculptural pieces
- Dust-free glass or acrylic shelf panels
- Hidden switch for niche lighting
- Smooth plaster finish around niches
- Ladder or step stool for higher niches (if needed)
How to Achieve This Look
- Identify wall studs and cavities to plan niche placement.
- Cut shallow niches into drywall or use framed recessed shelving.
- Paint niche interiors a slightly darker tone for depth.
- Install LED strip lights at the top of each niche.
- Add tempered glass or thin wooden shelves if needed.
- Style each niche with three objects max for balance.
- Maintain a consistent spacing pattern between niches.
- Ensure switches or wiring are installed safely by a pro.
- Keep a small dusting routine for displayed items.
- Add a runner aligned with the shelf pattern to guide the eye.
How to Style / Use It
Use niches to display seasonal decor or meaningful objects. Light each niche individually to avoid flat lighting. Keep items low-weight to prevent shelf sagging. Swap objects periodically to keep the hallway feeling refreshed.
8. Soft Cove Lighting for Airiness
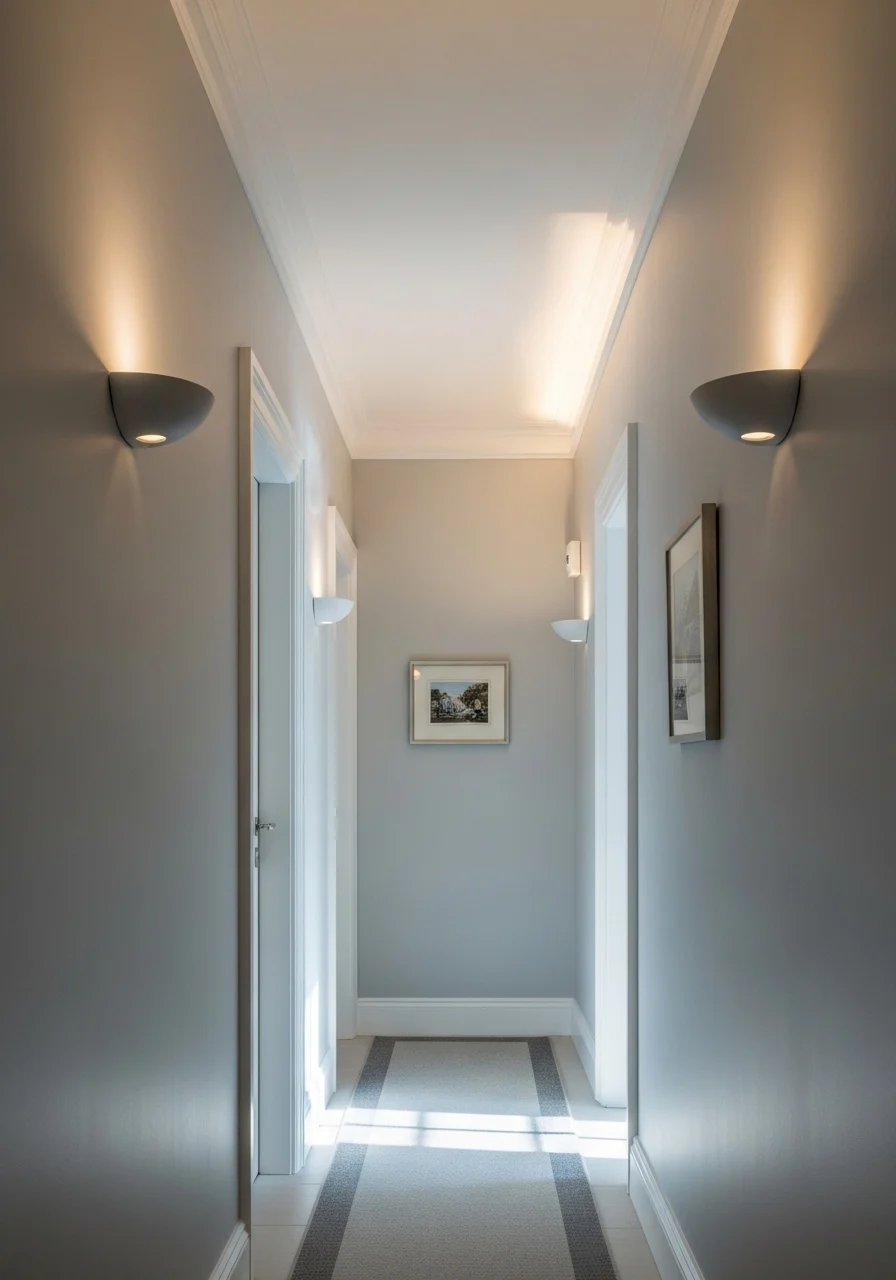
Cove lighting washes walls and ceiling with indirect light, making the hallway feel higher and softer. It reduces harsh shadows, creating a spa-like floaty feel. This technique suits both new builds and remodels. You'll notice a subtle lift in perceived height.
Key Elements
- Recessed cove lighting or LED strip around ceiling perimeter
- Warm white bulbs (2700–3000K)
- Smooth, matte ceiling finish
- Neutral wall color to reflect light evenly
- Slim runner that doesn't compete with light
- Dimmable controls for mood setting
- Minimal decorative furniture
- Concealed wiring and clean trim details
- Light-diffusing frosted covers for strips
- Professional installation recommended
How to Achieve This Look
- Plan a shallow cove or set-back ledge around the ceiling edge.
- Install LED strip lights or recessed fixtures inside the cove.
- Choose warm white LEDs for comfortable light.
- Paint the ceiling and upper wall in a coordinating color.
- Add a dimmer to control brightness for day and night.
- Keep ceiling finishes smooth to allow even light spread.
- Remove bulky ceiling fixtures to avoid conflict with cove light.
- Use a low-profile runner and minimal wall decor.
- Test the lighting at different times for best effect.
- Schedule professional help for wiring and trimming.
How to Style / Use It
Use cove lighting for evening ambiance and soft entryway light. Pair with reflective elements like muted mirrors for more depth. Use dimmers for different moods. Great for long hallways where ceiling detail adds architectural interest.
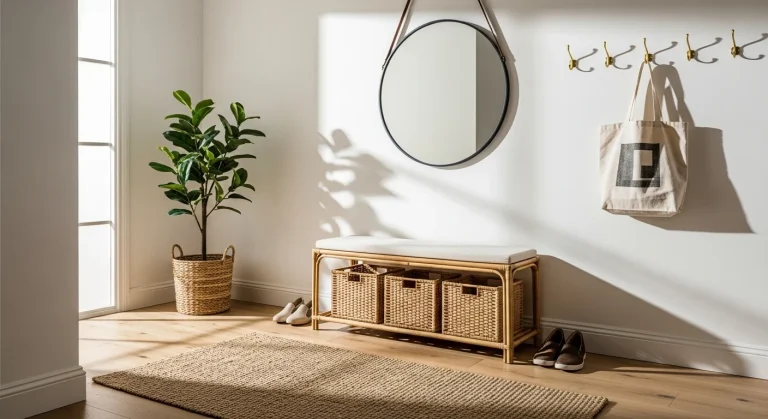
9. Slim Bench with Hidden Storage
A narrow bench gives a place to sit while keeping storage out of sight. Choose a bench with a hinged seat or drawers to hide clutter. It's practical for families and renters. You’ll keep entry items organized while maintaining an open walkway.
Key Elements
- Slim upholstered bench (12–16" depth)
- Hinged seat or pull-out drawers
- Neutral durable fabric like performance linen
- Low-profile shoe tray or shelf below
- Small throw cushion for comfort
- Wall hooks overhead for coats
- Entry tray on adjacent console
- Basket for umbrellas or dog leashes
- Soft overhead pendant or sconce
- Rug protection pad beneath bench
How to Achieve This Look
- Measure available width and select a bench depth under 16".
- Install the bench flush against the wall to keep the path clear.
- Choose a bench with a hinged seat for easy access.
- Add a thin shelf or tray underneath for daily shoes.
- Mount wall hooks above the bench for jackets and bags.
- Add a cushion in a durable fabric for sitting comfort.
- Place a basket beside the bench for umbrellas.
- Keep a small tray nearby for keys and mail.
- Clean fabric regularly with a vacuum and spot treatment.
- Use storage organizers inside the bench to separate items.
How to Style / Use It
Sit on the bench to put on shoes and use storage for seasonal items. Match the bench fabric to your runner for cohesion. Replace cushions for a seasonal refresh. Test the hinge or mechanism for stability periodically.
10. High-Contrast Door Frames
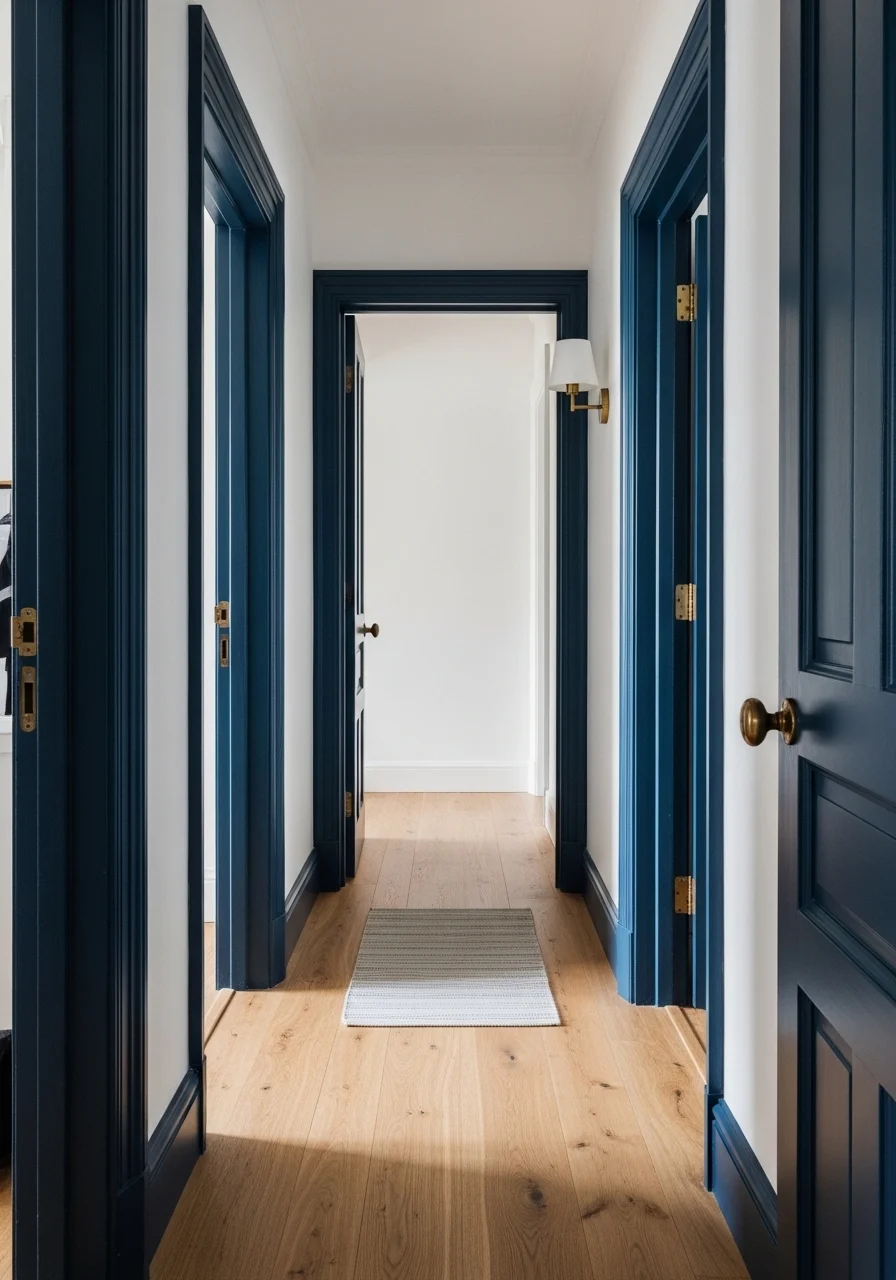
Painting door frames a contrasting dark color frames each doorway and pulls the eye outward. It creates an architectural rhythm that tricks the eye into spatial depth. This works well in modern and traditional spaces. You’ll give the hallway personality without clutter.
Key Elements
- Deep navy or charcoal door frames and trim
- Warm white walls to contrast
- Mid-tone wood floor
- Brass or matte black hardware
- Narrow runner in neutral tone
- Consistent paint sheen on trim
- Small wall-mounted art or mirror
- Painter’s tape for crisp lines
- Light-test at different times of day
- Door stoppers to prevent scuffs
How to Achieve This Look
- Choose a strong trim color like navy, charcoal, or hunter green.
- Paint doors and frames with a durable semi-gloss finish.
- Keep walls in warm white for contrast.
- Refinish or clean hardware to complement the color.
- Lay a neutral runner to guide the eye.
- Use painter’s tape for clean edges around trims.
- Allow paint to cure fully before touching hardware.
- Add small art pieces between doors to balance rhythm.
- Test color samples in the hallway light before full paint.
- Maintain paint with occasional touch-ups near high-contact areas.
How to Style / Use It
Coordinate trim color with accent pieces like vases or cushions in adjacent rooms. Use a darker trim for a bold, modern look. For a softer approach, choose a deep toned-gray instead of black. Keep doors closed for cleaner visual lines.
11. Glass Pocket Doors to Open Sightlines
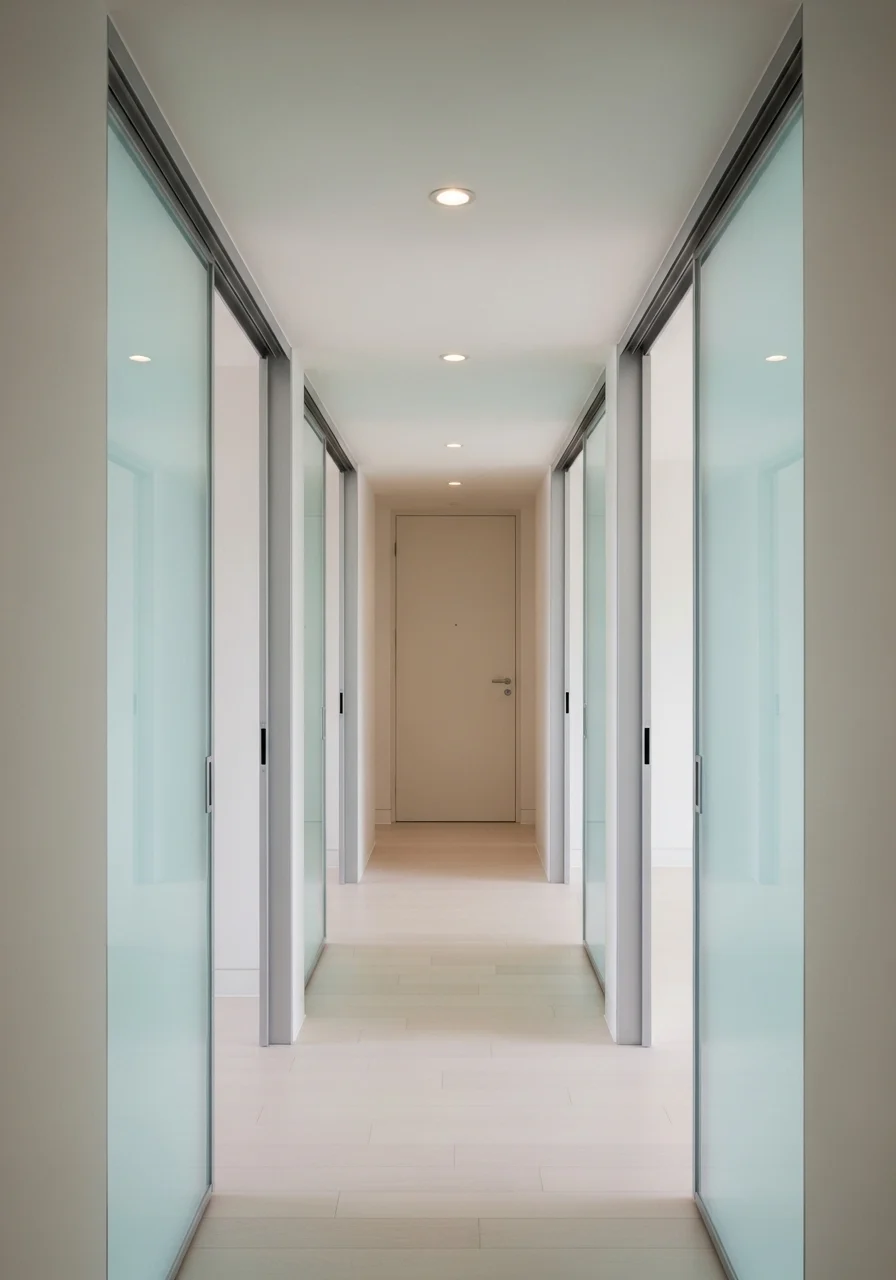
Pocket glass doors tuck away and let light pass between rooms, keeping sightlines open. Frosted glass balances privacy with brightness. This is ideal when you want separation without visual closure. You’ll get a more open, breathable corridor instantly.
Key Elements
- Frosted or clear glass pocket sliding doors
- Slim metal hardware in brass or matte black
- Smooth tracks recessed into wall
- Consistent floor running through doorway
- Soft ambient overhead lighting
- Minimal trim for modern look
- Soft-close mechanism for quiet use
- Privacy film option if needed
- Professional installation for flush fit
- Regular track cleaning
How to Achieve This Look
- Measure door openings and consult for pocket door framing.
- Choose frosted glass for privacy, clear glass for maximum light.
- Install pocket frames and tracks according to spec.
- Fit slim hardware and soft-close mechanisms.
- Align floor finish to flow through door opening.
- Install recessed lighting to complement glass light transfer.
- Add subtle handles for easy operation.
- Maintain tracks by cleaning out debris periodically.
- Consider privacy film options for future flexibility.
- Test doors for smooth operation and adjust as needed.
How to Style / Use It
Use glass doors between living spaces and hallways to share light. Frosted glass is great for bathrooms and bedrooms. Keep frames minimal to maintain an airy aesthetic. Pocket doors save swing space in narrow areas.
12. Light-Colored Wainscoting — small hallway ideas
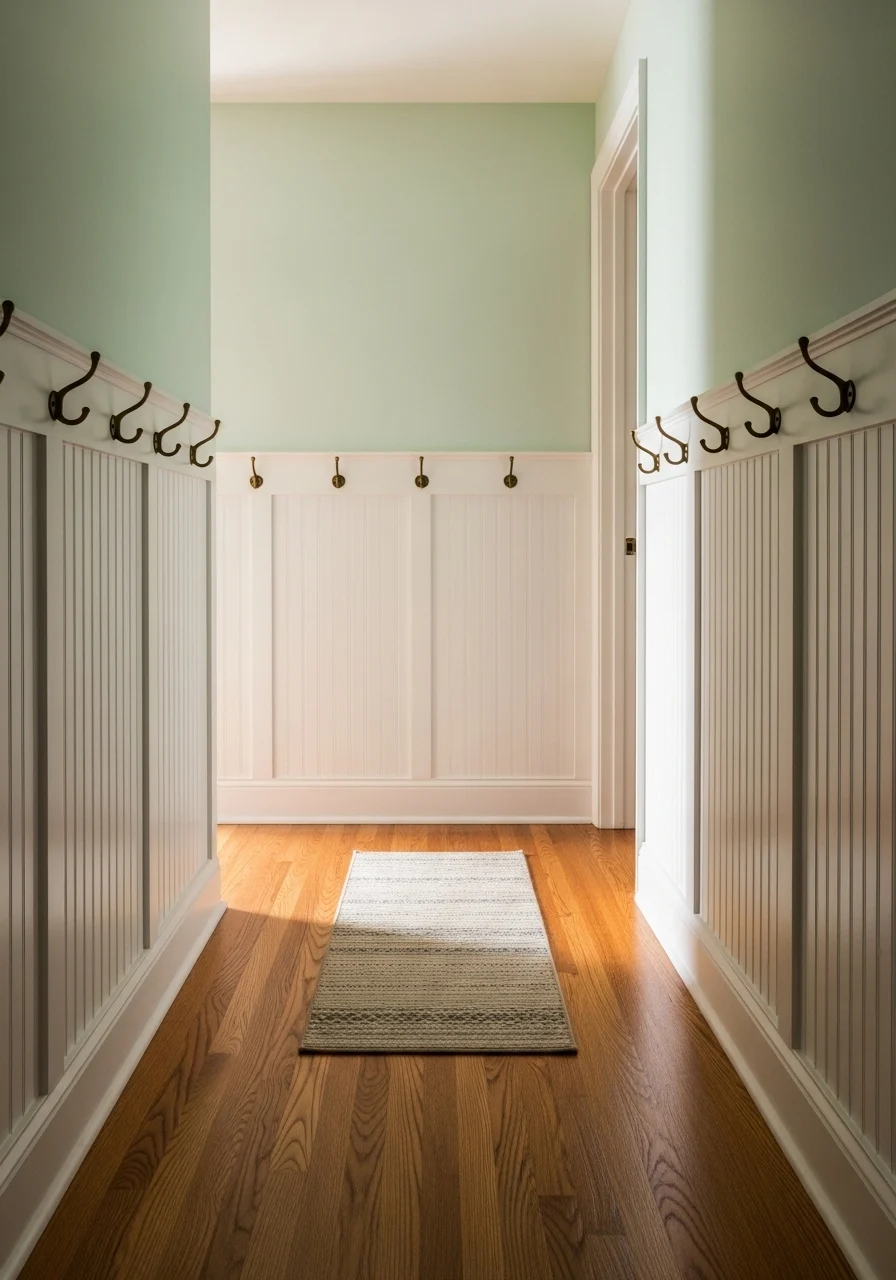
Wainscoting adds texture and architectural interest while keeping the upper wall light and bright. Light-colored panels reflect light and make walls feel less oppressive. This suits cottage, traditional, and modern-farmhouse styles. You’ll get dimension without narrowing the passage.
Key Elements
- Beadboard or flat-panel wainscoting painted light
- Chair rail and baseboard in matching tone
- Soft pastel or neutral upper wall color
- Low-profile runner
- Slim hooks or peg rail over wainscoting
- Matte or satin finish to reduce glare
- Simple framed mirror or art above the rail
- Concealed wiring behind paneling if adding lights
- Durable paint for high-traffic areas
- Rounded corner trim for single-sweep cleaning
How to Achieve This Look
- Measure and install wainscoting panels to a consistent height.
- Paint the wainscoting a warm white or pale tone.
- Paint the upper wall a slightly darker or pastel tone for contrast.
- Install a matching chair rail to finish the top edge.
- Add slim hooks for function without bulk.
- Place a runner to unify the floor.
- Seal edges with caulk for a finished look.
- Choose washable paint for easy maintenance.
- Add a small mirror for light reflection above the rail.
- Clean panels with a damp cloth to remove scuffs regularly.
How to Style / Use It
Keep the wainscoting color close to trim for a cohesive look. Use hooks for guests’ coats or quick access items. Swap the upper wall color seasonally for fresh contrast. Wainscoting also helps protect walls from daily wear.
13. Narrow Shelves and Ledges
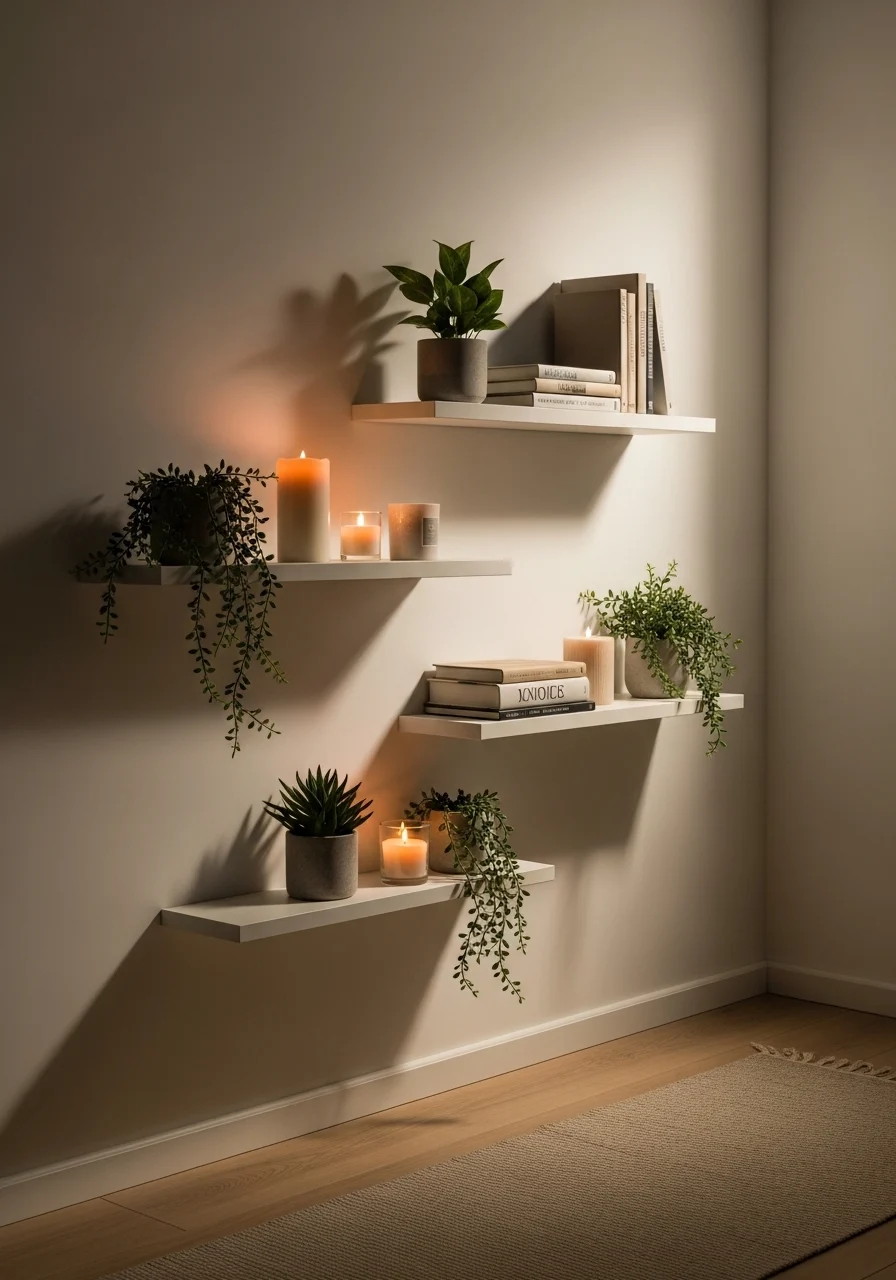
Slim shelves give you display space without eating into walking width. Staggered ledges provide visual movement and storage for small decor. This is great if you love small decorative touches. You’ll keep the floor open while adding personality.
Key Elements
- Floating shelves 4–6" deep
- Staggered vertical arrangement
- Small potted plants and candles
- Thin runner to keep floor visible
- Neutral wall paint to avoid distraction
- Small frames and compact objects
- Hidden anchors for sturdy mounting
- Dust-free materials like ceramic and glass
- LED strip accent lighting optional
- Minimal grouping per shelf
How to Achieve This Look
- Choose shallow shelves to avoid reducing width.
- Plan your staggered layout before drilling.
- Use anchors appropriate for wall type.
- Place three items max per shelf for balance.
- Alternate plant textures with hard objects.
- Add small accent lights to highlight select shelves.
- Keep lower shelves empty in very narrow areas.
- Check shelf heights for daily reachability.
- Dust items weekly to keep the look clean.
- Adjust layout seasonally for variety.
How to Style / Use It
Use shelves for rotating displays or small storage. Keep heavy items near studs. Pair with a runner that lines up with shelf grouping. Use faux plants in low-light halls.
14. Pale Ceiling Paint to Lift Height
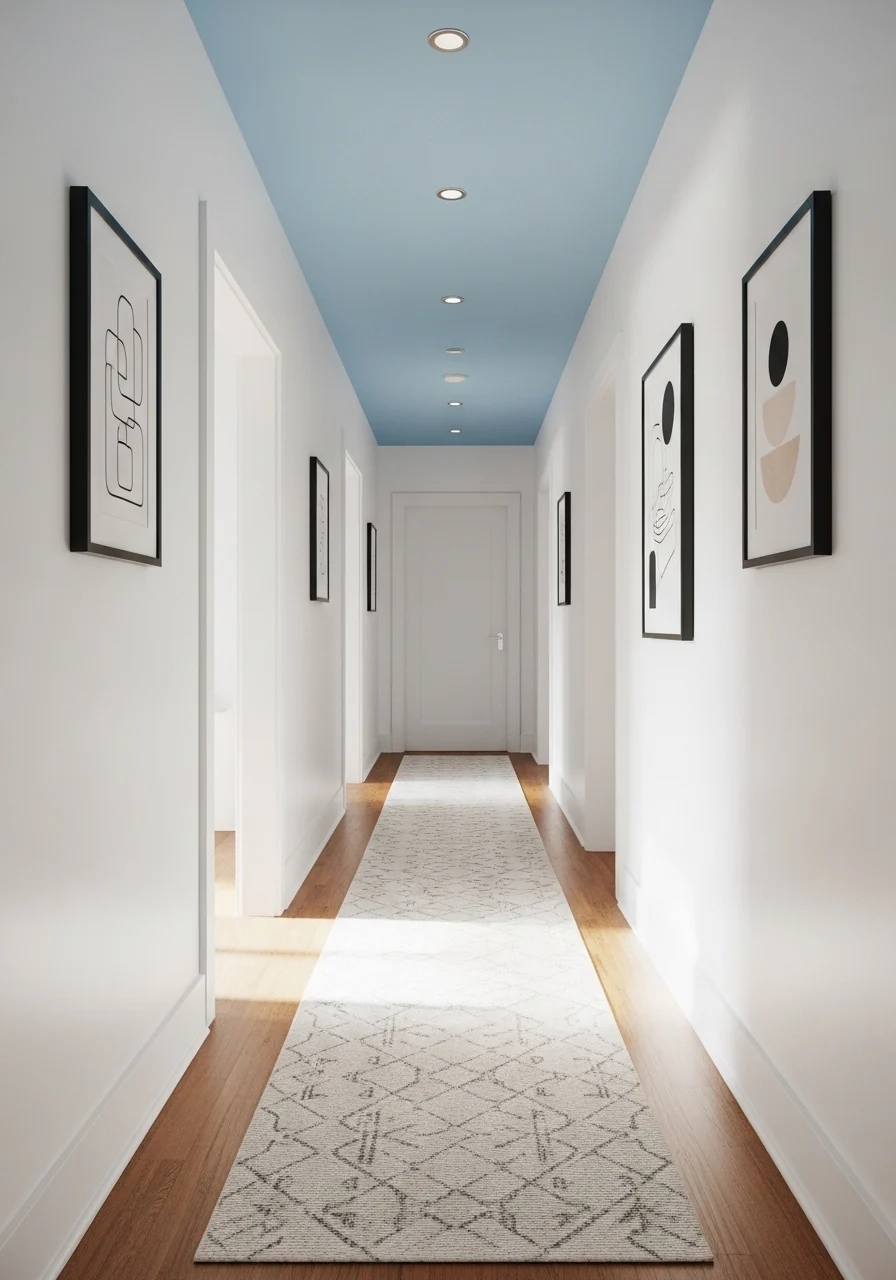
Painting the ceiling a pale color like blue visually raises the space and adds a hint of sky. It breaks the monotony of white while still reflecting light. This trick is subtle and cheerful. You’ll feel the corridor breathe and gain a friendly, open vibe.
Key Elements
- Pale sky-blue or soft pale-gray ceiling paint
- Contrasting warm white walls
- Recessed lights or thin pendant fixtures
- Neutral runner and trim
- Light-reflective ceiling finish (eggshell)
- Minimal art or sconces on walls
- Consistent flooring tone throughout
- Calming decorative accents like woven baskets
- Ladder or step stool for painting high areas
- Paint samples tested under actual hallway light
How to Achieve This Look
- Test pale ceiling colors in multiple spots at different times.
- Tape and protect the walls and trim before painting.
- Choose a low-sheen eggshell ceiling paint for mild reflection.
- Apply two coats for even coverage.
- Keep walls a warm white to keep the space bright.
- Use recessed lights to highlight the ceiling color at night.
- Add a runner aligned with the ceiling color for cohesion.
- Touch up edges after removing tape.
- Inspect for drips and correct immediately.
- Clean brushes and rollers for future touch-ups.
How to Style / Use It
Pair a pale ceiling with botanical art or coastal decor for a breezy feel. Use lighter bulbs to maintain the lifted look at night. Consider a soft blush ceiling for a warmer alternative.
15. Slim Coat Rail and Hooks — small hallway ideas
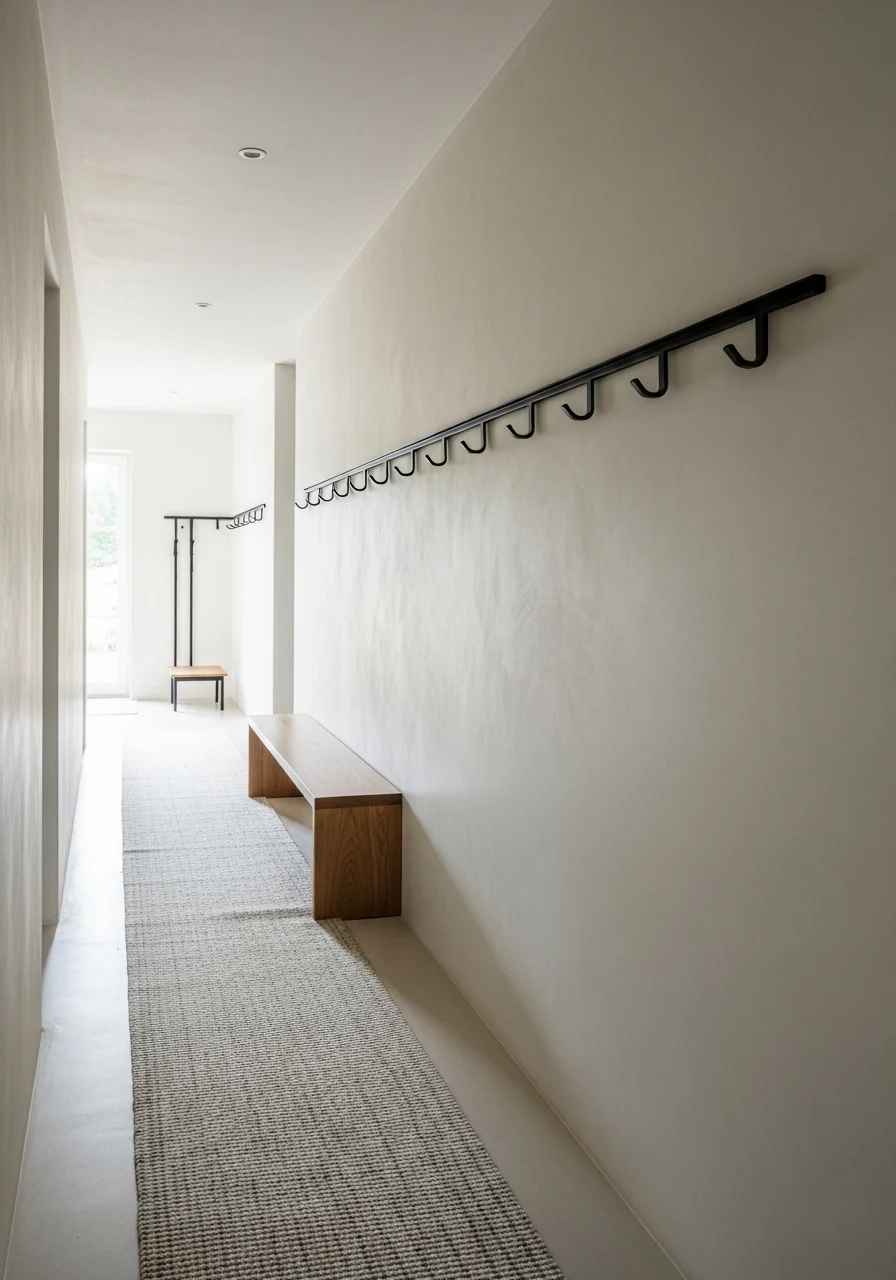
A continuous slim rail with hooks adds usable hanging space without bulky coat closets. It organizes jackets and bags along the wall, keeping floors clear. This suits busy households and renters. You’ll maintain walking room while gaining daily function.
Key Elements
- Slim continuous coat rail in metal or wood
- Small matching hooks evenly spaced
- Narrow bench or floating shelf below
- Neutral runner aligned with rail
- Warm white wall paint for contrast
- Concealed screws and anchors for neat look
- Umbrella stand or basket at the end
- Wall-mounted mirror near the rail
- Durable paint to handle scuffs
- Measuring tape and level for installation
How to Achieve This Look
- Measure wall length to plan rail and hook spacing.
- Install the rail at shoulder height for easy access.
- Fit hooks every 12–18 inches depending on need.
- Mount a narrow bench or shelf beneath for dropped items.
- Use anchors suited to your wall type for secure mounting.
- Paint or finish rail to match existing hardware.
- Add a small basket for hats or gloves.
- Keep heavier coats at one end to balance weight.
- Adjust hook heights if children will use them.
- Wipe the rail and hooks regularly to maintain finish.
How to Style / Use It
Use matching hangers or hangers with clips for bags. Rotate coats seasonally to avoid clutter. Pair with a bench cushion for quick seating. For rentals, use removable rail systems that clamp without drilling.
16. Narrow Chalkboard or Memo Wall
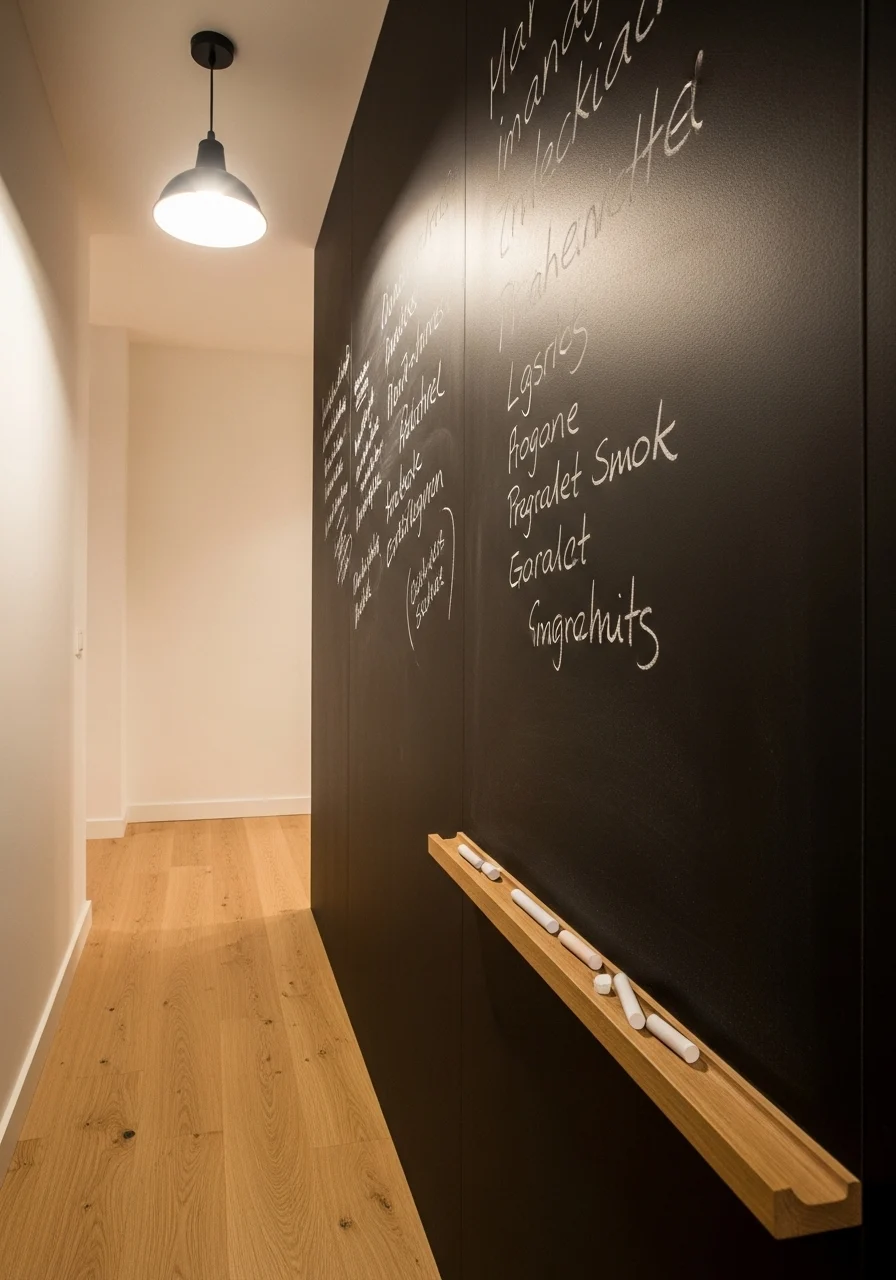
A chalkboard or memo wall adds personality and function without taking space. It becomes a command center for lists and family notes. This is ideal near the front door for busy households. You’ll get creativity and organization without crowding the hallway.
Key Elements
- Matte chalkboard paint panel or framed board
- Small wooden chalk ledge
- Slim framed corkboard option for mixed use
- Chalk markers and chalk set
- Neutral runner and light flooring
- Thin sconce to illuminate the board
- Small hooks nearby for quick notes
- Clean eraser and cloth for maintenance
- Magnetic strip for keys (optional)
- Child-safe height options for family use
How to Achieve This Look
- Choose a narrow wall section and tape off edges.
- Apply several coats of chalkboard paint for even coverage.
- Mount a small ledge to hold chalk and erasers.
- Hang a slim sconce above for visibility.
- Use chalk markers for neater writing that wipes clean.
- Add a magnetic strip for keys or small memos.
- Keep the board at reachable height for all users.
- Use a damp cloth for deep cleaning occasionally.
- Rotate messages and art to keep the board fresh.
- Consider a corkboard combo for pinning items.
How to Style / Use It
Use the board for grocery lists, reminders, and quick drawings. Encourage family members to update it daily. Pair with a small basket for incoming mail. Use chalk markers for colorful, tidy notes.
17. Low-Profile Skylight or Solar Tube
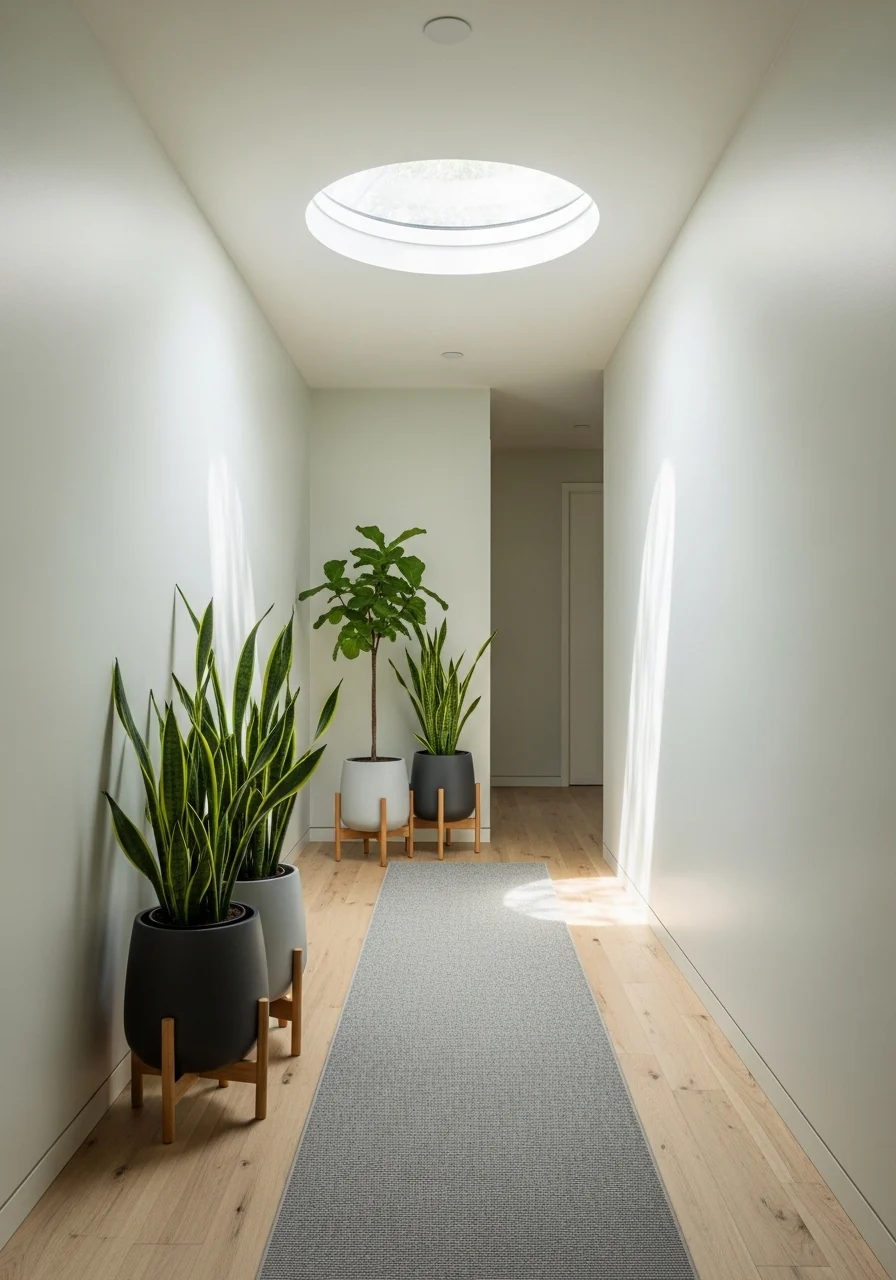
A skylight or solar tube brings daylight into windowless hallways, making them feel instantly bigger. Natural light is the most convincing way to open tight spaces. This works if structural conditions allow. You’ll get daylight without adding a window.
Key Elements
- Solar tube or small skylight
- Diffuser to soften light
- Warm white trim to match the ceiling
- Neutral wall colors to reflect light
- Low-profile runner to keep floor visible
- Houseplants to benefit from new light
- Dimmer or supplemental lighting for evenings
- Professional installation for roof work
- Waterproof flashing and seals
- Regular cleaning access
How to Achieve This Look
- Consult a contractor to evaluate roof placement.
- Choose a solar tube for lower cost and less structural change.
- Install a diffuser to evenly spread light.
- Paint the ceiling and upper wall in a reflective tone.
- Place plants near the light source to enliven the space.
- Complement with soft ceiling or wall lights for night.
- Ensure proper roof flashing and water protection.
- Clean the tube or skylight annually for optimal light.
- Test the daylight at various times of day.
- Add a blind or diffuser if direct sun creates glare.
How to Style / Use It
Use the natural light to highlight art or plants. Combine with mirror placement opposite the tube for added bounce. Solar tubes are great in narrow hallways where windows aren’t possible. Maintain roof seals to prevent leaks.
18. Glass-Front Cabinets for Depth
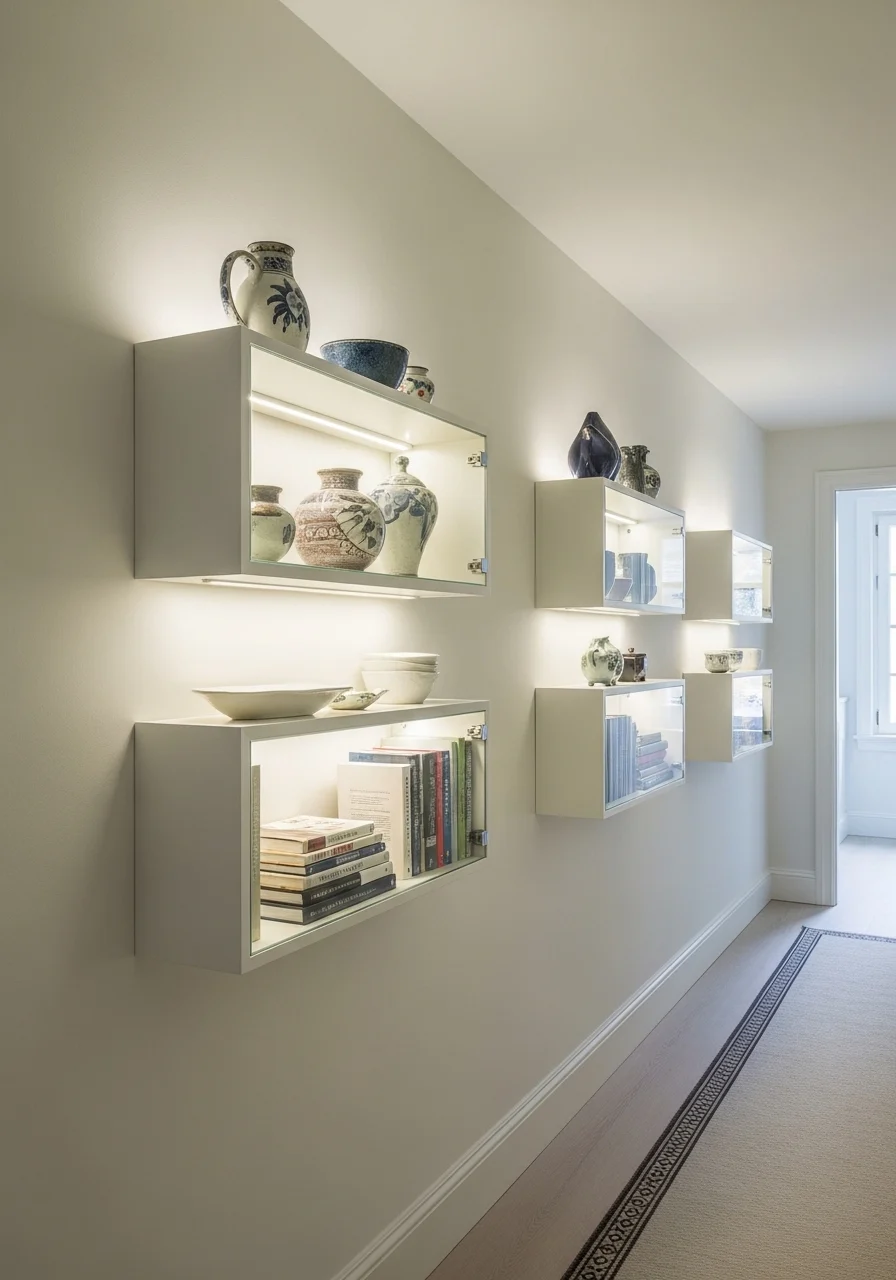
Shallow glass-front cabinets add depth because your eye sees inside the cabinet, not just the surface. They provide display space and perceived volume. Use glass that’s clear or frosted—both reflect light. You’ll get stylish storage without closing the space.
Key Elements
- Shallow glass-front cabinets (4–8" deep)
- Internal LED shelf lighting
- Clear or frosted glass panes
- Narrow baseboards for modern look
- Neutral wall and runner to highlight displays
- Curated objects: small ceramics, books, glassware
- Concealed cabinet hardware
- Soft-close hinges
- Dust seals for low maintenance
- Professional mounting for safety
How to Achieve This Look
- Choose cabinet depth that doesn’t protrude into the path.
- Mount cabinets at eye and chest levels for display.
- Install thin LED strips inside for even illumination.
- Arrange objects with breathing room between pieces.
- Use frosted glass for privacy; clear for full display.
- Keep cabinet doors aligned and hardware minimal.
- Secure cabinets into studs or use robust anchors.
- Dust and clean glass regularly to maintain clarity.
- Use a consistent color story inside cabinets for cohesion.
- Rotate objects seasonally to keep it fresh.
How to Style / Use It
Display small collections and rotate them to avoid clutter. Use similar-height objects for cleaner lines. Pair with low lighting to create evening ambiance. Glass cabinets also act as display cases for heirlooms without crowding tables.
19. Mirrored Runner for Horizontal Bounce
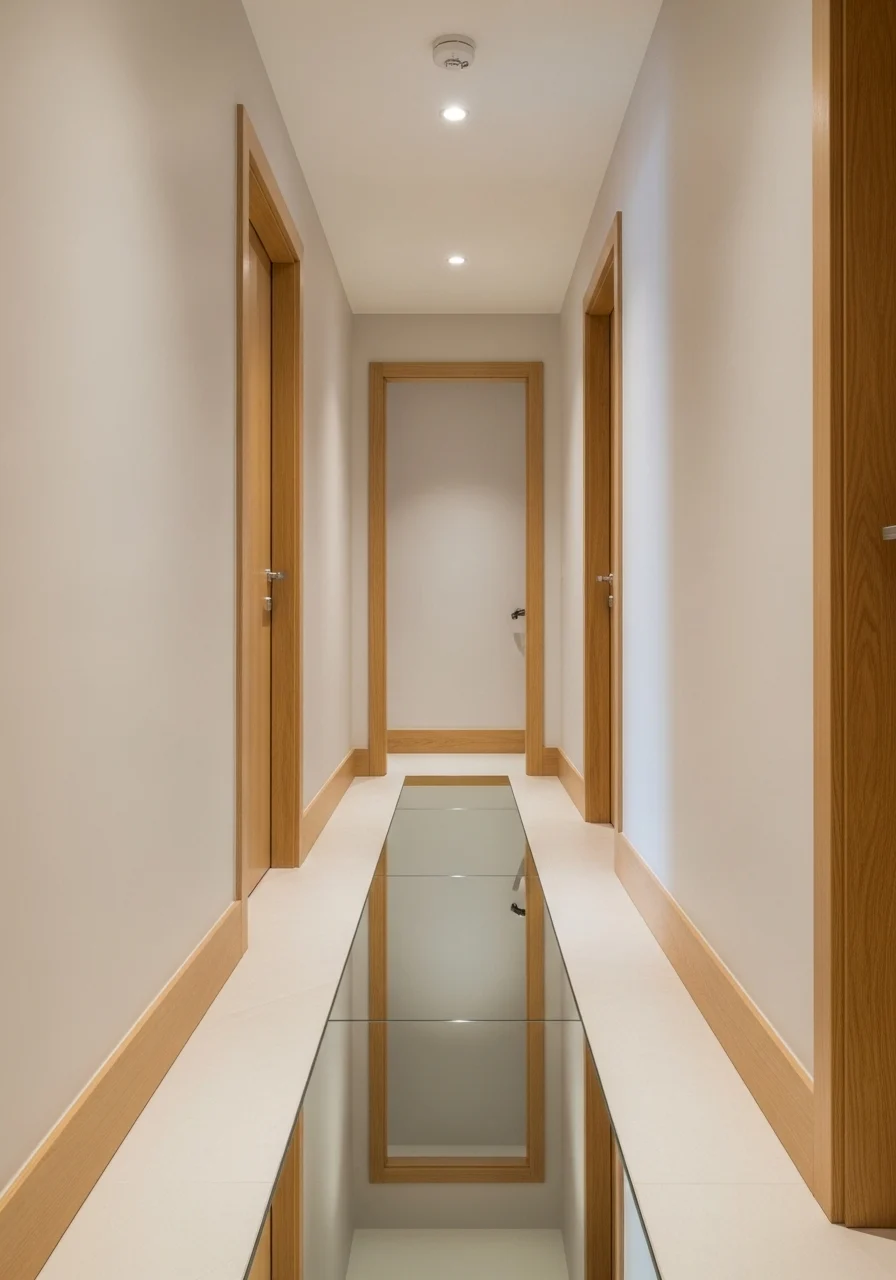
A mirrored runner or set of floor panels reflects ceiling height and light, creating a broader sense of space. It’s a bold choice that reads as contemporary and bright. Use durable, safe mirrored panels. You’ll get immediate wow factor and more perceived width.
Key Elements
- Long narrow mirrored floor panels (tempered)
- Protective edging or trim
- Non-slip backing or gripper pads
- Warm wood or metal borders
- Soft overhead lighting to boost reflections
- Neutral wall paint so reflection carries the space
- Careful cleaning supplies for glass
- Professional install to ensure safety
- Runner alternative for high-traffic protection
- Rubber-backed carpet runner overlay option for seasons
How to Achieve This Look
- Choose tempered mirror panels rated for floor use.
- Install backing and edge trim to protect and secure mirrors.
- Place panels in the center of the hallway to maximize reflection.
- Use LED ceiling lighting to enhance mirror effect.
- Add non-slip backing beneath panels for safety.
- Clean regularly with non-abrasive cleaner to avoid scratches.
- Consider a removable runner overlay for wet seasons.
- Test foot traffic and adjust placement for comfort.
- Keep walls minimal so reflections remain the focal point.
- Consult a pro for custom mirrored installations.
How to Style / Use It
Use mirrored floors sparingly in high-traffic home areas. Pair with warm lighting to avoid a cold, clinical feel. Try mirrored strips instead of full panels for a subtler effect. Consider removable options for rentals.
20. Narrow Built-In Bench with Coat Closet
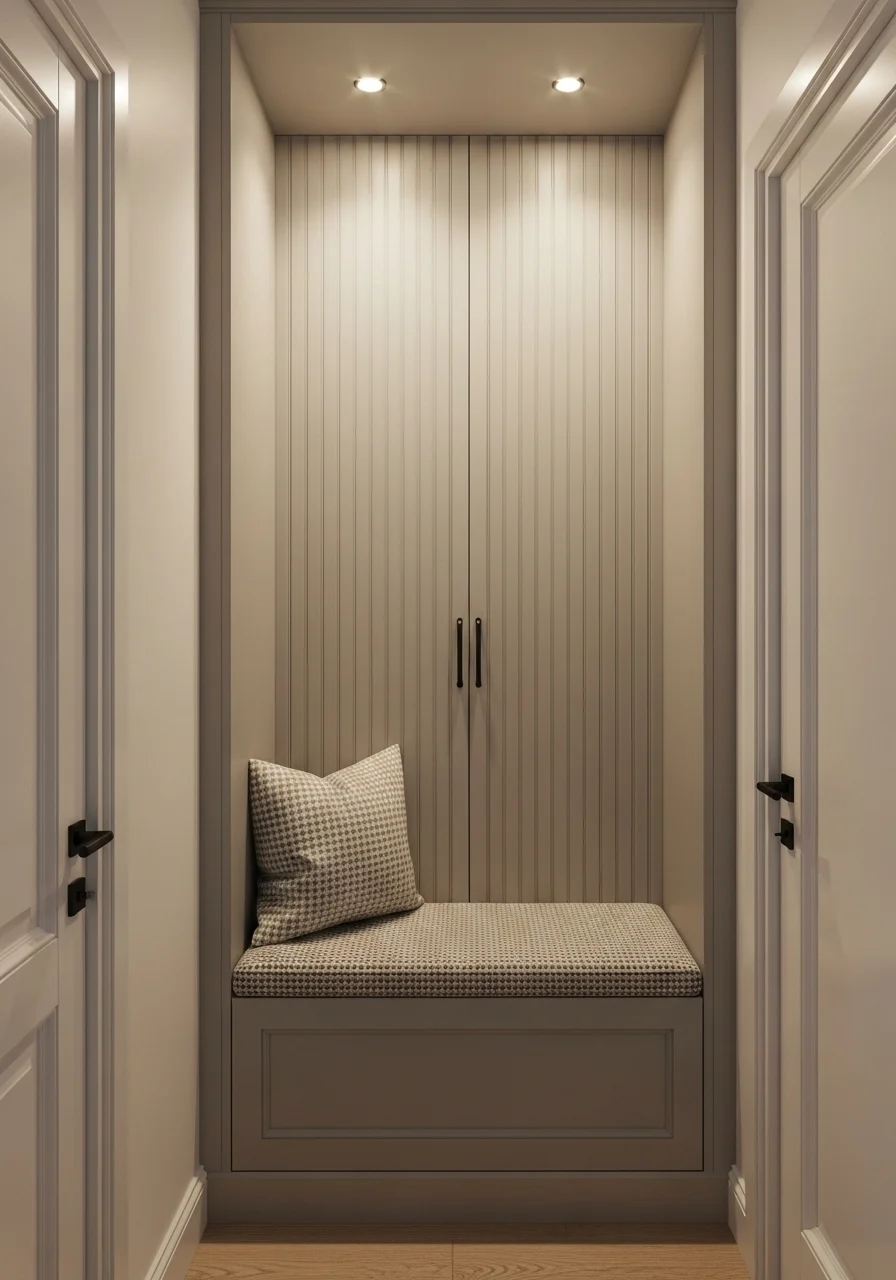
A compact built-in bench with an integrated closet uses vertical space and keeps floors clear. Slender closet doors hide coats and shoes in one tidy spot. This custom approach makes small hallways feel organized and streamlined. You’ll gain function and visual calm.
Key Elements
- Built-in bench 12–16" deep
- Slim closet doors with vertical slats for ventilation
- Internal hooks and slim shoe shelves
- Soft cushion in durable fabric
- Concealed lighting inside closet
- Neutral paint to blend with wall
- Flush cabinet hardware
- Bench storage under seat
- Wall mirror near bench
- Professional carpentry for fit
How to Achieve This Look
- Measure the alcove or wall space for a slim built-in.
- Design a bench height suitable for sitting and storage.
- Install slim vertical doors that don’t protrude into the hall.
- Add internal hooks and shallow shelving for shoes.
- Fit concealed lights that activate when doors open.
- Add a durable cushion on the bench for comfort.
- Seal edges and paint to match walls for seamless look.
- Install ventilation slats in doors to prevent odor buildup.
- Keep heavier items at the back of shelves for balance.
- Maintain an annual declutter routine to prevent overflow.
How to Style / Use It
Use the bench daily for shoes and the closet for seasonal coats. Keep a small tray on top for keys. Coordinate cushion fabric with runner tones. Use vertical slatted doors for texture without visual bulk.
21. Minimal Color Blocking with Warm Neutrals
Color blocking the lower wall in a warm neutral anchors the hallway visually and reduces the sense of narrowness. The darker lower plane grounds the space while a pale upper wall opens it up. It’s stylish and subtle for contemporary and transitional homes. You’ll get dimension and warmth at once.
Key Elements
- Two-tone wall paint: pale upper, warm neutral lower
- Clean dividing line at chair-rail height or lower
- Slim console or ledge matching lower tone
- Neutral runner aligned with color blocks
- Brass or black hooks for contrast
- Warm wood or tile floor
- Matte paint finish for modern look
- Minimal art to avoid competition
- Painter’s tape for crisp lines
- Sample paint swatches tested under hallway light
How to Achieve This Look
- Select two complementary paint tones; test in the hallway.
- Mark the dividing line at the desired height with a level.
- Use painter’s tape for a crisp edge and paint the lower half first.
- Remove tape and touch up any overlap.
- Add a slim console that echoes the lower tone.
- Place a runner to visually anchor the floor.
- Add hooks or small decor aligned with the lower section.
- Keep upper wall mostly free for light reflection.
- Clean scuffs on the lower paint regularly.
- Change the lower tone seasonally for a subtle refresh.
How to Style / Use It
Pair warm lower walls with brass accents for a cozy look. Use darker lower paint to hide scuffs in high-traffic zones. Switch runner colors seasonally to keep the look fresh. Color blocking works well with minimal accessories.
22. Pocket Nook for a Mini Home Office
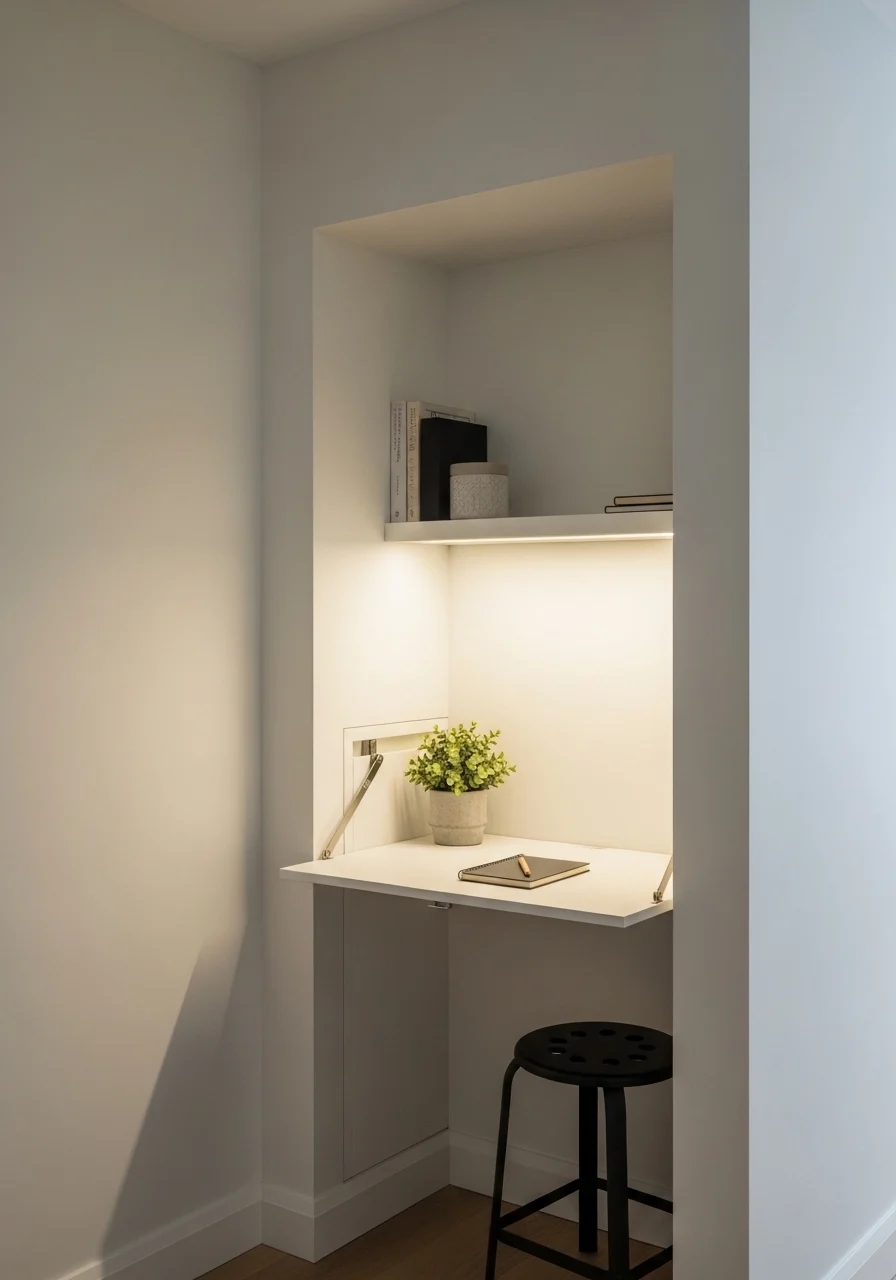
A folded desk nook uses unused hallway depth for a tiny home office. A fold-down top and built-in shelves give you a functional workspace without intruding on traffic. This suits those who need a quick work station or kid’s homework spot. You’ll get productivity without sacrificing flow.
Key Elements
- Fold-down desk top or slim floating desk
- Narrow stool that tucks under the desk
- Slim floating shelf above for storage
- Under-shelf LED task lighting
- Power outlet nearby or hidden cable solution
- Neutral paint to keep the space airy
- Small plant and notebook for styling
- Cable management clips or channels
- Soft-close hinge for fold-down desks
- Wall-mounted peg for headphones or bag
How to Achieve This Look
- Measure a recessed spot or small wall section for a desk.
- Install a fold-down desk or slim floating shelf at comfortable height.
- Add a narrow stool that stores beneath the desk.
- Fit an under-shelf LED light for task illumination.
- Ensure a nearby outlet or install a discreet one.
- Add a slim shelf above for books and supplies.
- Use cable clips to keep cords tidy.
- Keep the desk surface minimal to avoid clutter.
- Add a small plant for a calming touch.
- Fold the desk away when not in use to restore clear passage.
How to Style / Use It
Use this nook for quick tasks or as a command center. Keep office supplies in small boxes on the shelf. Swap the stool for a cushion in low-use setups. Close the desk during busy traffic times for a clear hallway.
You’ve got 22 practical small hallway ideas that feel bigger instantly, from simple paint tricks and mirrors to smart storage and lighting upgrades. Mix and match these strategies to suit your style and budget. Try one idea this weekend and pin the ones you’ll come back to.
Which of these small hallway ideas will you try first? Save this for later or share it with a friend who has a narrow entryway — they’ll thank you. Give one a go and come back to tell me how it changed your space.