19 Hallway Panelling Ideas for a Stylish Upgrade
You walk into a hallway every day, yet it often feels like wasted design real estate. A little panelling can turn that narrow passage into a memorable moment that sets the tone for your whole home. These 19 hallway panelling ideas give you practical, stylish ways to refresh that space — whether you want classic wainscoting, bold modern panels, or a simple painted groove for texture.
You'll find a range of styles here: traditional wainscoting, board-and-batten, shiplap, beadboard, picture-rail and more. Each idea includes a photo prompt, materials list, step-by-step how-to, and styling tips so you can make the look yours. Use these hallway panelling ideas as a roadmap, whether you DIY or hire a pro. Pin the ones you love and try one room at a time — your hallway will thank you.
- Classic Wainscoting — Timeless Hallway Panelling Idea
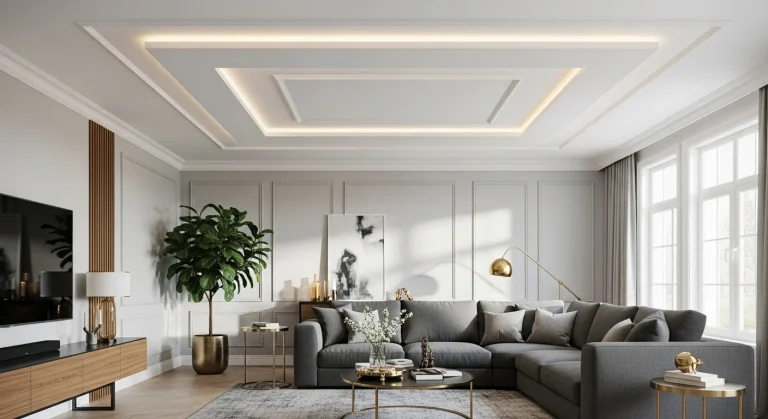
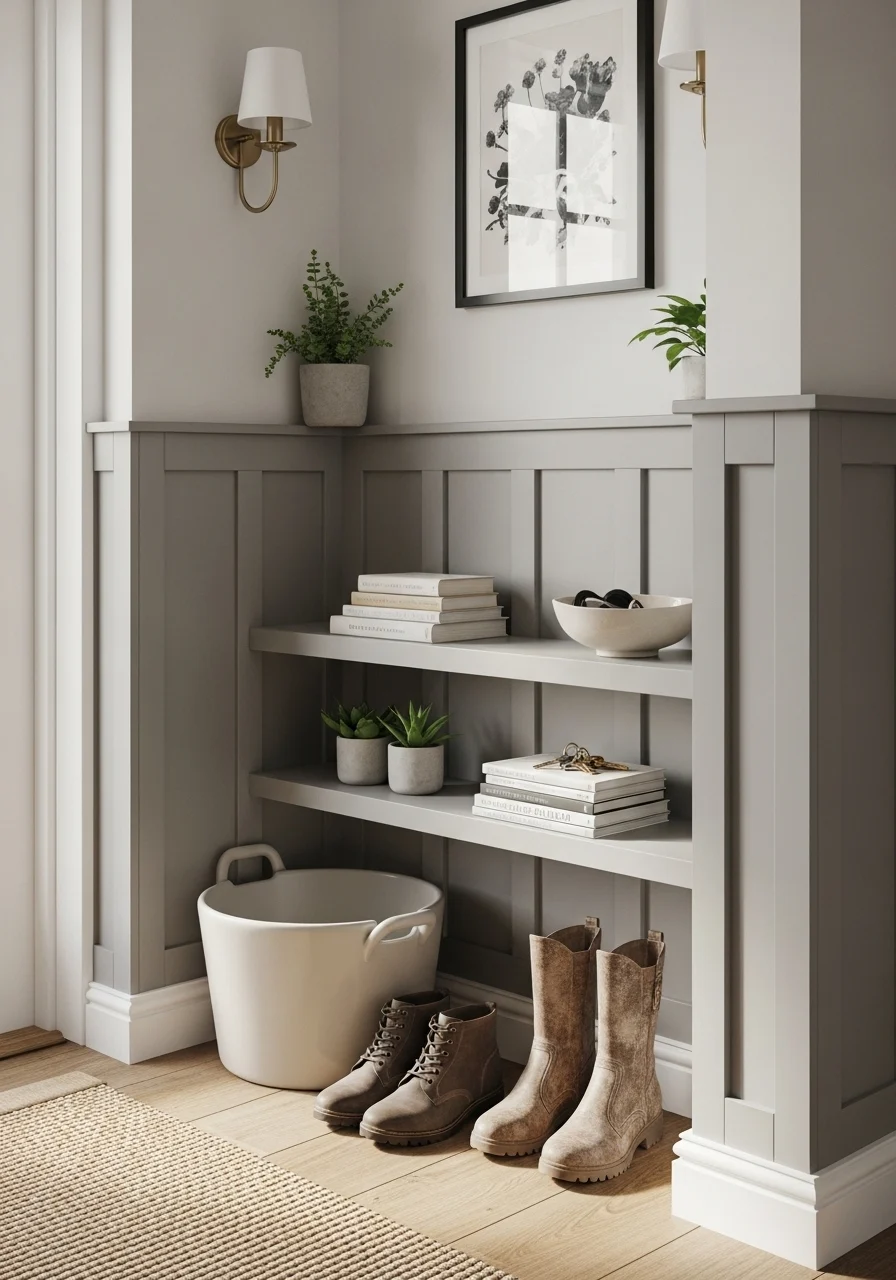
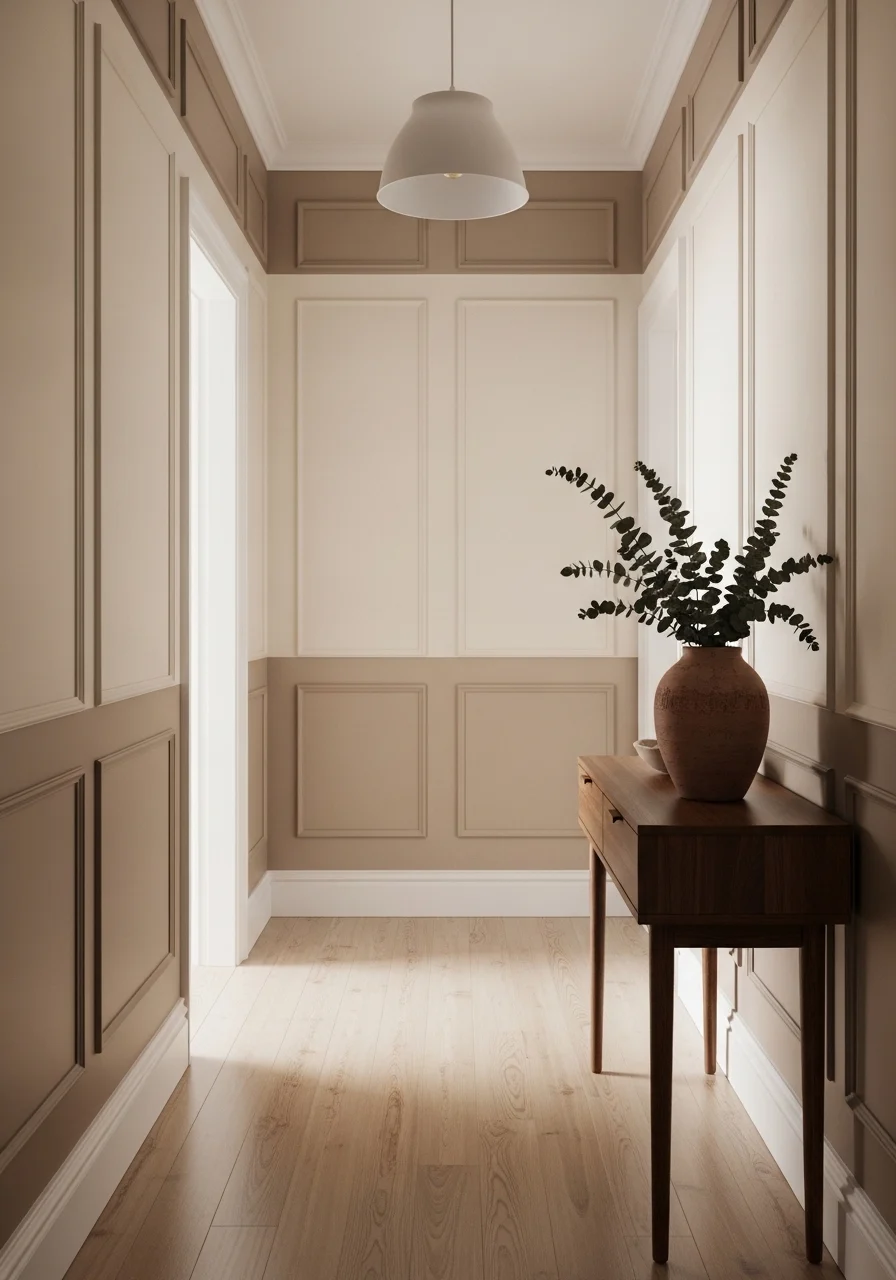
What makes this classic wainscoting idea so appealing is its proven balance of formality and warmth. The lower paneling anchors the hallway visually, while painted upper walls keep the space bright. It uses crisp vertical stiles and recessed panels for a refined look. This suits traditional and transitional homes. If you love timeless detail and a neat, tailored feel, you'll enjoy this. The tactile panel frames add shadow and depth when sunlight hits.
Key Elements — wainscoting, chair rail, recessed panels
- MDF or primed poplar panels for smooth finish
- 1×4 chair rail moulding, profile with subtle ogee
- Stile and rail trim (1×3 or 1×4) for panel frames
- Backerboard or plywood for flat recessed sections
- Premium latex primer and satin topcoat
- Caulk (paintable) for seams
- Finishing nails (18-ga) and wood filler
- Level, tape measure, stud finder, miter saw
- Sanding block (120–220 grit)
- Optional: picture rail hooks or chair rail hooks
How to Achieve This Look
- Measure hallway length and height. Sketch panel layout with equal panel widths.
- Locate and mark studs; install a top and bottom ledger where rail sits.
- Cut chair rail to length and miter corners. Attach with finish nails into studs/ledger.
- Build stile and rail frames from 1×3/1×4 trim; attach vertically for stiles and horizontally for rails.
- Mount recessed backer panels inside frames; glue and nail to secure.
- Fill nail holes, seams, and miters with paintable caulk and wood filler.
- Sand filled areas smooth (120–220 grit). Wipe dust.
- Prime all wood components with a quality primer.
- Paint two coats of satin or semi-gloss topcoat for durability.
- Add picture hooks or rail-mounted sconces after paint cures.
How to Style / Use It
Hang small framed photos or a single long runner to emphasize length. Pair white wainscoting with warm wood floors and brass hardware. Wipe paint with a damp cloth for scuffs. For seasonal changes, swap framed art and runners. Darker paint above the rail gives a cozy, moody vibe in winter.
- Board-and-Batten Hallway — Modern Cottage Charm
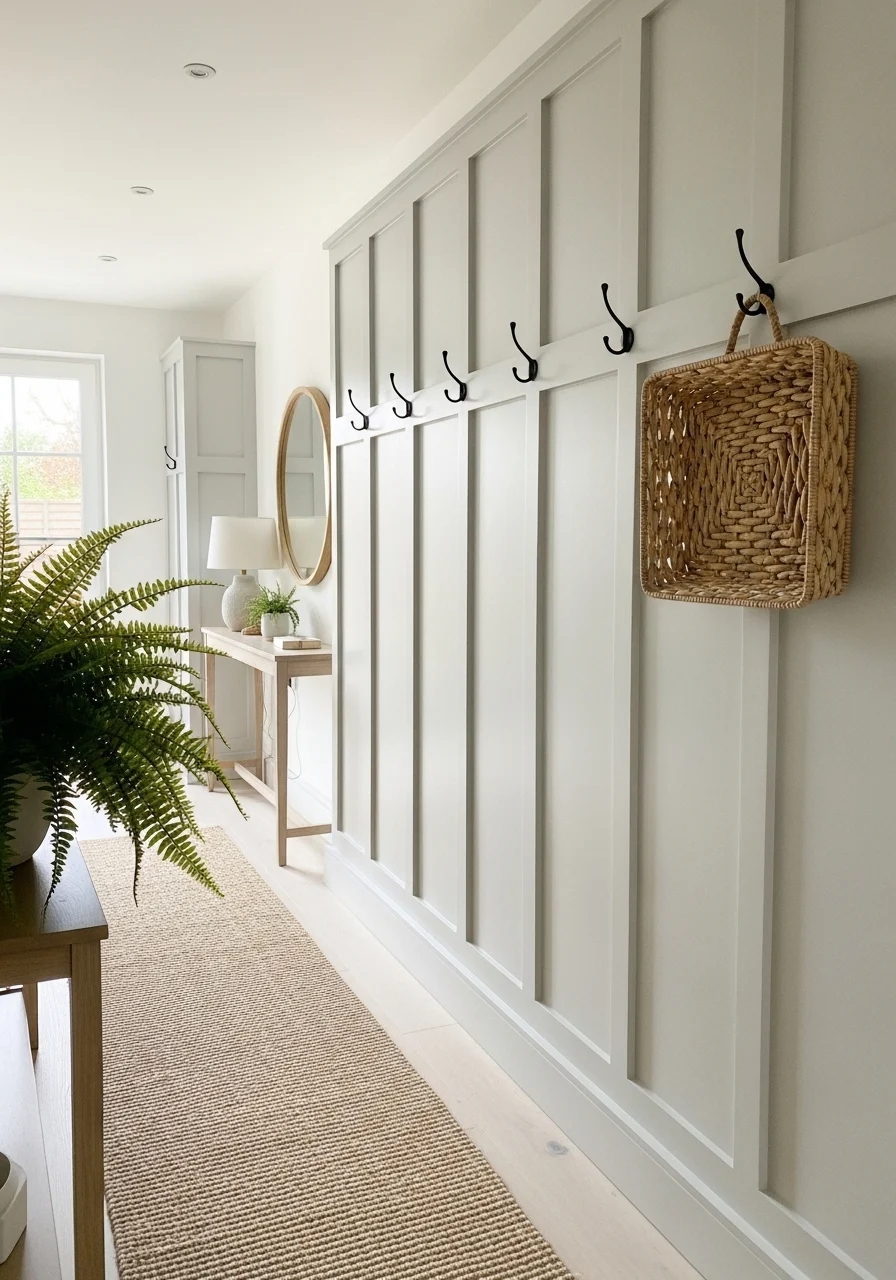
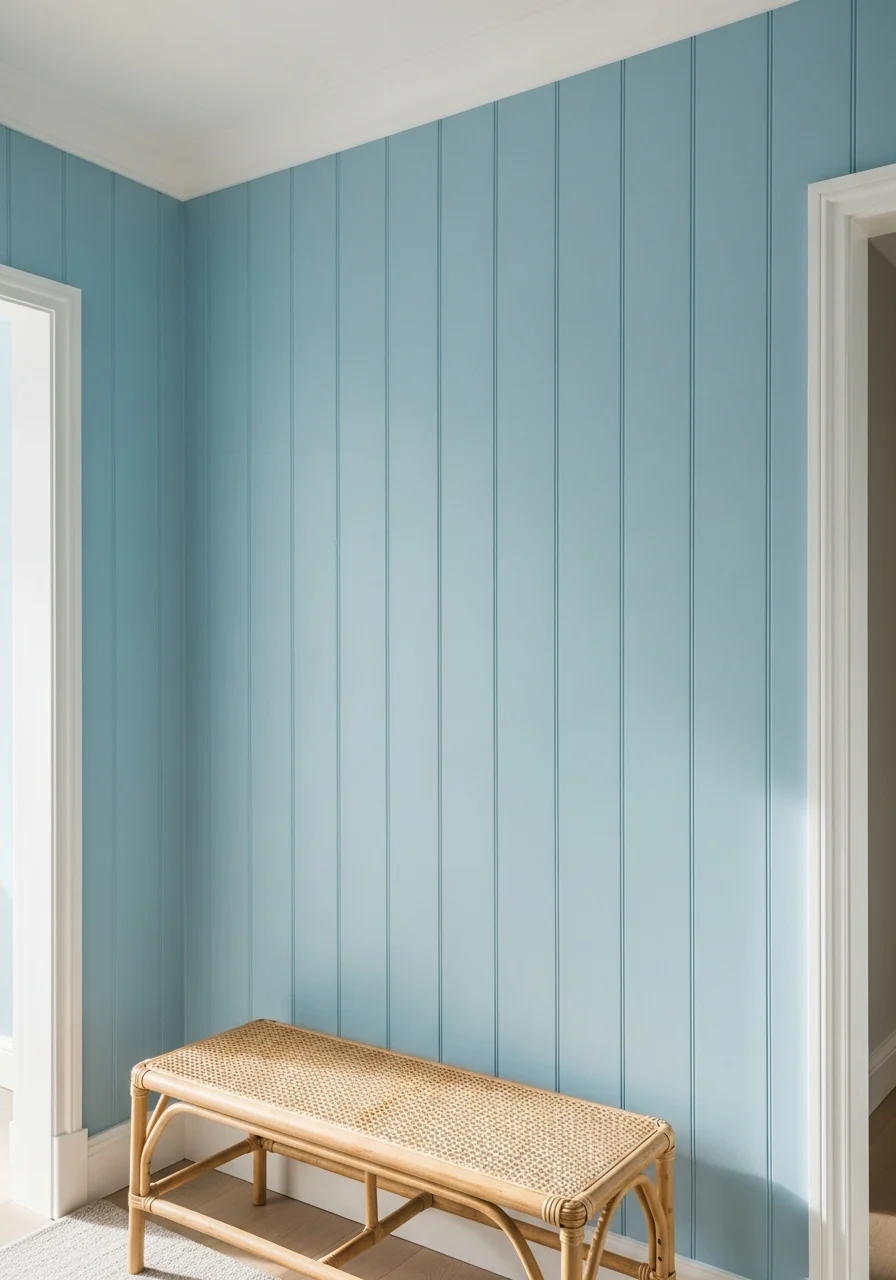
This board-and-batten hallway panelling idea feels fresh and friendly. Vertical battens create rhythm and a sense of height. It's forgiving with uneven walls and suits narrow spaces well. The vertical lines visually stretch the ceiling. If you like modern cottage, farmhouse, or Scandinavian touches, this will click. It feels tactile and homey — like a warm embrace when you pass through.
Key Elements — board-and-batten, battens, vertical emphasis
- 1×6 or 1×8 MDF/pine boards for the base sheathing
- 1×2 or 1×3 battens for vertical strips
- Paint primer and satin/matte finish paint
- Construction adhesive and brad nails (18-ga)
- Caulk for seams and paintable wood filler
- Jute or wool runner to complement texture
- Matte black or brass hooks and small shelf
- Stud finder, level, miter saw, nailer
- Optional: moisture barrier in humid spaces
How to Achieve This Look
- Measure wall height; decide battens' spacing for balanced rhythm.
- Install baseboards and a top cap or rail if desired.
- Attach base sheathing boards horizontally or vertically as a flat substrate.
- Mark and pre-paint battens lightly on back to reduce field touch-up.
- Apply construction adhesive for each batten and nail into studs/backs.
- Keep battens perfectly vertical with a level; space evenly.
- Fill nail holes and seams; caulk where battens meet boards.
- Prime any raw wood and paint two coats over the entire wall.
- Install hooks, a slim shelf, or a mirror after paint dries.
- Position a runner to ground the look and protect the floor.
How to Style / Use It
Lean oversized artwork against battens or hang slim frames between battens. Use matte black hooks for contrast. Keep runner textures natural to match cottage feel. For high-traffic entries, choose semi-gloss paint on battens for easier cleaning. In summer, add bright textiles for a fresh look.
- Shiplap Hallway — Coastal-Inspired Panelling Ideas
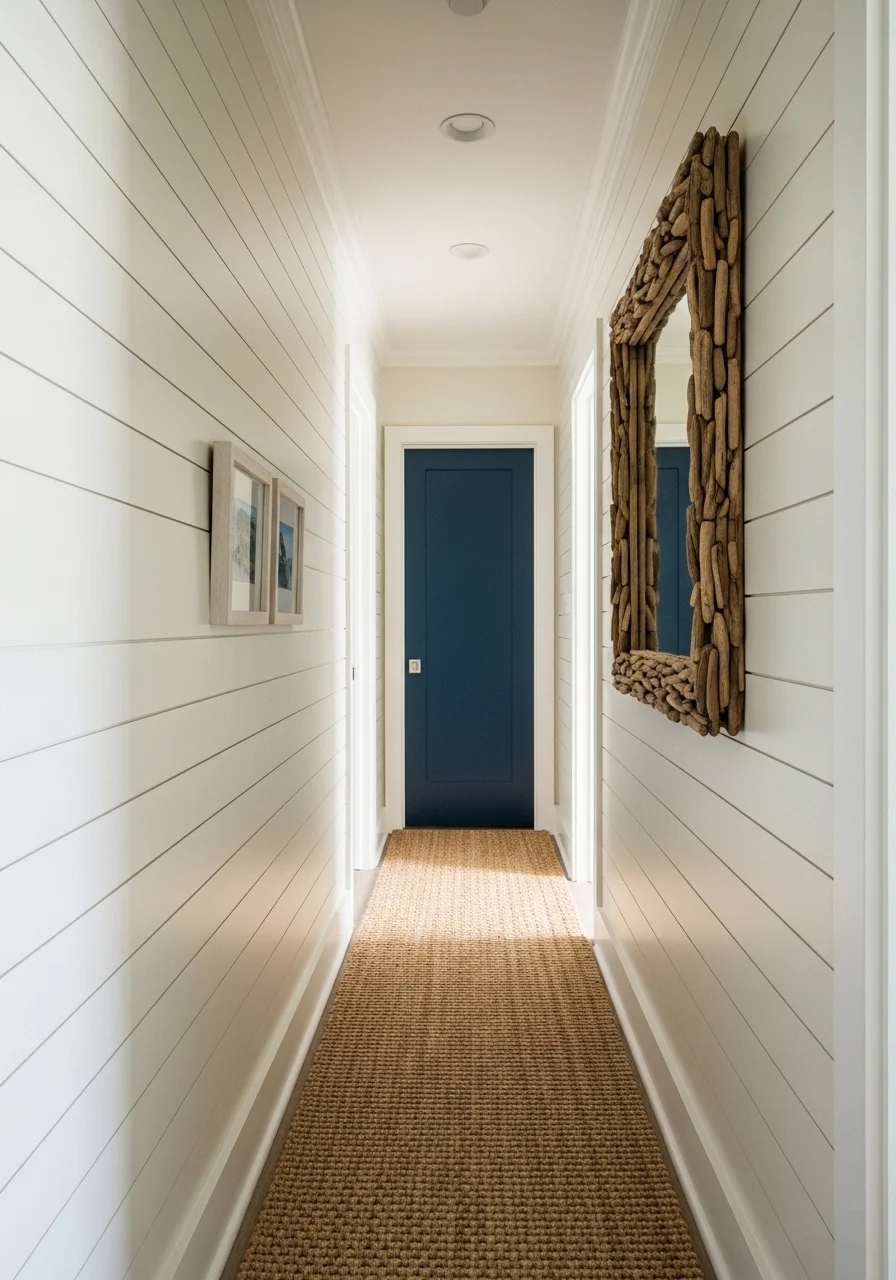
Shiplap creates a soft, horizontal rhythm that reads casual and airy. Painted white or pale shades keep narrow hallways feeling wider. The thin reveal between boards gives shadow lines that look cozy without heavy ornament. This style is great for coastal, cottage, or minimalist interiors. You'll love the relaxed, beachy mood and the subtle tactile lines underfoot.
Key Elements — shiplap, horizontal lines, casual texture
- 1×6 or 1×8 primed shiplap boards or tongue-and-groove MDF
- Nickel gap or V-groove detail for shadow lines
- Construction adhesive and finish nails
- Paint primer and eggshell or satin topcoat
- Runner in natural fiber (seagrass, jute)
- Driftwood or woven mirror and light fixtures
- Stud finder, level, coping saw, nailer
- Caulk and wood filler for seams
How to Achieve This Look
- Measure and choose board width and reveal size for proportion.
- Start at the baseboard and work upward; cut boards to length.
- Apply adhesive to the stud-bearing areas and nail into studs.
- Maintain consistent reveal with spacers between boards.
- Stagger end joints for a cleaner appearance.
- Fill nail holes and caulk where boards meet trim.
- Sand very lightly if necessary; wipe dust.
- Prime raw edges if needed, then paint two coats.
- Install trim at ceiling for a finished look.
- Add coastal decor like woven mirrors and whitewashed accents.
How to Style / Use It
Keep wall color soft to reflect light and widen the hallway. Pair shiplap with navy or deep green doors for contrast. Use runners in natural fibers to complement horizontal grain. For a modern twist, paint shiplap a single bold color and add minimal artwork.
- Beadboard Hallway — Vintage Cottage Panelling Ideas
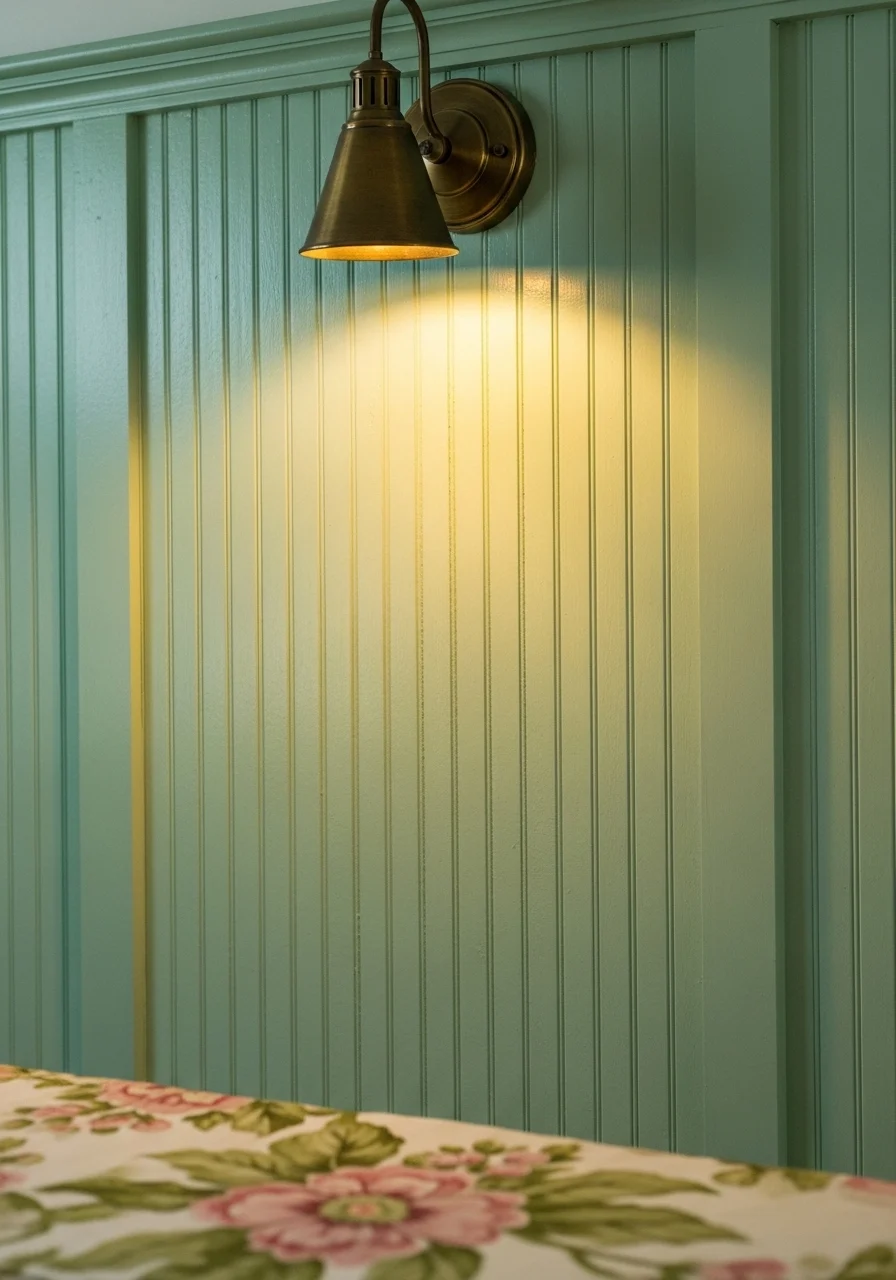
Beadboard has narrow vertical grooves that give a charming vintage feel. It's lighter in scale than wainscoting and fits traditional cottages, period homes, or eclectic spaces. The rhythm of beads creates a neat, age-old texture. You'll enjoy the tactile grooves and the way light plays across the panel ridges. It reads approachable and cozy.
Key Elements — beadboard, narrow grooves, retro charm
- Beadboard sheets (4'x8') or tongue-and-groove beadboard planks
- 1×4 or 1×6 top cap or picture rail
- Primer and high-gloss or satin paint for durability
- Construction adhesive and brad nails
- Caulk and paintable wood filler
- Vintage or brass sconces to complement style
- Slim runner with small-scale pattern
- Stud finder, circular saw, nail gun
How to Achieve This Look
- Measure wall area and cut beadboard panels to fit height.
- If using sheets, score and snap for a clean edge.
- Apply adhesive and affix beadboard to studs. Nail along studs every 12–16".
- Install top cap or picture rail to conceal upper edge.
- Fill nail holes and seams with wood filler and caulk edges.
- Sand small areas and wipe down.
- Prime any exposed MDF edges; paint two coats of glossy or satin paint.
- Replace or add sconces after paint dries.
- Hang small framed prints or a mirror over the upper painted section.
- Add a runner to tie pattern scale to the beadboard.
How to Style / Use It
Pair beadboard with vintage brass or porcelain hardware. Glossy paint makes beadboard easy to wipe clean in busy zones. Use patterned runners to echo vertical rhythm. For an updated look, paint beadboard two-toned—white lower beads and a soft hue above.
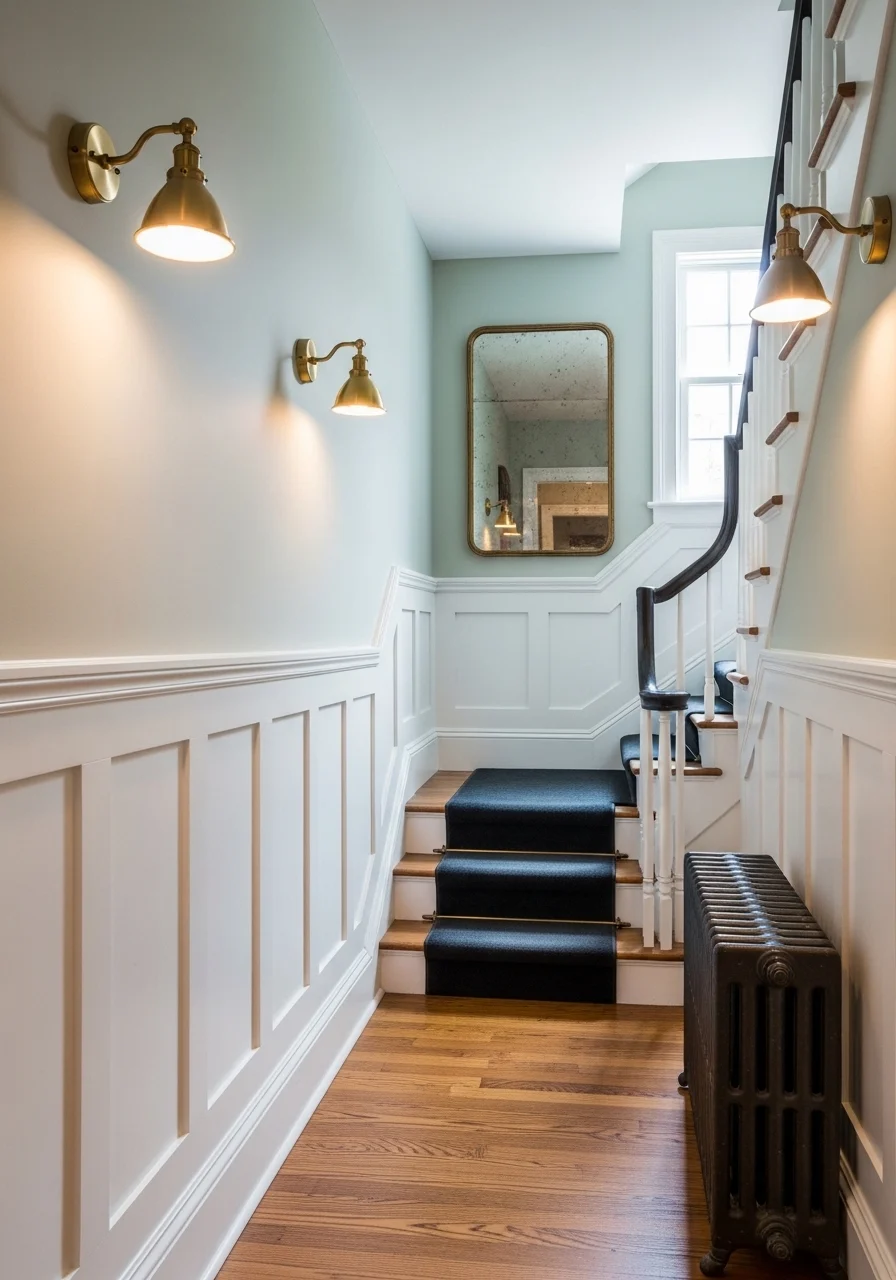
- Half-Painted Panelling — Bold Two-Tone Hallway Idea
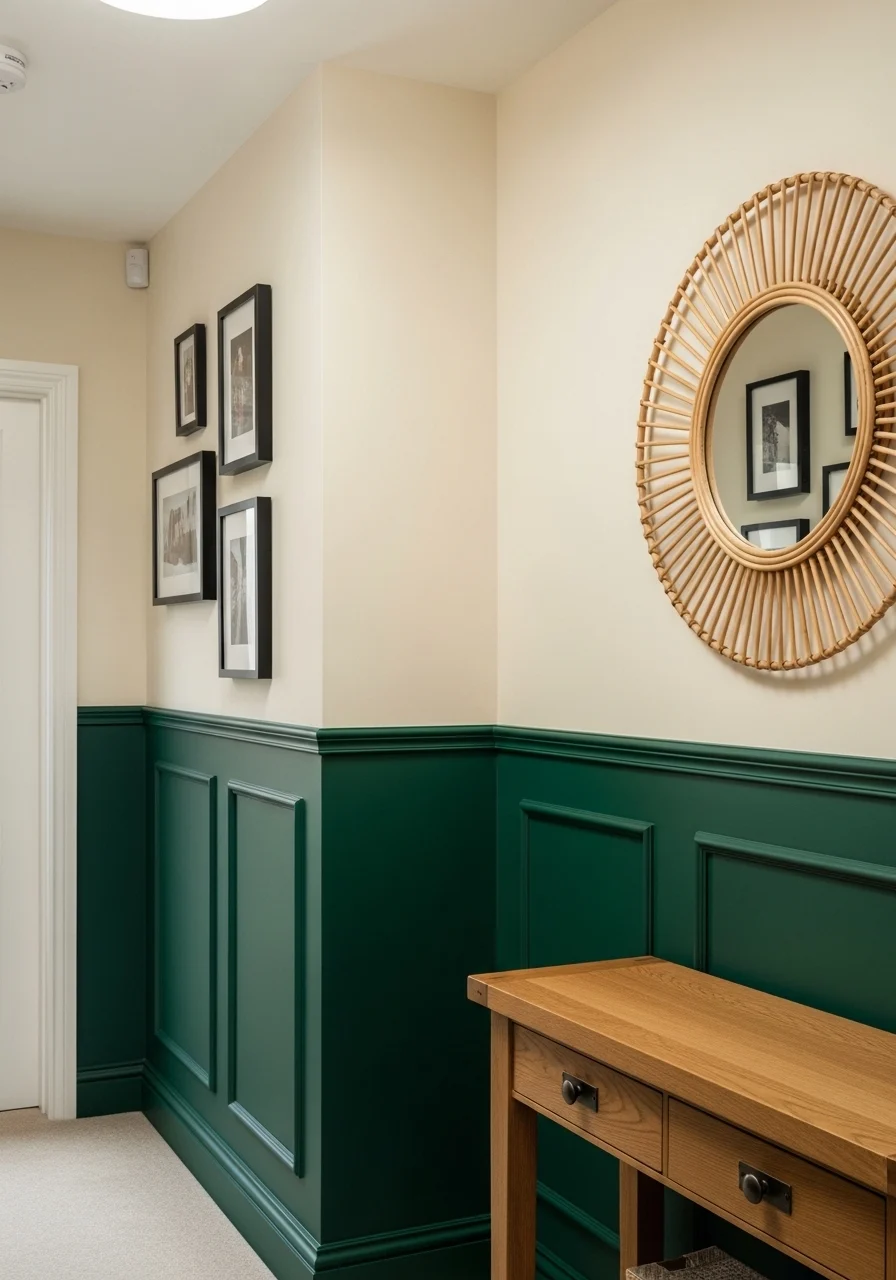
Half-painted panelling is all about bold color contrast and easy visual punch. You get the solidity of panelling with a contemporary two-tone feel. The top color keeps things light while the darker lower paint grounds the space. This suits anyone who wants style without heavy carpentry. It feels confident, cozy and modern.
Key Elements — two-tone paint, crisp dividing line, bold color
- Smooth panelling substrate (MDF, plywood) up to chair-rail height
- Painter's tape for crisp line
- High-quality eggshell or satin paints in two complementary tones
- Primer and stain-blocking primer if needed
- Roller and angled sash brush for clean edges
- Caulk for seams where panels meet trim
- Matte black hooks or brass accents
- Runner with subtle pattern and coordinating tones
How to Achieve This Look
- Decide height of lower painted area (30–42" typical). Mark a continuous level line.
- Install a thin rail or use painter's tape for a crisp edge.
- Prep and prime lower panel surface if bare wood or MDF.
- Paint lower section with two coats of deep color; let dry fully.
- Remove tape carefully once paint is dry for a sharp line.
- Paint upper wall color with two coats, blending at seam if necessary.
- Add trim or moulding over seam for a finished look.
- Touch up any paint edges and caulk gaps for durability.
- Add hooks, a mirror, and artwork that pick up the lower tone.
- Install runner that complements both colors.
How to Style / Use It
Use darker lower paint in high-traffic hallways for hiding scuffs. Pair with brass or black fixtures for modern contrast. Change the upper hue seasonally—lighter in summer, moodier in winter. Clean with gentle soap and water; semi-gloss on lower halves helps durability.
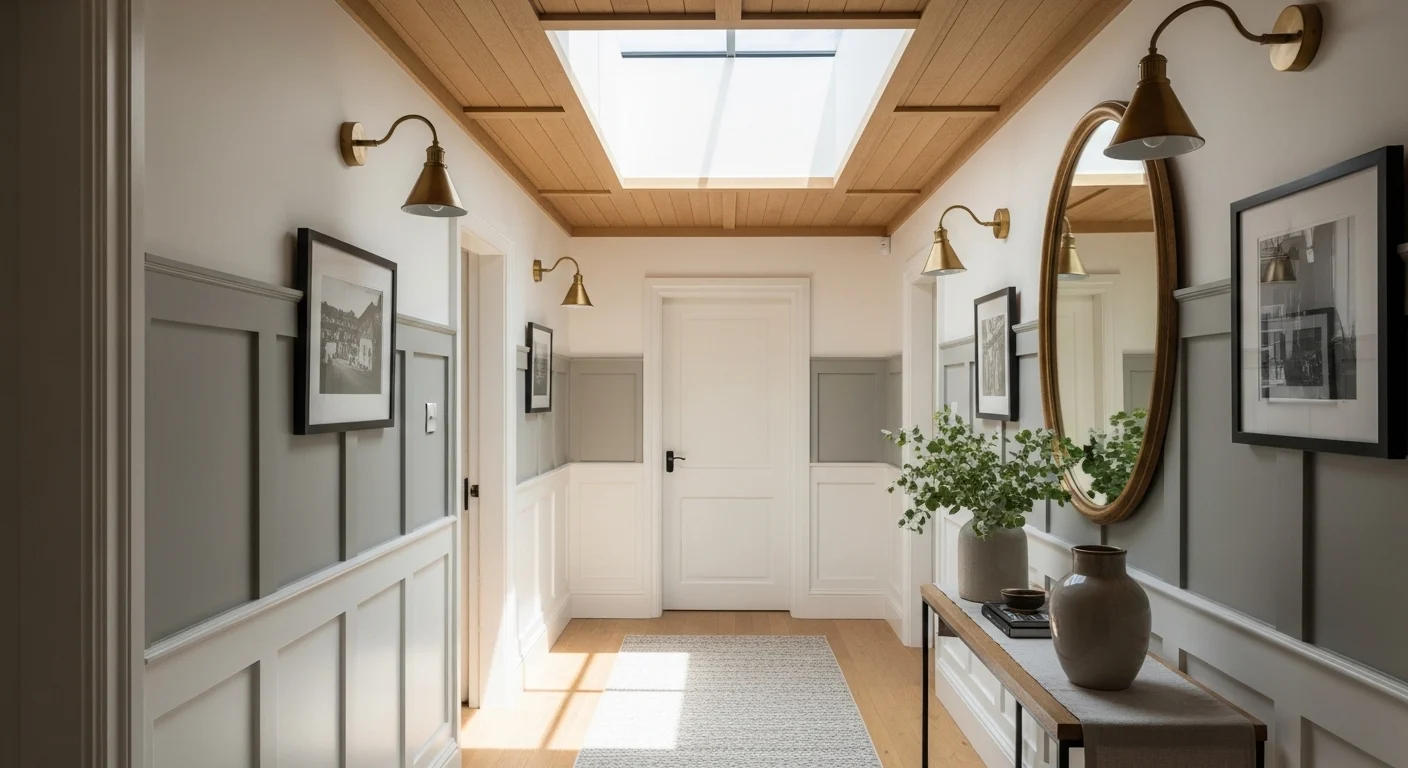
- Picture Rail Panelling — Curated Gallery Hallway Idea
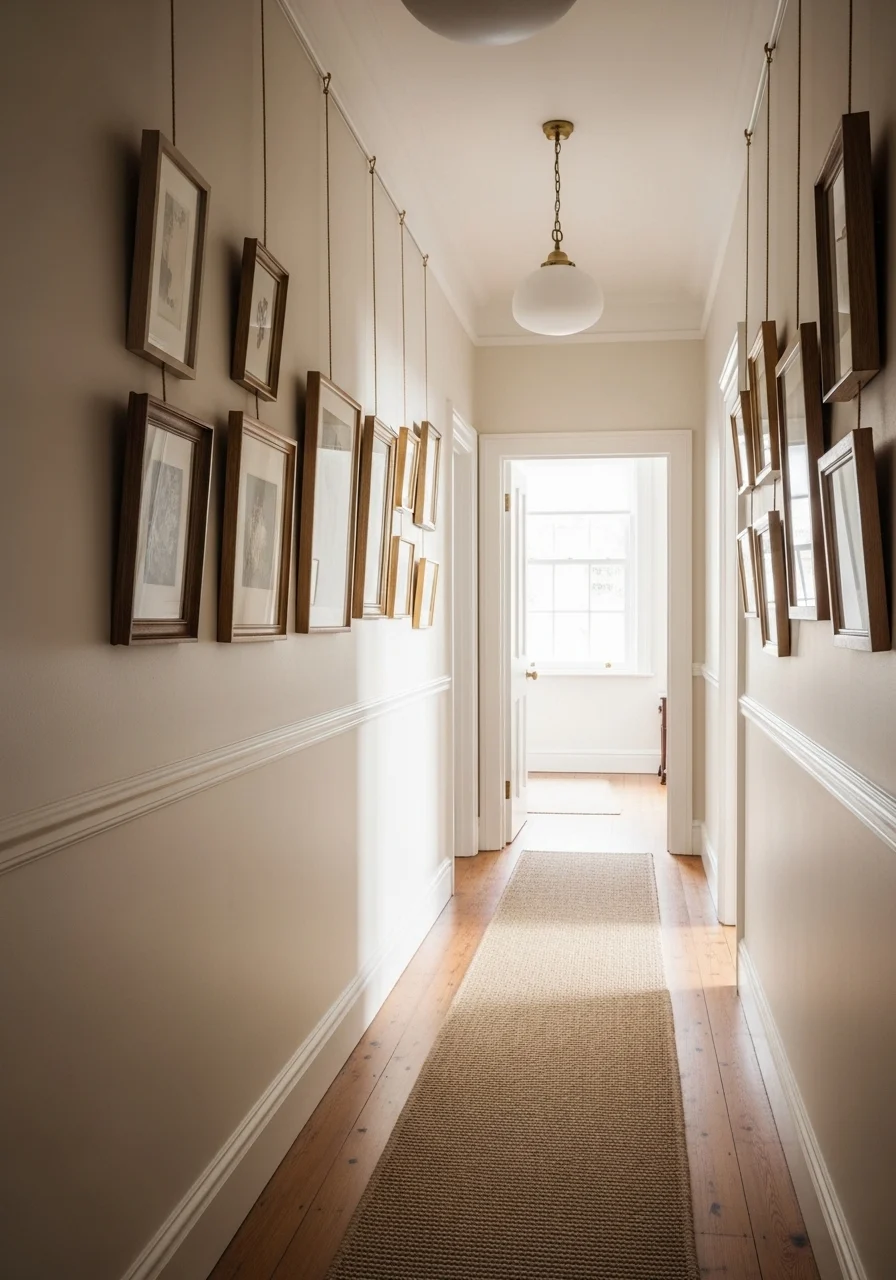
Picture rail panelling gives you a decorative ledge and a clean way to hang art without damaging walls. It nods to classic interiors and helps you curate rotating galleries. The rail acts as a horizontal anchor that complements other panelling or stands alone. If you love art and frequent rearranging, you'll appreciate this practical design.
Key Elements — picture rail, hanging system, curated gallery
- 1×4–1×6 picture rail moulding installed near ceiling or shoulder height
- Brass or nickel picture hooks and braided cords/wire
- Lightweight to medium framed art in mixed sizes
- Wall anchors for heavier pieces if needed
- Paint or stain to match trim or contrast wall color
- Slim console for placing curio objects
- Runner to guide the eye down the gallery
- Level, stud finder, miter saw, finish nails
How to Achieve This Look
- Choose rail height (typically 7–8' from floor). Mark continuous level line.
- Cut picture rail to length, miter corners where needed.
- Secure rail into studs with screws and finish nails.
- Paint or stain rail to match trim before final installation.
- Install hooks designed for picture rails, test weight limits.
- Hang framed art using cords that allow for easy repositioning.
- Group frames in clusters or linear progression to guide movement.
- Add console or spotlighting to highlight focal pieces.
- Replace art seasonally or rotate to refresh hallway mood.
- Inspect hooks and cords periodically for safety.
How to Style / Use It
Create a themed gallery—black-and-white photography, family portraits, or botanical prints. Keep heavier items lower and secured to studs. Use coordinated frames for a cohesive look or mix for eclectic energy. Picture rails make seasonal swaps quick and scuff-free.
- Textured Plaster Panels — Subtle Sculptural Hallway Panelling Ideas
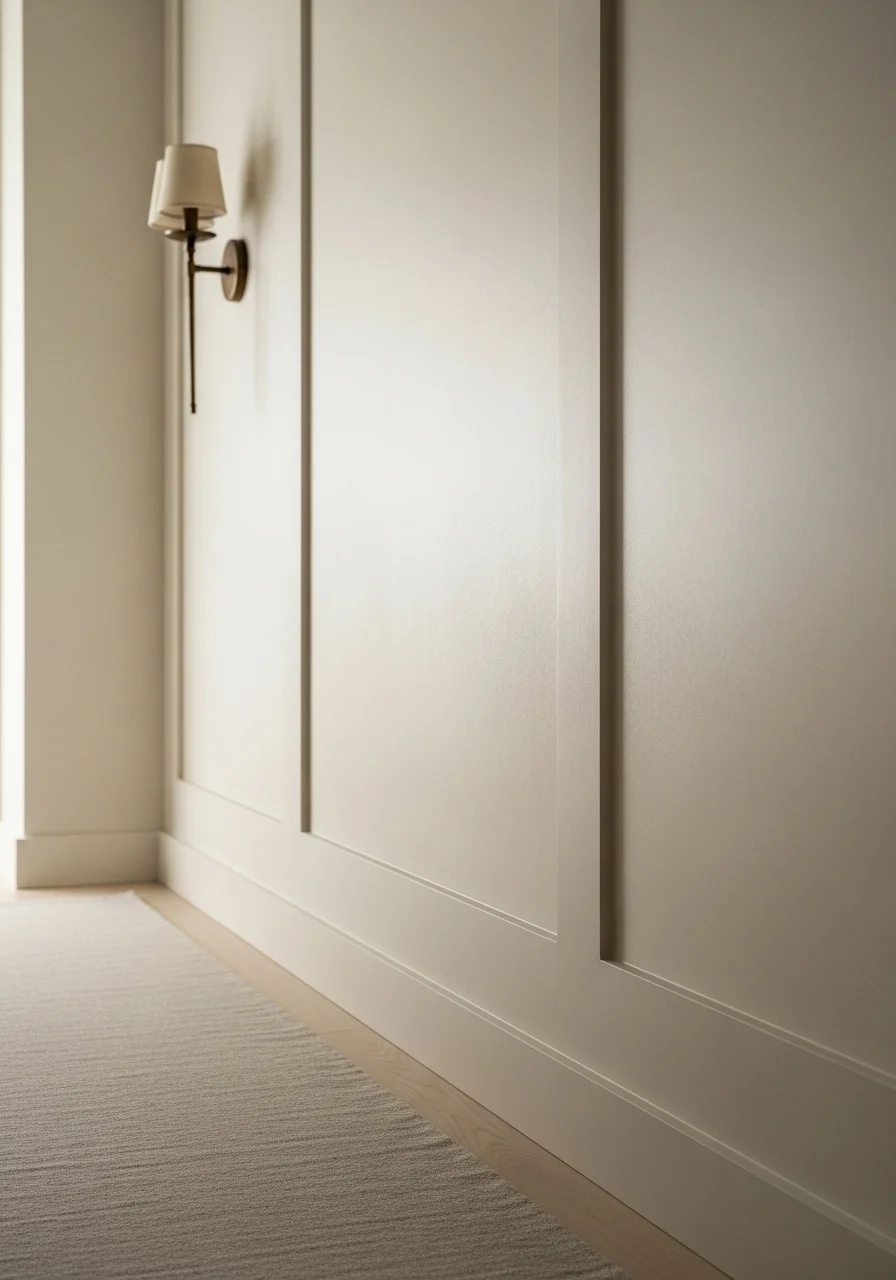
Plaster panels bring subtle sculptural texture without bulky trim. The shallow recessed panels and hand-troweled finish read artisanal and calm. This approach fits contemporary, Mediterranean, or muted modern interiors. It creates soft shadows and tactile interest while staying understated. If you like refined texture over ornament, this is for you.
Key Elements — plaster panels, troweled finish, soft texture
- Cement or gypsum-based skimcoat/plaster
- Backerboard or cement board substrate where needed
- Painter’s tape and straightedge for panel lines
- Sanding sponge and light-grit sandpaper
- Primer-sealer and matte or eggshell paint
- Corner bead for crisp edges if desired
- Small trowel and hawk for application
- Runner in muted tones and soft textiles
How to Achieve This Look
- Prepare wall substrate: clean, repair, and prime as required.
- Use tape and straightedges to outline panel shapes.
- Apply a base skimcoat to level the wall. Let dry.
- Trowel a second thin coat within outlined panels; create subtle texture.
- Smooth edges with corner bead or drywall knife for crisp lines.
- Sand lightly when dry to soften high spots.
- Prime the plaster surface with a sealer primer.
- Apply two coats of matte or eggshell paint for an understated finish.
- Remove any layout tape and touch up edges.
- Add soft lighting to enhance plaster shadows.
How to Style / Use It
Keep accessories minimal to showcase texture. Use warm metallic sconces to create gentle shadow play. Plaster works well with natural wood floors and linen runners. For humidity-prone hallways, choose plaster mixes suitable for damp areas.
- Picture-Frame Moulding — Refined Panel Play
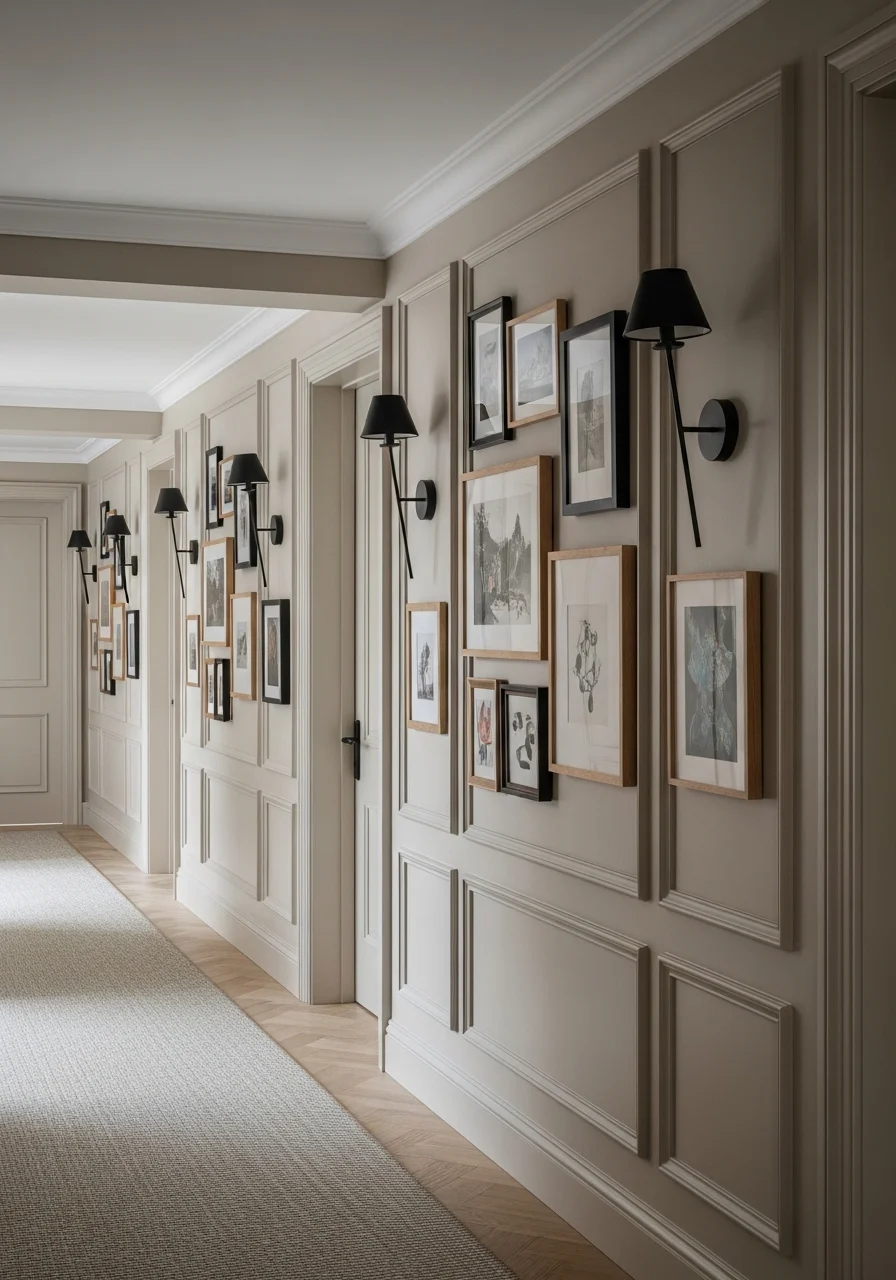
Picture-frame moulding creates framed wall sections that feel intentional and gallery-ready. It’s less deep than wainscoting but adds a polished cadence along the corridor. Panels can be uniform or vary in size for visual interest. It suits transitional and modern traditional homes. You'll appreciate how it defines the wall without heavy carpentry.
Key Elements — picture-frame moulding, uniform panels
- 1×2 or 1×3 primed moulding for frames
- Painter's caulk and wood filler for seams
- Satin or eggshell paint finish for panels
- Adhesive and brad nails for moulding attachment
- Frames or artwork sized to panel proportions
- Slim console or floating shelf where space allows
- Runner and coordinated lighting
- Measuring tape, level, miter saw
How to Achieve This Look
- Plan panel sizes proportionate to hallway height and length.
- Map layout on the wall with pencil and level.
- Cut moulding to size with precise 45° miters for corners.
- Attach moulding with adhesive and brad nails into studs.
- Fill nail holes and seams with wood filler and caulk all edges.
- Sand lightly, prime as needed, and paint two coats within frames.
- Hang artwork or mirrors centered in each frame area.
- Add sconces between panels for rhythm.
- Place runner and a slim console to balance proportions.
- Maintain paint by cleaning gently as needed.
How to Style / Use It
Use consistent frame sizes for a formal look or varied sizes for a curated vibe. Match moulding paint to trim for a seamless effect. Use the framed panels to anchor individual artworks. Wipe painted moulding carefully to prevent chipping.
- Painted Geometric Panelling — Graphic Hallway Panelling Ideas
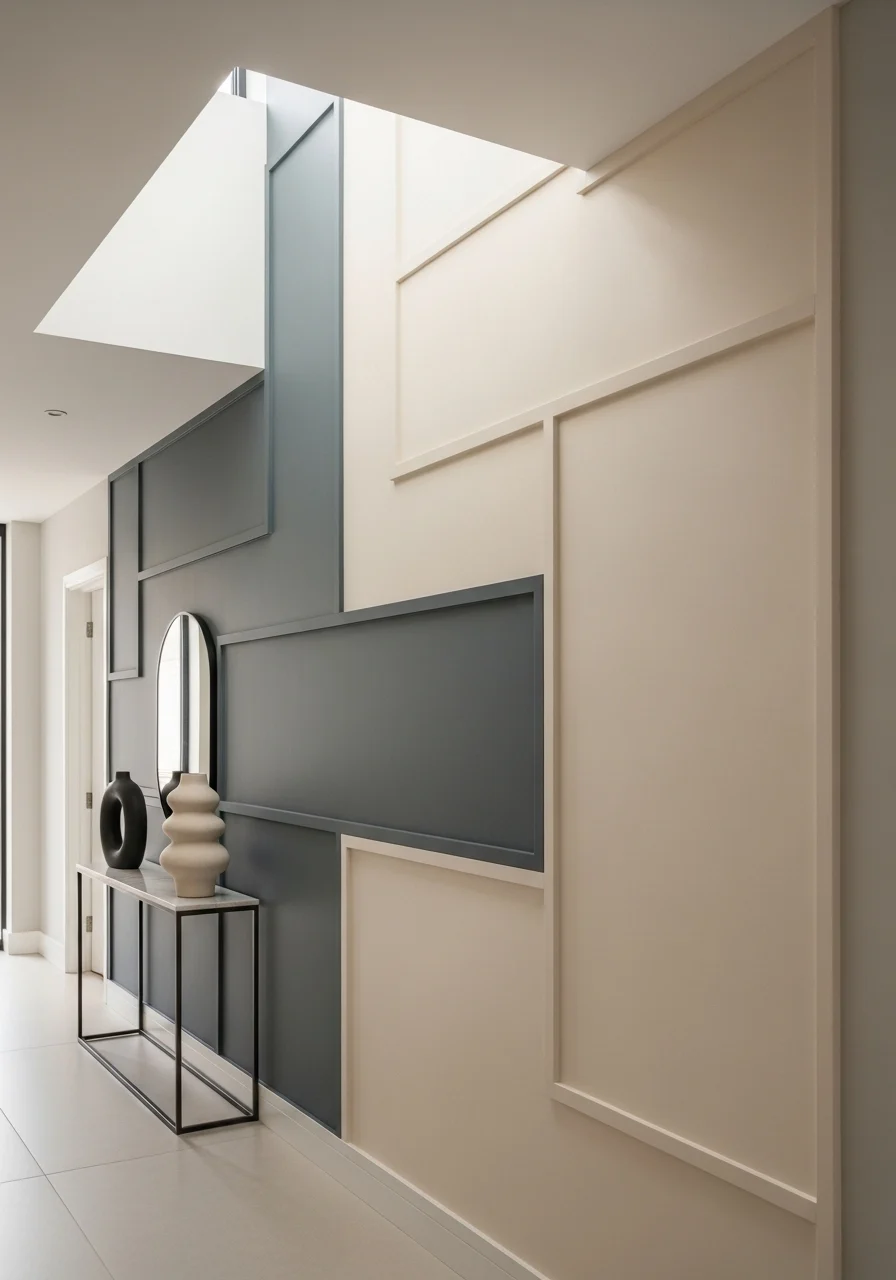
This painted geometric panelling idea uses panels as a backdrop for color-blocked drama. By painting the framed shapes in contrasting hues, you get strong visual interest without deep trim. It fits modern, mid-century, or eclectic interiors. You'll love the playful, artistic vibe and how it can emphasize hallway length or height.
Key Elements — geometric panels, color blocking, modern effect
- Picture-frame moulding or thin battens for panel shapes
- Two to three coordinated paint colors (main, accent, trim)
- Painter's tape for clean paint edges
- Primer and semi-gloss or satin paints for durability
- Level, measuring tools, and miter saw
- Minimalist accessories to keep focus on panels
- Runner that picks up one accent color
- Caulk and wood filler for seamless finish
How to Achieve This Look
- Sketch panel geometry and test paint colors on a board.
- Mark panel layout on the wall using a level and pencil lines.
- Install thin battens or moulding to create panel outlines.
- Caulk seams and fill nail holes. Sand smooth.
- Prime the entire wall if using drastic color changes.
- Tape off areas for color blocks and paint the accent shapes.
- Remove tape carefully and touch up crisp edges.
- Paint trim or moulding a coordinating color for definition.
- Add minimalist art that complements the color palette.
- Place runner to draw the eye and reinforce geometry.
How to Style / Use It
Keep furniture and decor minimal to let geometric panelling shine. Use one accent color for textiles like runner and pillows. For a softer look, use analogous color schemes. If renting, create removable painted panels on thin MDF for a temporary installation.
- Reclaimed Wood Panelling — Rustic Hallway Character
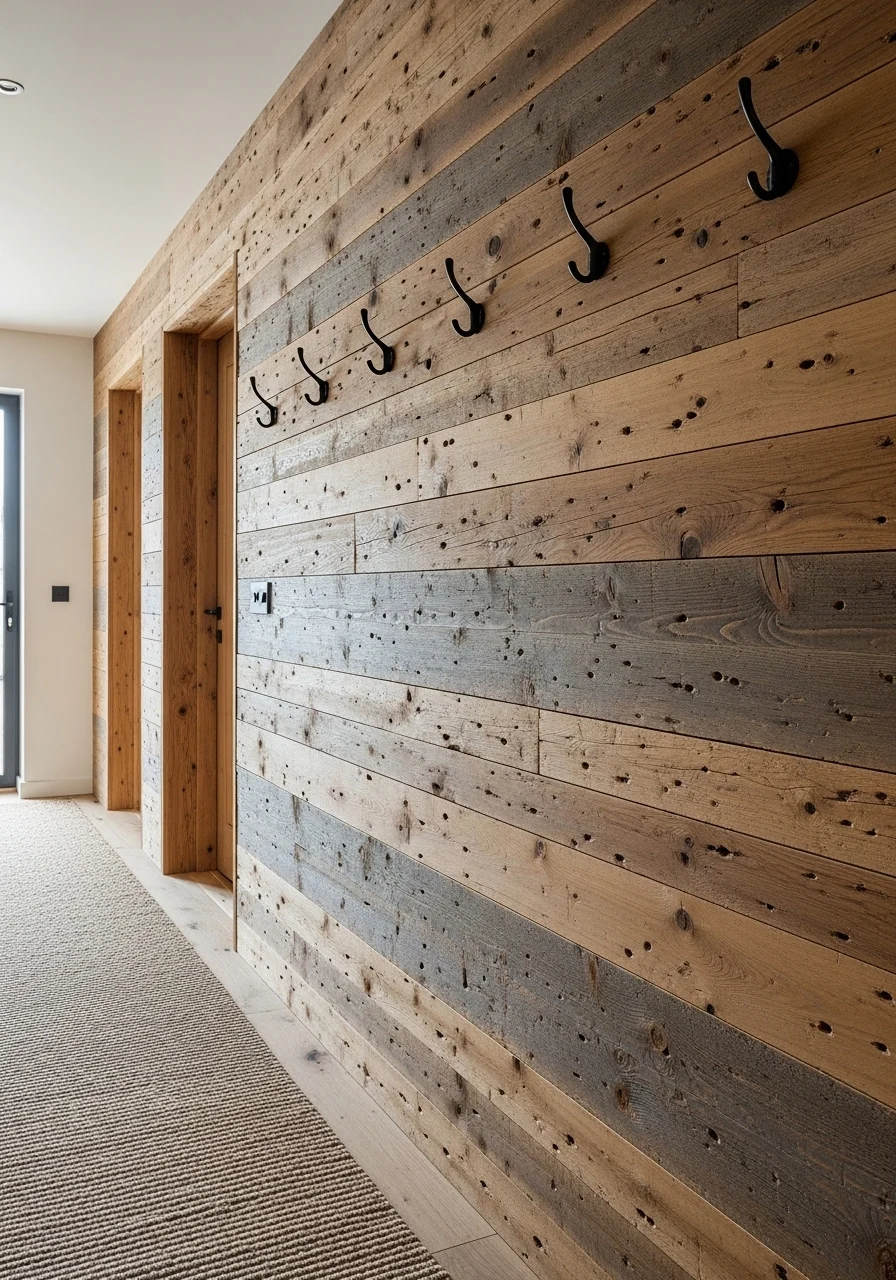
Reclaimed wood panelling brings warmth, history, and texture to a hallway. The varied tones and knots add character you won't get from new lumber. It's perfect for eclectic, farmhouse, or industrial interiors. If you enjoy imperfect patina and tactile surfaces, reclaimed panels will give your hallway personality.
Key Elements — reclaimed planks, mixed tones, rustic texture
- Reclaimed wood planks (oak, pine, barn wood) or engineered reclaimed-look panels
- Sanding tools and wire brush for cleaning
- Finish oil, clear matte lacquer or hardwax oil for protection
- Screws and shiplap adhesive for secure attachment
- Moisture barrier if installing over drywall in damp climates
- Heavy-duty sealer or insect treatment if raw reclaimed wood
- Runner in natural fibers, matte black or brass hardware
- Stud finder, circular saw, drill
How to Achieve This Look
- Source reclaimed wood and inspect for nails, rot, or pests. Clean and sand planks.
- Acclimate wood to indoor humidity for several days.
- Prepare wall and install a moisture barrier if needed.
- Start at a corner and place planks horizontally or vertically per design.
- Use screws into studs for heavier reclaimed boards; apply adhesive where needed.
- Stagger joints for a natural appearance.
- Sand rough edges lightly and treat with finish oil or matte lacquer.
- Trim ends and install baseboard or top cap.
- Add hooks and hardware that match rustic tone.
- Maintain finish with periodic oiling or touch-up.
How to Style / Use It
Pair reclaimed panelling with warm metal fixtures and woven textiles. Use matte finishes to keep an authentic, aged look. For high-traffic areas, choose a hardy finish like lacquer. Mix reclaimed wood with crisp white trim to keep the space balanced.
- Mirrored Panel Panelling — Light-Boosting Hallway Trick
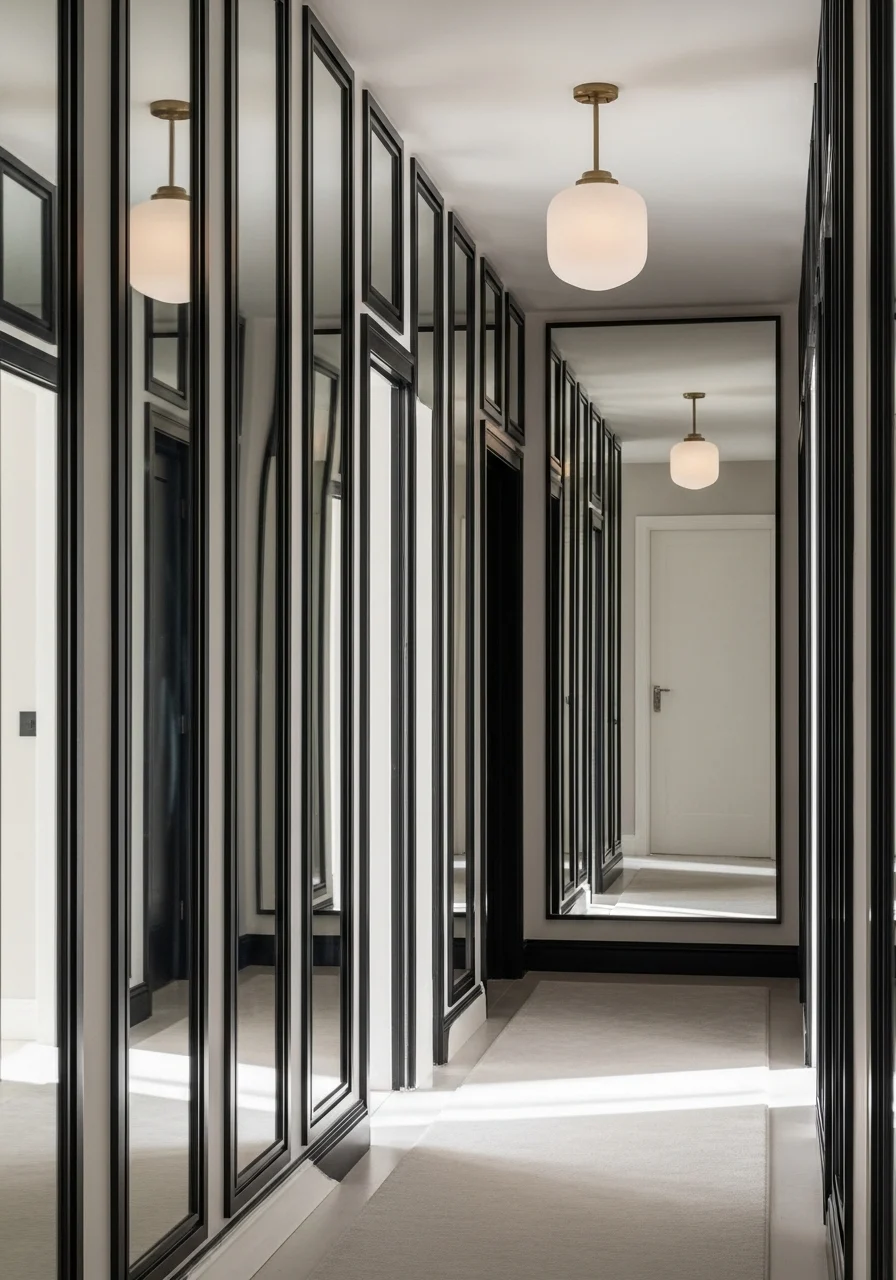
Mirrored panels amplify light and make narrow hallways feel twice as wide. Framed mirror sections create elegant depth without heavy ornament. This idea suits modern, glam, or minimalist homes that need brightness. If your hallway lacks windows, mirrored panelling is a smart visual hack.
Key Elements — mirrored panels, framed reflections
- Safety-backed mirror panels cut to size
- Framed moulding (black or metallic) for visual definition
- Mirror adhesive and mirror clips for secure fixing
- Foam spacers and backing to prevent rattling
- Soft runner to reduce glare and add warmth
- Low-profile lighting to prevent direct glare
- Stud finder, level, caulk for edging
How to Achieve This Look
- Measure and plan mirror panel sizes and spacing on the wall.
- Order cut-to-size mirrors with safety backing.
- Attach foam spacers to backing wall to allow for slight movement.
- Apply mirror adhesive and press mirrors into place; secure with mirror clips.
- Install moulding frames around mirrors, caulk, and paint if needed.
- Check for secure attachment and clean mirror faces.
- Add soft runner and low-glare lighting to balance reflections.
- Use non-abrasive glass cleaner for maintenance.
- Replace with framed art seasonally for variety.
- Ensure mirror edges are sealed to avoid moisture issues.
How to Style / Use It
Use mirrored panels to reflect a focal point at the hallway end, like a doorway or artwork. Pair with matte finishes and soft textiles to avoid a cold look. Avoid placing mirrors opposite bright lamps to reduce glare. Clean regularly to keep reflections crisp.
- Dark Moody Panelling — Dramatic Hallway Makeover

Dark panelling gives hallways dramatic and intimate personality. Rich charcoal, navy, or forest green adds depth and luxury. Panels read elegant and unexpected in narrow spaces, creating a cinematic arrival. If you love bold, moody interiors, this gives your hallway presence. The dark walls make artwork and metals pop.
Key Elements — deep paint, dramatic tone, mood lighting
- High-quality deep-hued paint with satin finish
- Panel moulding or wainscoting substrate in primed MDF
- Warm LED uplighting or wall sconces to soften darkness
- Brass or black hardware for contrast
- Plush runner in complementary jewel or neutral tone
- Artwork with light matting to stand out
- Caulk, primer, and sanding supplies
- Touch-up paint for scuffs
How to Achieve This Look
- Prep walls with primer if transitioning from light to dark color.
- Install panel moulding or wainscoting if desired for structure.
- Prime trim and panels thoroughly.
- Paint two coats of deep-hued paint, allowing full drying.
- Add warm lighting—sconces or uplights—to highlight panel relief.
- Install runner and matching hardware for contrast.
- Hang light-framed artwork or use metallic accents to break the darkness.
- Seal edges and touch up any drips or uneven spots.
- Keep a small touch-up paint pot nearby for scuffs.
- Enjoy the cinematic effect with dimmable lights.
How to Style / Use It
Use dark panelling to make a statement between rooms or in period homes. Pair with brass or gold accents for glamour. For safety, ensure adequate lighting and light-colored floor runners. Dark paint hides imperfections but shows dust—clean regularly.
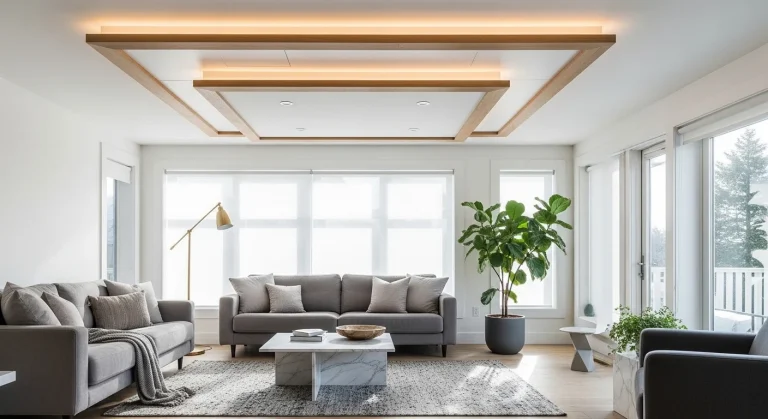
- Slim Vertical Slat Panels — Contemporary Linear Hallway Idea
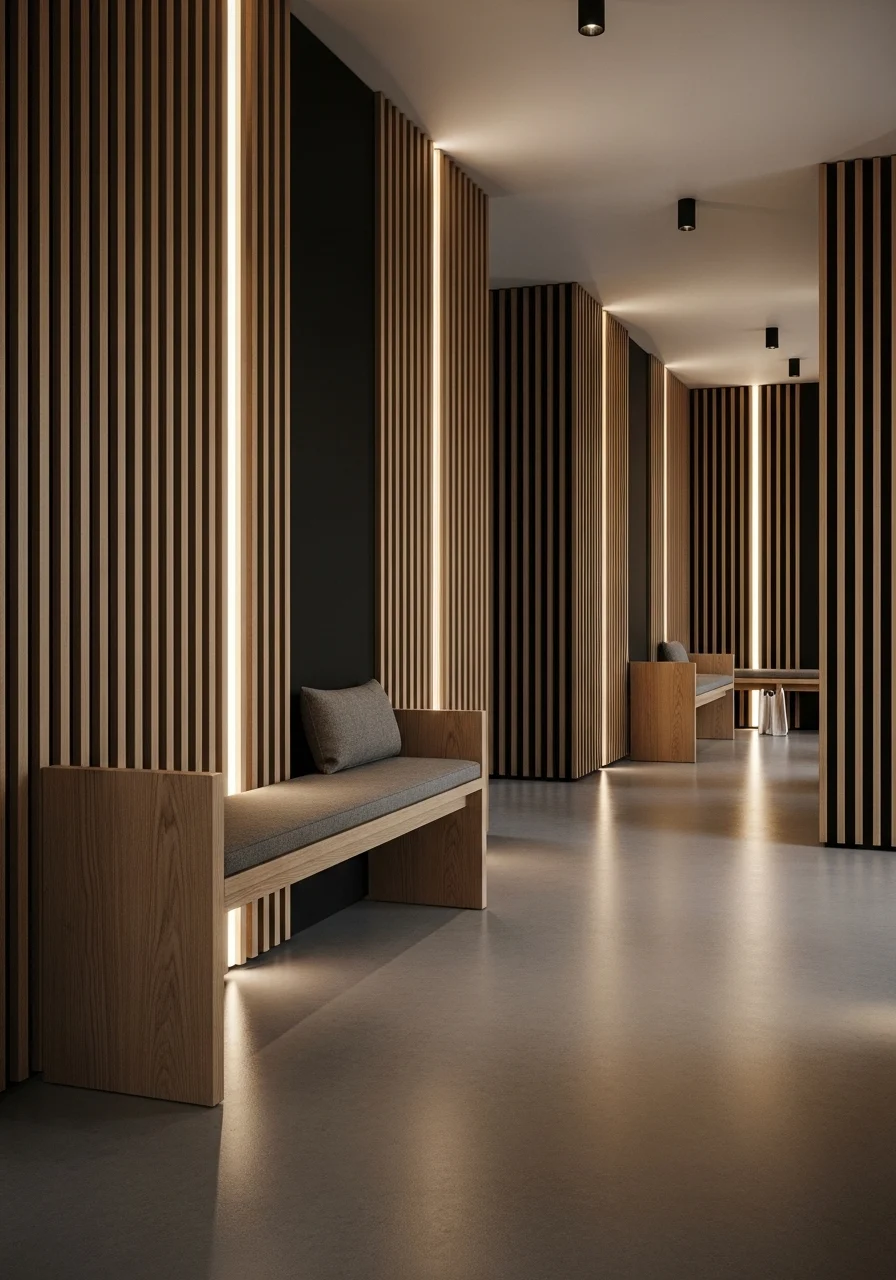
Slim vertical slats create rhythm and a sleek modern texture without heavy moulding. The repetition makes ceilings feel taller while keeping a minimalist profile. This idea works in contemporary, Scandi, or industrial spaces. You'll like the refined linear look and the way light filters through slat gaps.
Key Elements — vertical slats, linear rhythm
- Slim slats (1×1" or 1×2") in oak, walnut, or painted MDF
- Backing panel painted a contrast color (black or deep gray)
- LED strip lighting placed behind slats (optional)
- Construction adhesive and finish nails/screws
- Natural-fiber runner and minimalist bench
- Caulk and fine sanding tools
- Stud finder and miter saw
How to Achieve This Look
- Plan slat spacing and measure wall area.
- Install painted or stained backing panel first.
- Mark vertical lines and pre-cut slats to length.
- Attach slats with adhesive and brad nails into the backing.
- Maintain equal spacing with spacers while nailing.
- Add LED strips behind slats for subtle glow if desired.
- Fill nail holes and sand lightly.
- Seal wood slats with clear satin varnish or oil.
- Install runner and a slim bench for function.
- Test lighting and adjust spacing for desired shadow play.
How to Style / Use It
Keep decor minimal to highlight the linear effect. Use slats as a backdrop for a floating shelf or console. For renters, use removable slat panels constructed on a thin plywood base. Regular dusting keeps slats crisp-looking.
- Metal Channel Panelling — Industrial Chic Hallway Idea
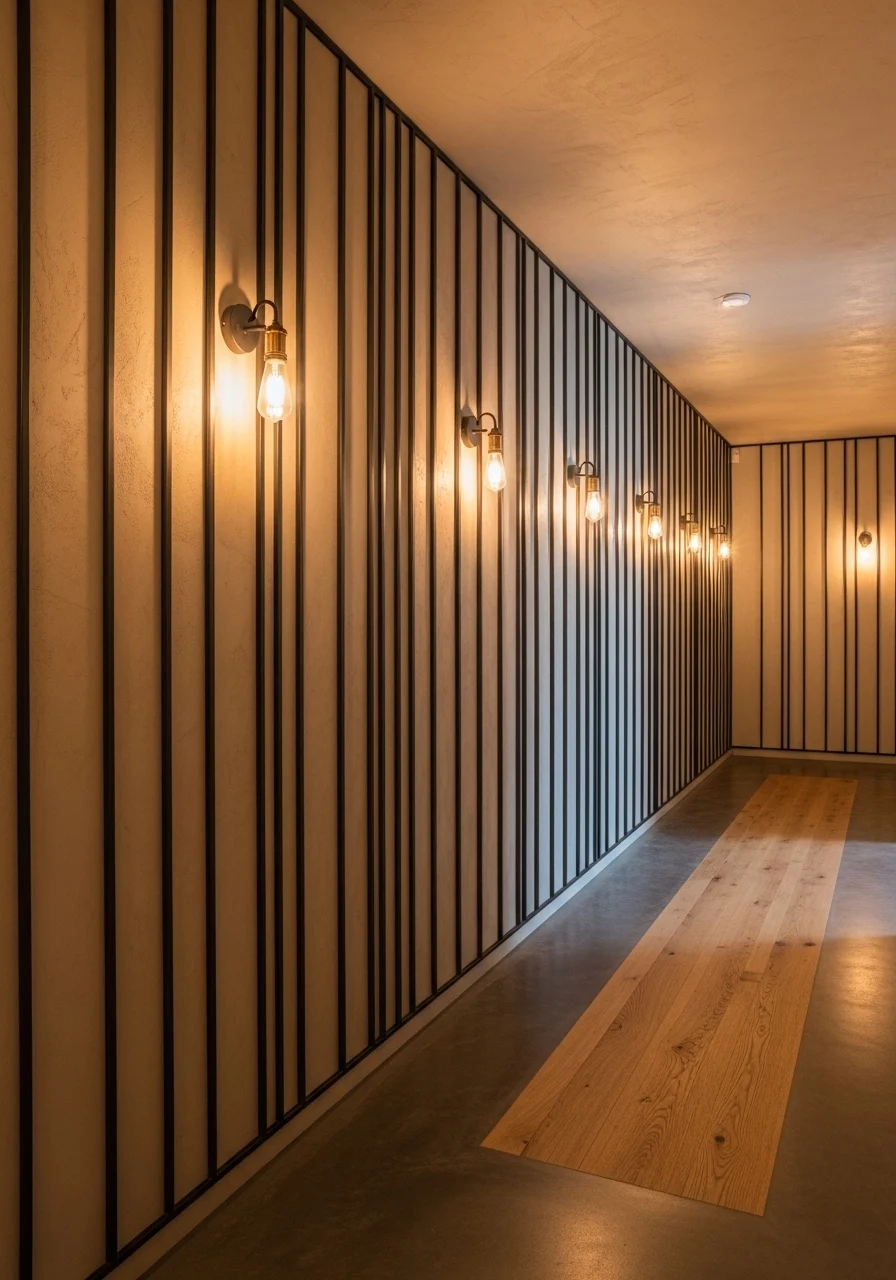
Metal channel panelling mixes metal with drywall for a lean, architectural look. Thin aluminum or steel channels mounted flush create clean lines and a modern industrial edge. It's low-profile and durable. If you want a streamlined, design-forward hallway, metal channel panelling offers graphic detail with minimal bulk.
Key Elements — metal channels, industrial lines
- Aluminum or steel channel strips (painted or raw)
- Drywall or plaster wall substrate prepared smooth
- Construction adhesive and small screws at studs
- Matte paint finish on wall for contrast
- Warm lighting to soften metal's coolness
- Runner in neutral or charcoal tones
- Rubber-back for channels in humid areas
- Stud finder, level, drill, metal snips
How to Achieve This Look
- Decide channel pattern—vertical, horizontal, or grid. Sketch layout.
- Mark stud locations and level lines for channel placement.
- Cut metal channels to length with snips.
- Attach channels to studs with small screws and adhesive.
- Fill screw heads and caulk edges where needed.
- Paint wall around channels if desired; use primer for metal contact points.
- Add lighting to reduce starkness and enhance texture.
- Install runner and minimal furnishings to complement industrial look.
- Inspect channels for secure attachment.
- Clean metal with appropriate cleaner to avoid corrosion.
How to Style / Use It
Contrast cool metal with warm wood and soft textiles to avoid feeling cold. Use matte black or brass channels for different moods. Metal channels are durable—great for busy entry corridors. For renters, attach channels on a removable thin board mounted to the wall.
- Floating Shelf Panelling — Functional Hallway Panelling Ideas
Integrating floating shelves into panelling gives you storage and display without clutter. Shelves break monotony and provide places for keys, plants, and art. This idea blends form and function, ideal for entries that need landing space. If you want panelling that's useful as well as pretty, this will suit your lifestyle.
Key Elements — floating shelves, built-in function
- Floating shelf hardware and 3/4" plywood or solid wood shelf boards
- Picture-frame moulding or recessed panel backing
- Paint or stain to match panelling
- Small storage bowls, trays, and wall hooks for drop zone
- Wall anchors and stud-mounted supports for heavy items
- Runner and console alternative for narrow hallways
- Quick-access lighting like a picture light or LED strip
How to Achieve This Look
- Identify shelf height and spacing for practical use (keys vs decor).
- Reinforce wall studs or use deep-mount shelf brackets for support.
- Build framed panel sections where shelves will sit flush.
- Install floating shelf hardware per manufacturer's instructions.
- Slide and secure shelf onto hardware; test weight-bearing capacity.
- Paint or stain shelves and surrounding moulding.
- Add small trays, bowls, and a decorative mirror nearby.
- Keep one shelf designated for daily items and another for decor.
- Add LED strip under shelf for subtle task lighting.
- Rearrange items seasonally to keep things tidy.
How to Style / Use It
Use floating shelves as a landing for keys and mail near the door. Pair with a narrow runner and a mirror above for a functional entry. Keep heavy items on stud-mounted brackets to avoid sagging. Declutter weekly to preserve the clean look.
- Tongue-and-Groove Panelling — Clean Lined Classic
Tongue-and-groove panelling creates a seamless, joined surface with clean vertical or horizontal grooves. It's versatile and gives a neat, continuous pattern. Works well in traditional, coastal, or modern interiors. You’ll enjoy the consistent rhythm and easier installation compared to ornate trim.
Key Elements — tongue-and-groove, continuous surface
- T&G boards in pine, cedar, or primed MDF
- Hidden fastening or finish nails per tongue edge
- Primer and two coats of paint or wood stain and sealer
- Baseboard and crown moulding to finish edges
- Runner and small bench or umbrella stand for function
- Stud finder, pneumatic nailer, coping saw
How to Achieve This Look
- Choose board orientation—vertical to add height or horizontal to widen space.
- Start at a corner and insert board tongues into grooves.
- Use a nailer to fasten through the tongue into studs for hidden nails.
- Stagger end joints and ensure boards are tight for a seamless look.
- Fill any small gaps with caulk and allow movement in humid climates.
- Prime raw edges if painting; apply two coats of paint or stain and sealer.
- Install baseboard and crown moulding to conceal edges.
- Add runner and furnishings to balance the space.
- Maintain with gentle cleaning; seal wood well if stained.
- Touch up nail holes and seams each season as needed.
How to Style / Use It
Tongue-and-groove is great for renters when installed on removable panels. Paint it crisp white for classic appeal or a soft color for personality. Use vertical boards to make low ceilings feel taller. Keep humidity in check to avoid board movement.
- Painted Stripe Paneling — Playful Hallway Pattern
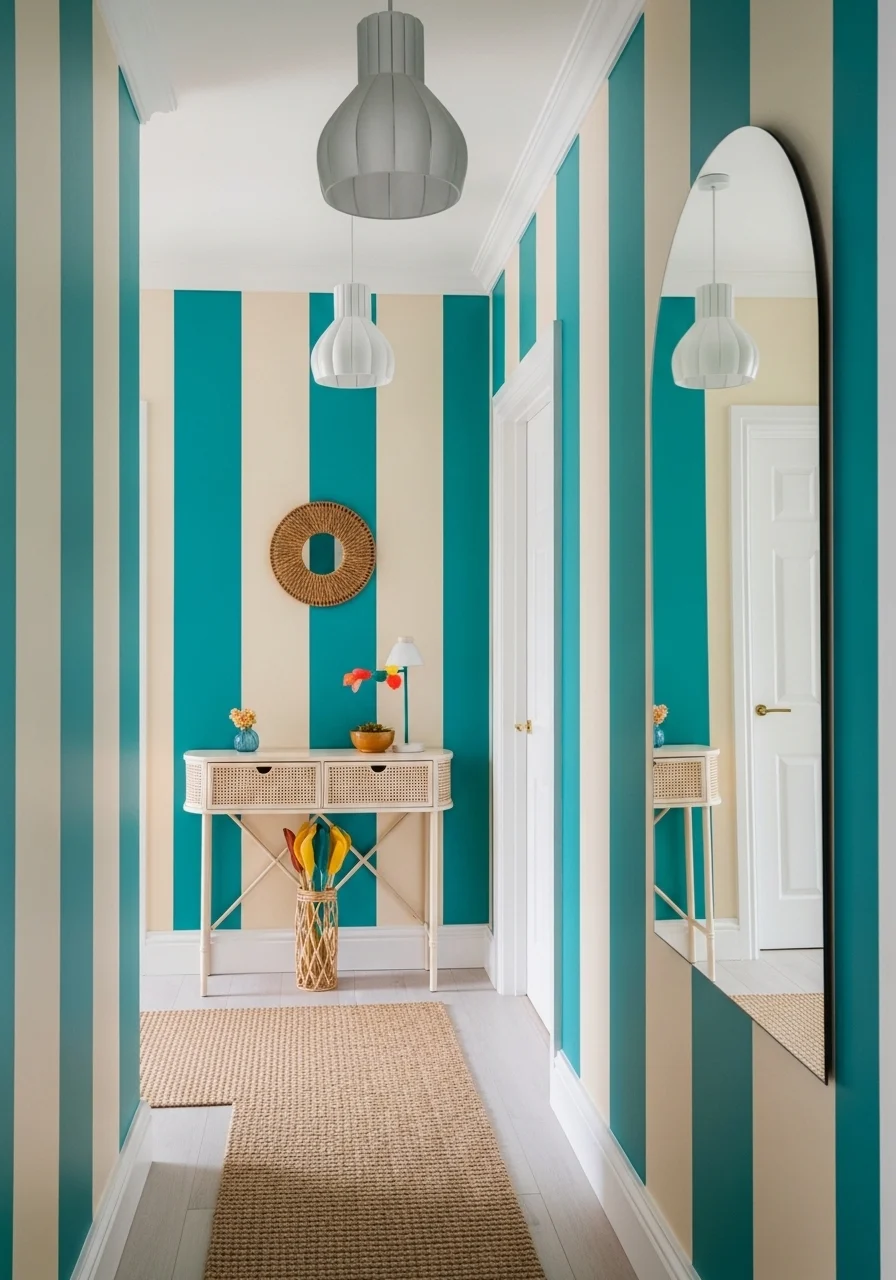
Painted stripe panelling uses moulding or tape to create a striped graphic that’s lively and simple. It’s an affordable way to add pattern without deep woodworking. This option suits playful, modern, or kid-friendly homes. You'll love how stripes energize the space while still feeling orderly.
Key Elements — painted stripes, graphic pattern
- Painter’s tape and primer for crisp lines
- Two contrasting paint colors (bold + neutral)
- Thin moulding strips for raised stripe effect (optional)
- Roller and angled brush for cut-ins
- Runner that echoes stripe color palette
- Measuring tape and level for even spacing
- Caulk for seams if using moulding
How to Achieve This Look
- Decide on stripe widths and orientation; measure and mark with a level.
- If using moulding, install strips first and caulk edges.
- Prime wall if dramatic color change is required.
- Tape off stripes carefully with painter’s tape.
- Paint the lighter color first; remove tape after drying.
- Re-tape to paint darker or accent stripes.
- Apply second coats as needed for full coverage.
- Remove tape slowly and touch up edges with a small brush.
- Install runner and matching decor for continuity.
- Maintain with touch-up paint for chips over time.
How to Style / Use It
Use vertical stripes to make ceilings feel taller. Pair with simple accessories to avoid competing patterns. For a softer look, choose pastel stripes; for energy, use saturated tones. Painted stripes are easy to repaint when you want a change.
- Upholstered Panel Panelling — Soft Fabric Hallway Idea
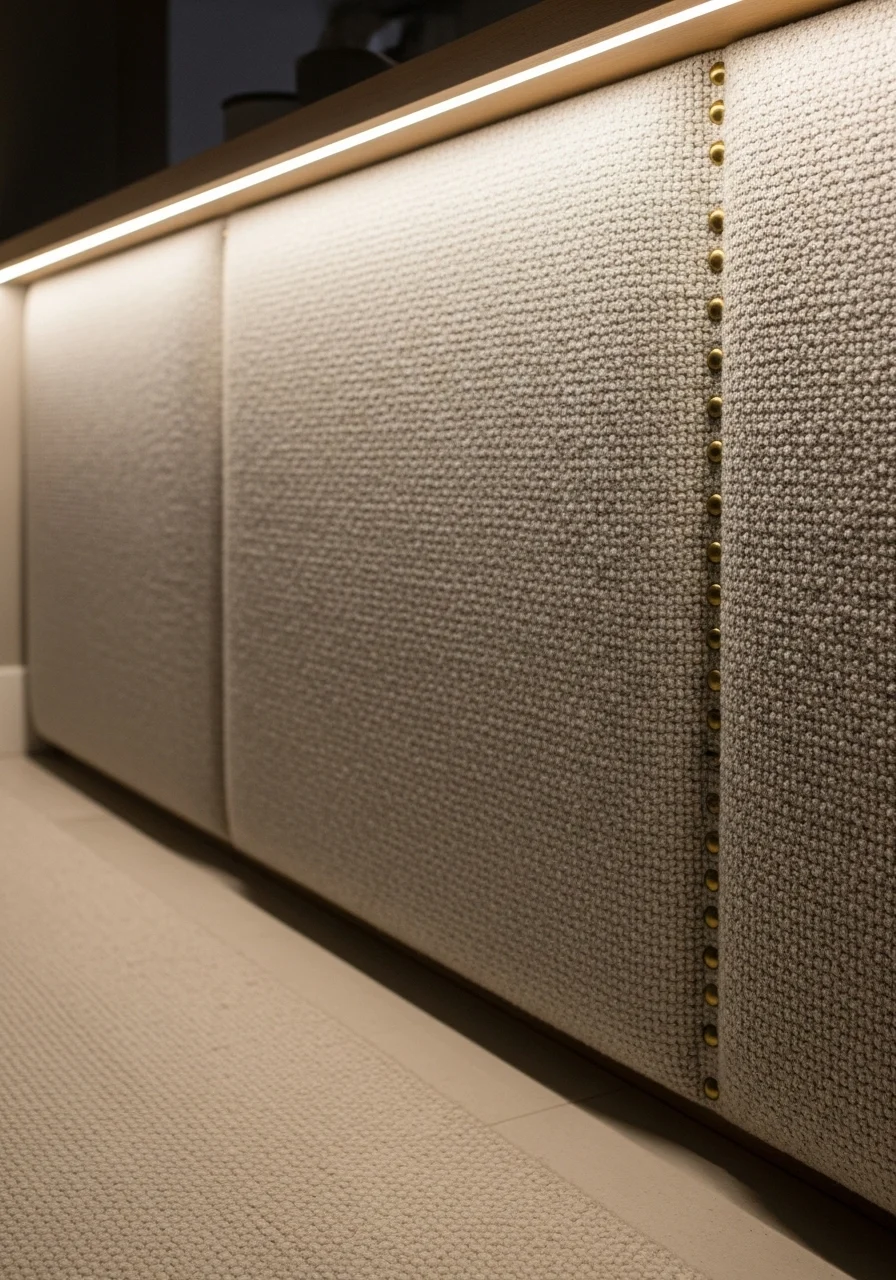
Upholstered panelling adds softness, sound absorption, and a luxurious hotel-like feel. Fabric-covered panels mounted to the wall create a plush backdrop. This is ideal for long corridors where echo reduction matters. If you crave warmth and tactile comfort under foot and ear, upholstered panels deliver.
Key Elements — upholstered panels, fabric texture
- Padded MDF panels or foam-backed plywood
- High-density foam (1–2") and batting for wrap
- Fabric: boucle, linen, velvet, or durable upholstery textile
- Staple gun, adhesive, and decorative nails or brass stud trim
- Picture hooks and small shelf brackets for attachments
- Runner and soft lighting to enhance texture
- Stud finder, jigsaw for panel cuts
How to Achieve This Look
- Cut MDF panels to size and round edges if desired.
- Attach high-density foam to panels with spray adhesive.
- Wrap batting and then fabric over foam, stapling at back.
- Mount panels to wall with cleats or screws into studs.
- Add decorative nails or brass trim around edges if desired.
- Space panels evenly and ensure level alignment.
- Vacuum fabric occasionally and spot-clean per fabric care.
- Install runner for comfort and noise reduction.
- Use subtle lighting to highlight fabric texture.
- Replace or reupholster panels if fabric wears over time.
How to Style / Use It
Choose durable fabrics for high-traffic areas and consider stain-resistant treatments. Upholstered panels are great in long hallways that need sound control. Pair with soft lighting and minimal hardware for a luxe look. Rotate fabric choices to refresh the hallway mood.
- Painted Molding Grids — Customized Hallway Panelling Ideas
Painted molding grids let you design custom panel patterns without deep recesses. The grid becomes a canvas for two-tone paint, wallpaper inserts, or framed art. It's flexible and works with many styles. If you like to personalize details and enjoy pattern play, this approach offers tailored charm.
Key Elements — molding grid, customizable panels
- 1×2 or 1×3 primed moulding for grid framework
- Paint or wallpaper for panel inserts
- Adhesive, brad nails, and caulk for neat assembly
- Two coordinating paint colors for grid and background
- Runner and small console to anchor the layout
- Level, measuring tape, and miter saw
- Optional: wallpaper samples for each cell
How to Achieve This Look
- Sketch your grid layout and measure panel sizes relative to wall.
- Cut moulding to exact lengths and create mitered or square corners.
- Attach moulding to wall with adhesive and brads, working one row at a time.
- Caulk seams and fill nail holes; sand lightly.
- Paint moulding and background or insert wallpaper into cells.
- Use painter’s tape for crisp paint edges inside grid cells.
- Seal wallpapered cells with clear acrylic if desired.
- Add small decorative elements like a mirror in one cell for surprise.
- Install runner and lighting to complement pattern.
- Maintain with gentle dusting and occasional touch-up.
How to Style / Use It
Use wallpaper inserts for seasonal swaps or themed cells. For a minimal look, keep a neutral palette and let texture do the work. Molding grids are perfect for small hallways—use a single row of panels to avoid overwhelming the space. Swap paint colors to refresh the look quickly.
You now have 19 tested and varied hallway panelling ideas to match different tastes and budgets. Whether you prefer classic wainscoting, sleek slats, or upholstered warmth, there's a practical plan and style tip here you can use. Pin the looks you love, try one small project first, and invite a friend or family member to help with measuring and sanding — it's more fun together. Which hallway panelling ideas will you try first, and who do you want to show the result? Share this list with someone who’s redoing their entryway and start planning a weekend makeover.