23 Hallway Wall Decor Ideas You’ll Want to Copy
You walk into your home and the hallway feels like a blank page. What if that in-between space became a stylish preview of the rest of your house? These 23 hallway wall decor ideas give you fresh, practical ways to dress narrow walls without crowding the flow.
You’ll find ideas for every style—modern, cozy, farmhouse, and minimalist. Each idea includes a clear visual, a materials list, step-by-step setup, and styling tips. Whether you want a gallery wall, clever storage, or a light-reflecting mirror cluster, there’s a plan you can copy this weekend.
Use these hallway wall decor ideas to brighten a dark corridor, add personality, or create a practical drop zone. Pin the ones you love, try a few, and enjoy how a small change reshapes how your home feels.
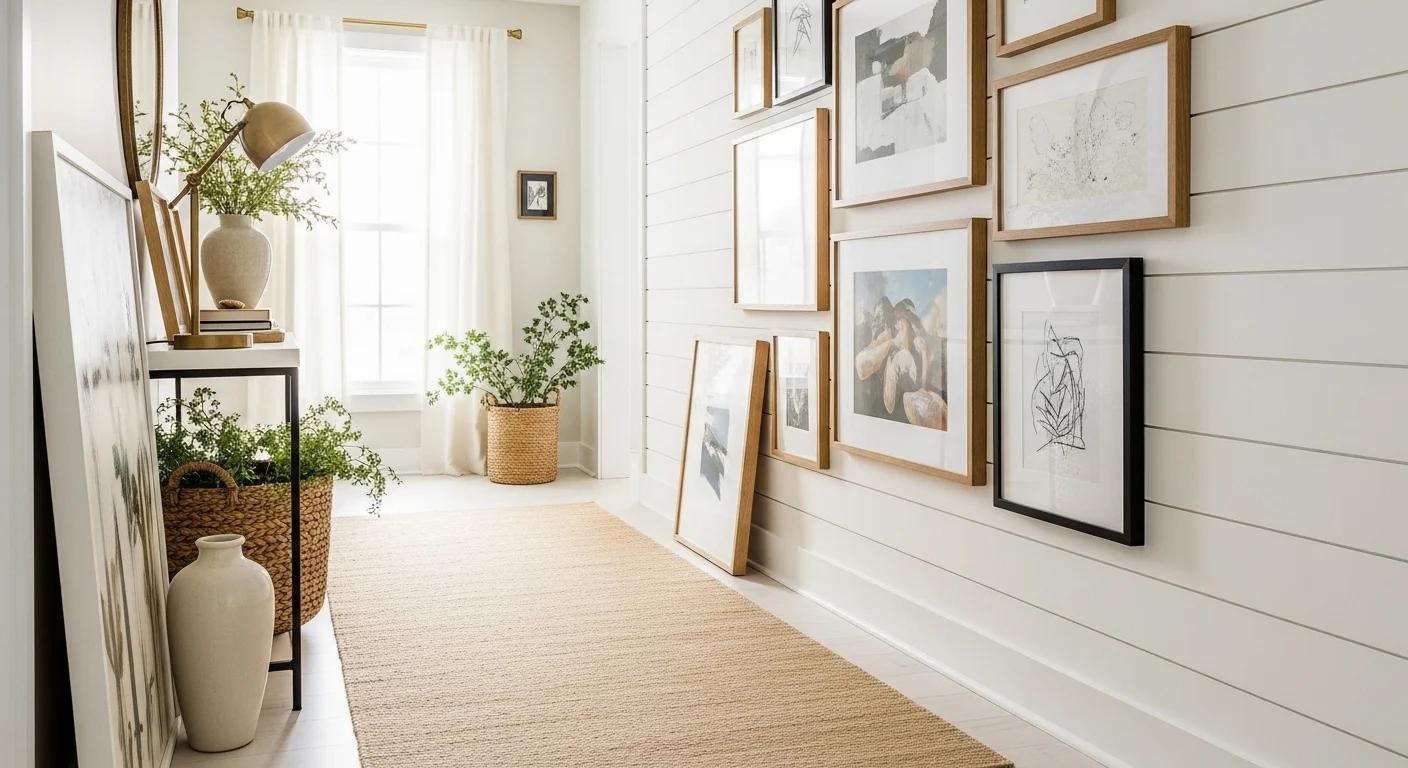
- Classic Gallery Wall — One of the Best Hallway Wall Decor Ideas

This classic gallery wall works because it tells a story. Mixed frames and consistent matting create cohesion. You can mix family photos, art prints, and small mirrors. It fits long, narrow hallways and echoes the home’s personality. People who love collected, layered looks will adore this. The result feels warm, curated, and lived-in.
Key Elements
- Assorted frames (black, natural wood, white)
- White mats for consistency
- 8–12 pieces in varied sizes
- Leveling hardware (D-rings, picture wire)
- Neutral wall paint (soft white or warm beige)
- Slim console or picture rail (optional)
- Soft runner in complementary tone
- Tape measure and paper templates
- Picture hanging kit and level
- Optional small accent mirror
How to Achieve This Look (gallery wall tips)
- Lay frames on the floor first to test arrangement.
- Use kraft paper templates to map on the wall.
- Start with a central anchor frame at eye level.
- Space frames 2–3 inches apart for cohesion.
- Hang heavier frames on wall studs when possible.
- Step back and tweak spacing as you go.
- Add small mirrors or art to break repetition.
- Insert a slim console beneath with a lamp.
- Replace pieces seasonally for freshness.
How to Style / Use It
Hang frames at eye level for best flow. Pair with a slim console and a single vase. Rotate art to keep the display interesting. Dust frames monthly and tighten hanging hardware yearly. Try black-and-white photos for a timeless feel, or colorful prints for a lively corridor.
- Oversized Statement Mirror
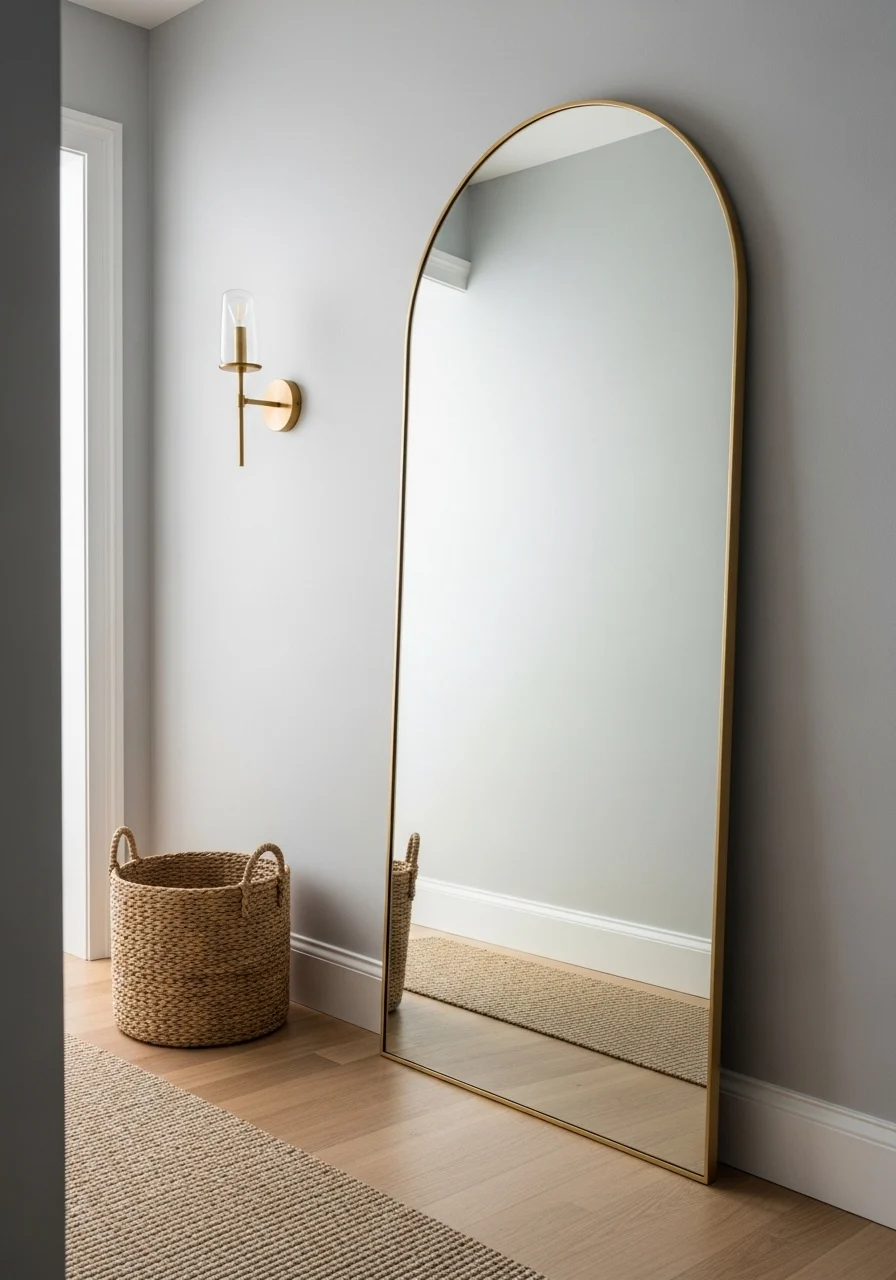
A single oversized mirror makes a big visual impact. It doubles light and visually widens the hallway. The arched or round shape adds softness to straight corridors. You’ll love this if you want drama without clutter. The mirror brings a calm, airy feel and works with many decor styles.
Key Elements
- One large mirror (floor leaning or hung)
- Frame style (brass, black metal, natural wood)
- Secure wall anchors if hung
- Soft runner to complement the frame
- Small wall sconce or pendant nearby
- Neutral wall paint for reflection
- Non-slip protector pads for leaning mirrors
- Optional narrow console or shelf
- Cleaning cloth and glass cleaner
- Level and measuring tape
How to Achieve This Look (mirror placement)
- Measure the wall height and choose mirror size accordingly.
- If leaning, add felt pads to prevent slipping.
- Hang mirror centered on wall for a formal look.
- Place a sconce or lamp to highlight the mirror.
- Position runner so mirror reflects the light.
- Secure hung mirrors with anchors and safety straps.
- Add small decor items near base for balance.
- Clean with glass cleaner and a lint-free cloth.
How to Style / Use It
Let the mirror be the focal point and keep nearby decor minimal. Pair with a small bench or tray for keys. Use warmer frame finishes for cozy spaces and metal frames for modern halls. Wipe fingerprints weekly in high-traffic homes. In winter, use the mirror to bounce limited daylight.
- Slim Floating Shelves with Styled Vignettes
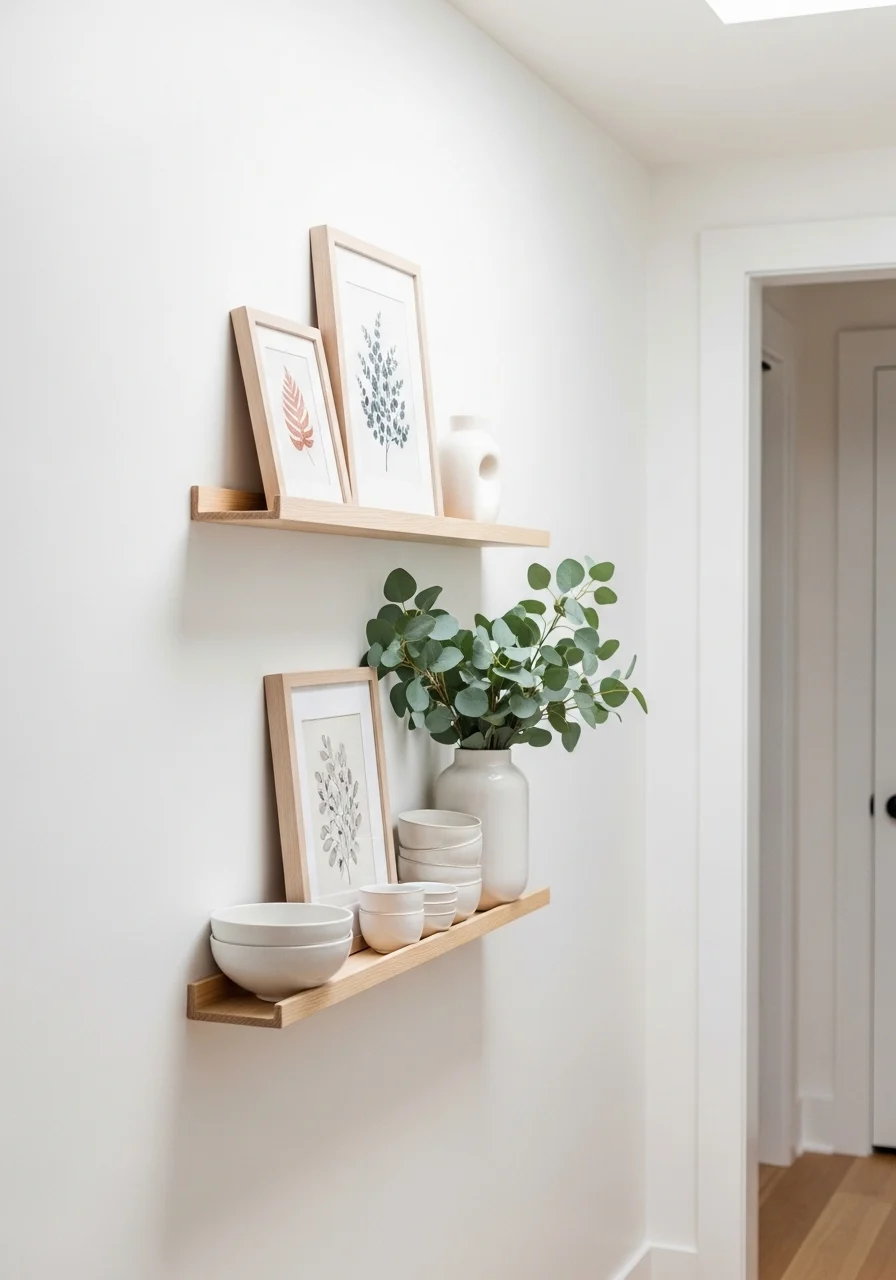
Floating shelves keep the wall visually light. They give you display space without bulk. You can change vignettes often. This suits renters and anyone who likes seasonal swaps. The look feels modern and tailored, with tactile textures like ceramics and linen.
Key Elements
- Slim floating shelves (10–12" deep)
- Wall anchors rated for shelf weight
- Mix of small art and ceramics
- Small potted plants (succulents or eucalyptus)
- Stack of small books for height
- Neutral paint or light wood finish
- Painter’s tape for placement
- Level and stud finder
- Cable management if using lights
- Dust cloth for maintenance
How to Achieve This Look (floating shelf tips)
- Decide shelf height—eye level for center items.
- Mark studs and use heavy-duty anchors.
- Install shelves level and secure.
- Start with three anchor items per shelf.
- Layer with smaller pieces in front.
- Add greenery for life and texture.
- Keep negative space to avoid clutter.
- Swap items seasonally for variety.
- Wipe dust and replace plants as needed.
How to Style / Use It
Use the shelves to tell a small story—photograph, ceramic, small plant. Keep heavier items toward the wall and lighter pieces at the edge. Use odd numbers for visual interest. Refresh vignettes monthly to avoid dust build-up and stale styling.
- Sconce-Lit Art Display
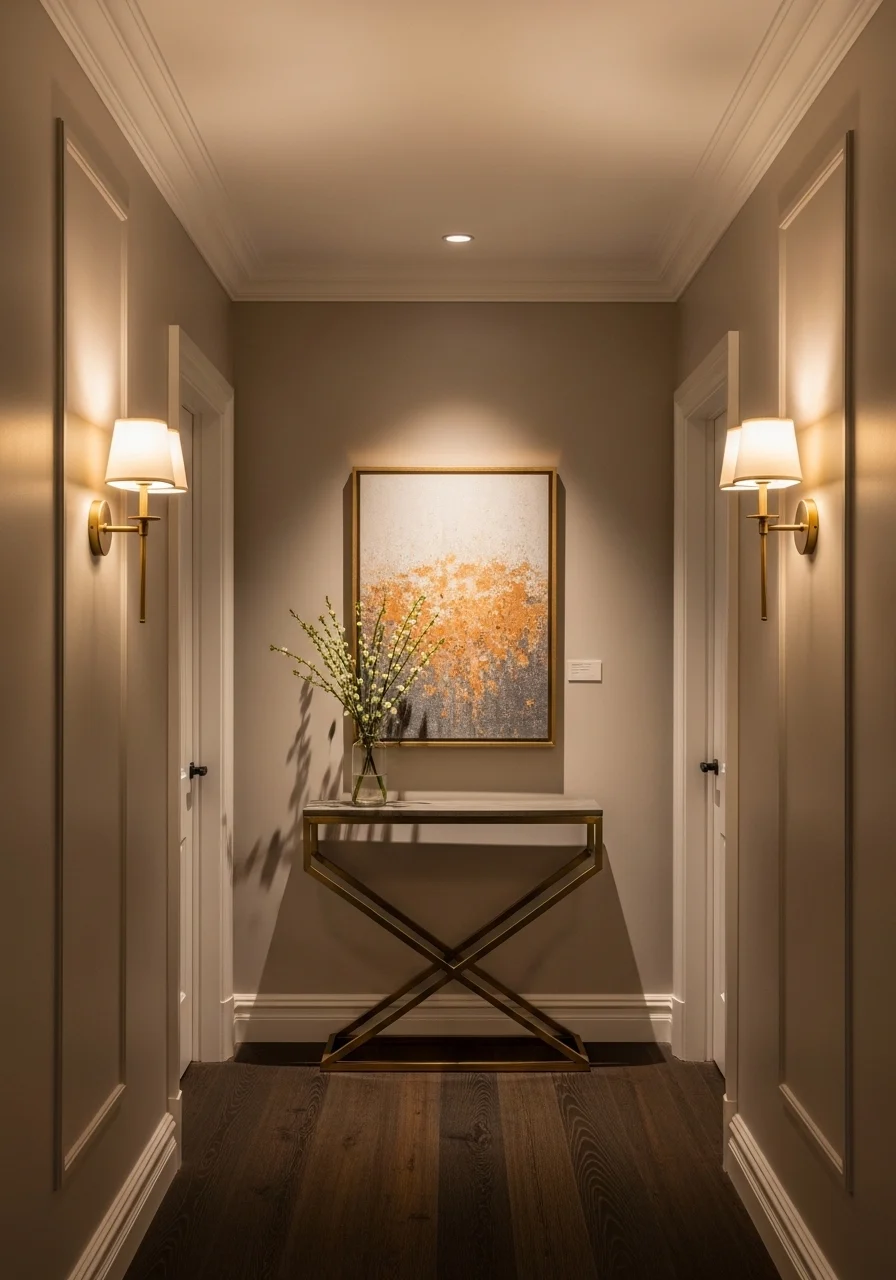
Sconces add mood and highlight artwork. This creates a gallery effect in a small footprint. The warm glow makes hallways feel intimate and welcoming. It's perfect if you want gallery-style drama. The lighting adds texture and depth to each piece.
Key Elements
- Pair of wall sconces (hardwired or plug-in)
- Mid-size framed art or canvas
- Dimmer switch for ambiance
- Proper height placement (top of frame)
- Warm light bulbs (2700K–3000K)
- Painter’s tape and stud finder
- Wiring kit for plug-in options
- Cord covers for visible wires
- Soft paint tones to enhance warmth
- Small console or runner to finish the scene
How to Achieve This Look (sconce lighting tips)
- Choose sconces that match your decor finish.
- Measure to center lights 8–12 inches from frame edge.
- Mount sconces at 60–70 inches from floor.
- Install dimmer for flexible brightness.
- Test light temperature with your art.
- Use plug-in sconces if hardwiring isn't possible.
- Conceal cords with paint-matched conduits.
- Check bulb wattage for gentle illumination.
- Step back and adjust angle for even coverage.
How to Style / Use It
Highlight one special piece or a pair of smaller works. Use warm bulbs for a cozy glow. Add a small bench under the art for balance and function. Turn on sconces in evenings to create mood. Replace bulbs every year to keep light consistent.
- Vertical Trim Molding & Paint Contrast
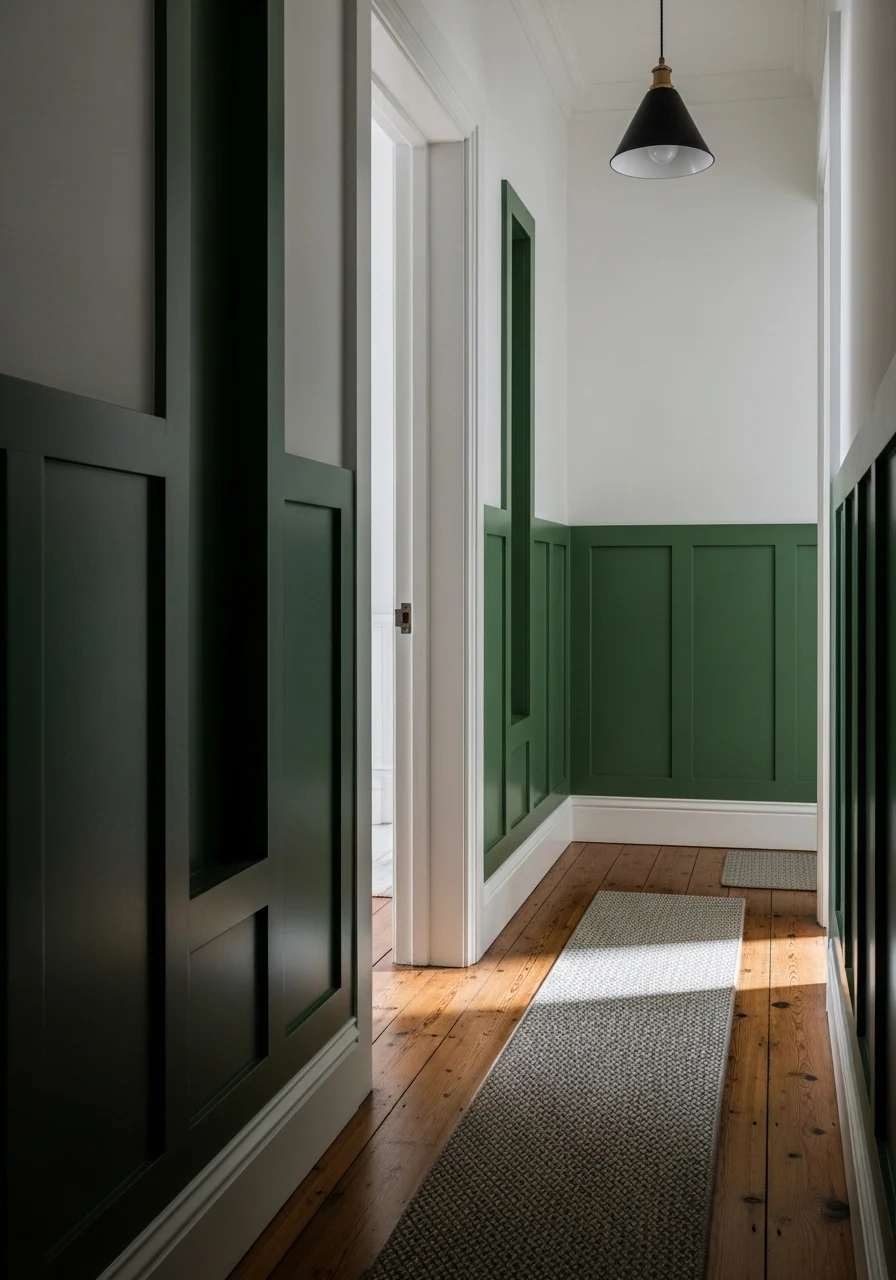
Adding vertical trim and two-tone paint creates instant architectural interest. It adds rhythm without bulky objects. This suits minimal and classic interiors. You’ll enjoy the tactile quality and shadow lines. The hallway feels purposely designed and anchored.
Key Elements
- MDF or wood trim (1×3” recommended)
- Painter’s caulk and high-quality primer
- Two complementary paint colors
- Level, measuring tape, and brad nailer
- Sanding block and wood filler
- Matte or eggshell finish
- Baseboard and crown matching
- Painter’s tape for clean edges
- Putty for nail holes
- Soft rag for cleanup
How to Achieve This Look (trim molding guide)
- Plan vertical spacing and panel sizes.
- Measure and cut trim pieces precisely.
- Attach trim with construction adhesive and nails.
- Fill nail holes and sand smooth.
- Prime trim and wall where needed.
- Paint base color first to dry.
- Mask and paint accent color inside panels.
- Remove tape for crisp lines.
- Add runner to complement the palette.
How to Style / Use It
Keep decor minimal to show off the molding. Add a slim bench or small console for function. Use deeper tones at eye level for drama. Dust trim with a soft cloth often. In rental spaces, use removable trim options.
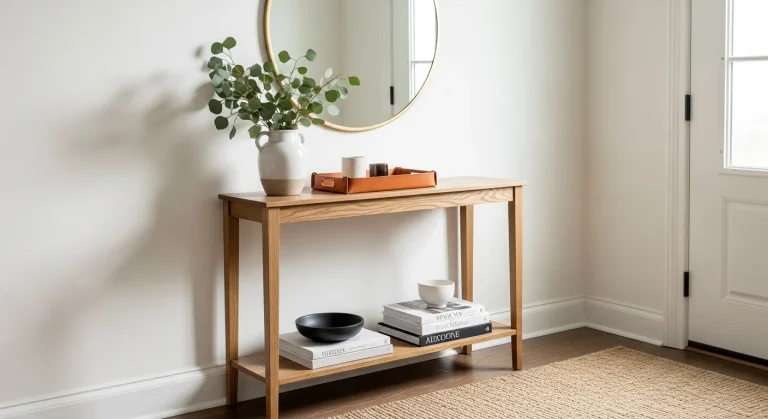
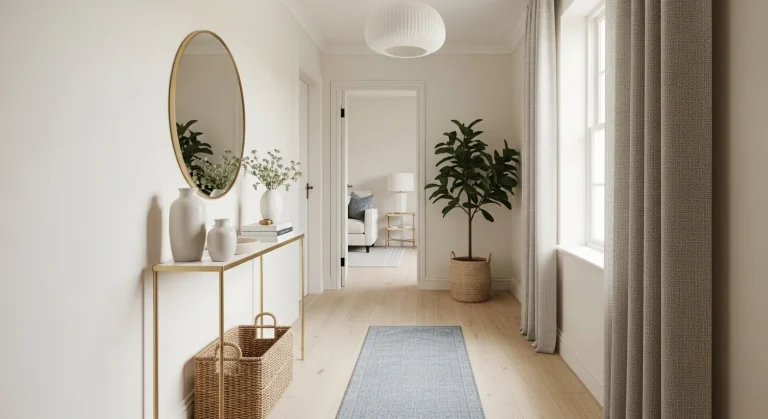
- Narrow Console with Stylish Backdrop
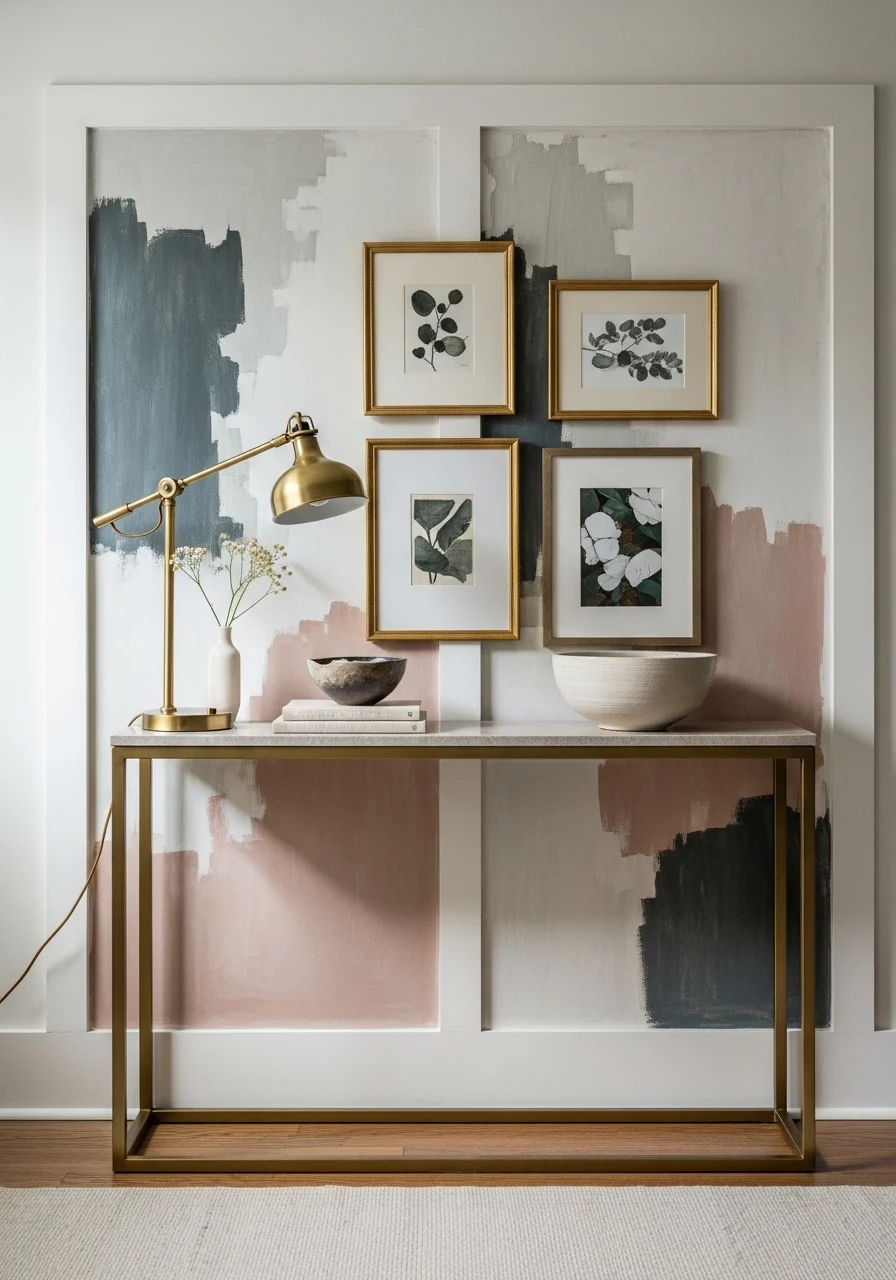
A narrow console anchors decor and offers storage. Use a backdrop like paint, wallpaper, or art to highlight it. This balances function with style in tight hallways. You’ll like this if you want a tidy drop zone. It keeps essentials at hand while looking chic.
Key Elements
- Slim console (10–12 inches deep)
- Accent backdrop (paint, wallpaper, or framed panel)
- Decorative tray for keys and mail
- Small lamp or tall vase
- Woven basket beneath for shoes or blankets
- Minimal wall art above or beside
- Soft runner to match tones
- Cable management for lighting
- Non-slip pads for console feet
- Microfiber cloth for dusting
How to Achieve This Look (console setup)
- Choose console depth to suit hallway width.
- Place console centered on wall.
- Install an accent backdrop behind the console.
- Add a lamp and a decorative tray.
- Place a basket below for essentials.
- Keep top surface clutter-free.
- Add a mirror or small gallery above.
- Use cable clips to hide cords.
- Adjust styling for seasonal needs.
How to Style / Use It
Keep everyday essentials in the tray for quick access. Use a lamp with soft light for evenings. Switch out small decor items seasonally. Tuck shoes in baskets to avoid floor clutter. Use a console that’s easy to wipe and maintain.
- Woven Wall Hangings and Textiles
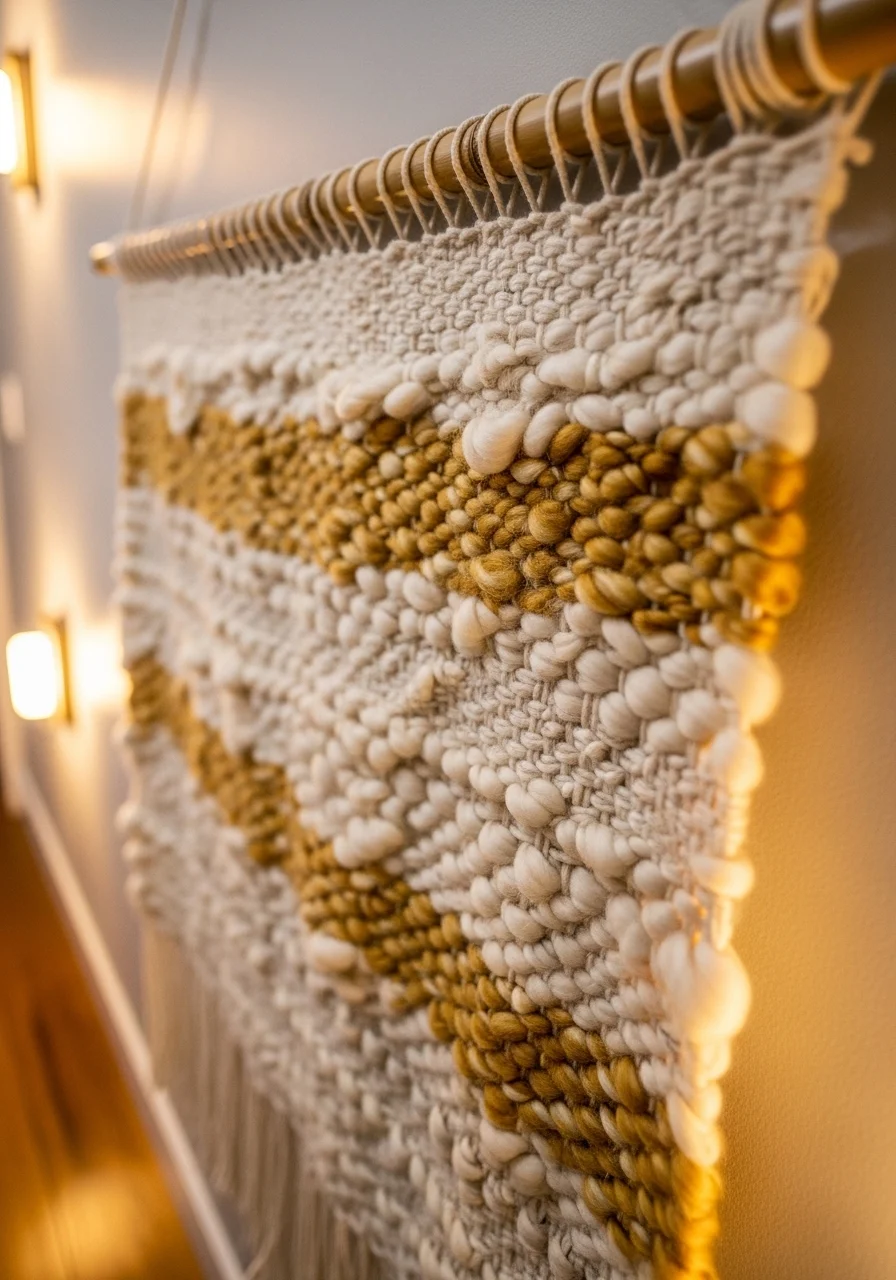
Large woven pieces add warmth and texture. They soften a narrow hallway and reduce echo. Textiles bring tactile comfort and color without heavy frames. You’ll love this if you favor boho or cozy styles. The piece feels inviting and handcrafted.
Key Elements
- Large woven wall hanging (wool, cotton)
- Natural dowel or brass rod for suspension
- Neutral wall paint to support fiber tones
- Small accent plant or woven basket
- Secure wall anchor for weight
- Ladder or step stool for installation
- Soft side lighting to reveal texture
- Optional small shelf beneath
- Fabric-friendly cleaning brush
- Humidity-controlled placement
How to Achieve This Look (textile hanging steps)
- Choose a hanging proportional to the wall height.
- Mark the hanging point at eye level.
- Use a wall anchor suitable for the weight.
- Hang dowel or rod level on the anchor.
- Add a small spotlight if desired.
- Complement with a basket or bench below.
- Keep textiles away from direct sunlight.
- Brush and air periodically to keep fresh.
How to Style / Use It
Pair with natural fiber rugs and wooden accents. Keep nearby items low to let textile breathe. Rotate hangings by season for variety. Avoid humid areas to prevent mildew. Spot-clean according to fiber recommendations.
- Mirror Cluster for Light — Hallway Wall Decor Ideas for Small Spaces
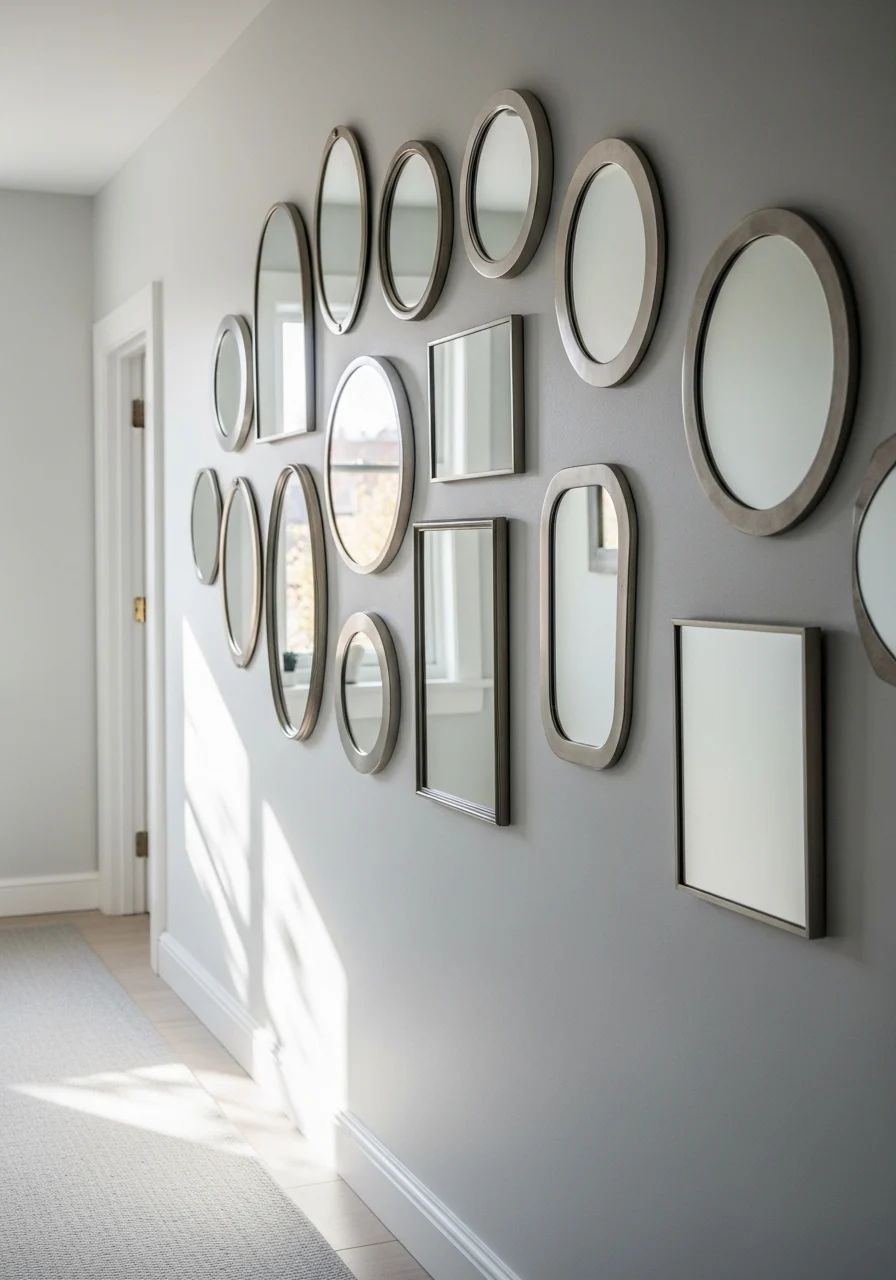
A cluster of small mirrors amplifies light and adds graphic interest. Mirrors in mixed shapes create movement. This is perfect for small, dark hallways. You’ll notice the space feels brighter and more spacious. The arrangement reads chic and collected.
Key Elements
- Assorted small mirrors (round, oval, hex)
- Mixed frame finishes (brass, black, wood)
- Hanging hardware for multiple pieces
- Template layout on kraft paper
- Measuring tape and level
- Neutral paint to let mirrors pop
- Warm bulbs nearby to enhance reflection
- Soft runner to balance the floor
- Cloth for polishing mirrors
- Optional small shelf or hook below
How to Achieve This Look (mirror cluster placement)
- Lay mirrors on the floor to test composition.
- Trace outlines on kraft paper and mark hanging points.
- Tape templates to the wall for placement.
- Start with the largest mirror as an anchor.
- Fill around with smaller shapes, spacing 2 inches.
- Use proper anchors for each mirror weight.
- Step back to ensure balanced reflections.
- Clean mirrors after installation.
How to Style / Use It
Use mirrors to reflect art or a window for doubled daylight. Keep frames varied but cohesive in tone. Polish regularly to keep reflections crisp. Add a nearby sconce for evening glow. Great for narrow, windowless corridors.
- Floating Picture Ledge with Leaning Frames

A picture ledge lets you lean frames for an easy, changeable display. It’s renter-friendly and safe for narrow spaces. You can swap art without rehanging. This appeals to people who frequently update decor. The vibe feels relaxed and curated.
Key Elements
- Long picture ledge (3–4" deep)
- Mixed framed art sizes
- Small potted plants for height variation
- Non-slip pads to prevent shifting
- Level and stud finder for installation
- Neutral wall paint for gallery feel
- Lightweight sculptures or books
- Dusting microfiber cloth
- Hanging hardware and anchors
- Optional shelf lighting
How to Achieve This Look (picture ledge steps)
- Measure and mount picture ledge at eye level.
- Secure into studs if possible.
- Lean largest frame first as an anchor.
- Layer smaller frames in front.
- Add plants and books for depth.
- Keep one side slightly heavier for deliberate imbalance.
- Swap pieces seasonally to refresh look.
- Clean ledge and frames monthly.
How to Style / Use It
Lean frames for a relaxed, modern feel. Add small plants for life and texture. Keep some negative space to avoid clutter. Use narrow ledges in tight hallways to preserve walking space. Rotate art with trends or seasons.
- Wall-Mounted Planters & Greenery
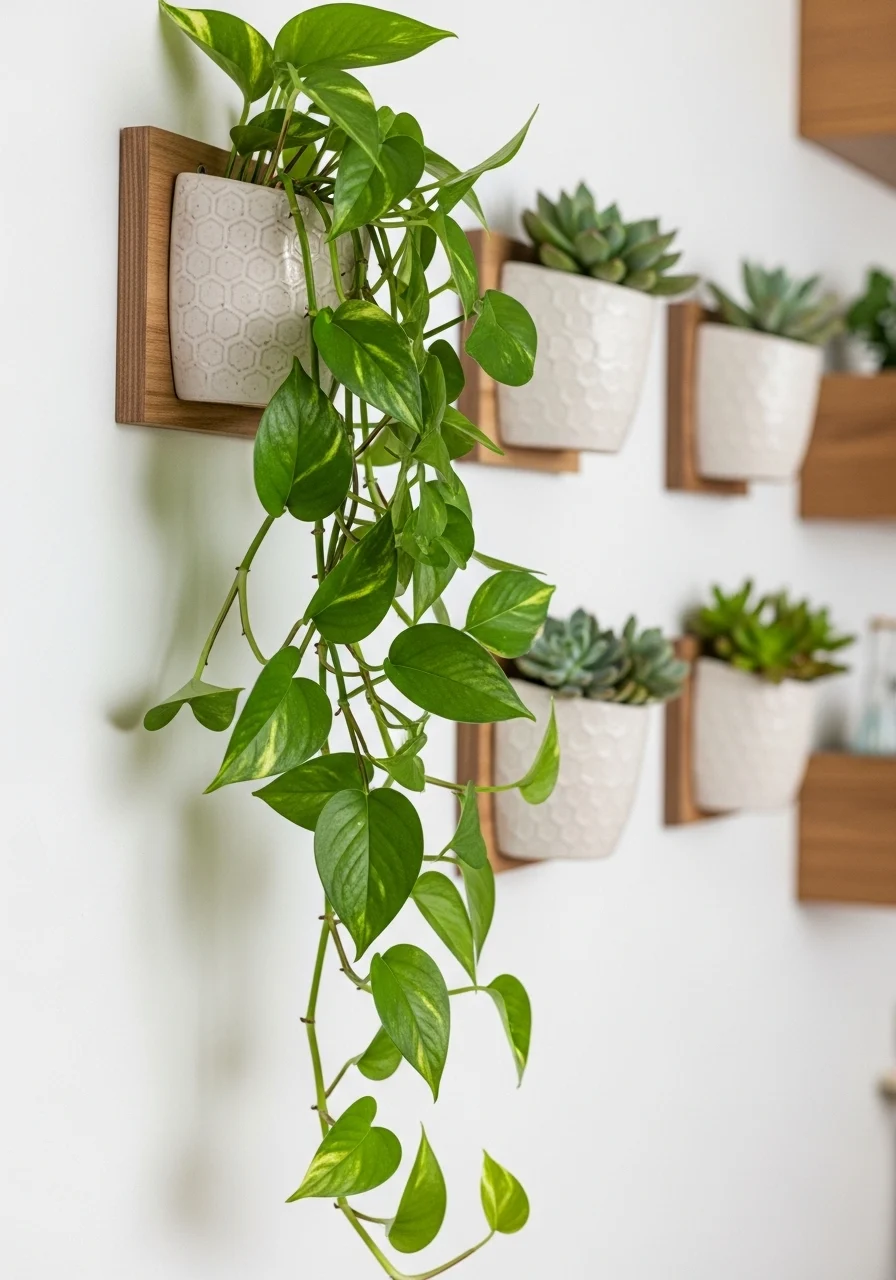
Greenery brings life and fresh air to hallways. Wall planters keep floor space free. Trailing plants soften vertical lines. This idea suits those who love living decor and low maintenance care. The effect is fresh, organic, and calming.
Key Elements
- Ceramic or metal wall planters
- Low-maintenance plants (pothos, philodendron, succulents)
- Water-resistant wall anchors
- Drip trays or saucers for indoor use
- Lightweight potting soil and fertilizer
- Small hand-pruner and mister
- Wall protector sheet for watering
- Bright, indirect light or grow light
- Hanging heights staggered for interest
- Weekly watering schedule
How to Achieve This Look (wall planter guide)
- Choose plants suited to hallway light.
- Install planter mounts at staggered heights.
- Use liners to catch excess water.
- Pot plants in well-draining soil.
- Hang largest planter first as anchor.
- Arrange trailing plants to cascade.
- Mist foliage weekly if air is dry.
- Rotate planters occasionally for even growth.
- Replace plants that struggle.
How to Style / Use It
Mix textures with ceramic, woven, and metal planters. Use trailing plants for movement and small succulents for accents. Keep watering controlled to avoid wall damage. Use grow lights in windowless halls. Trim and deadhead regularly to keep plants healthy.
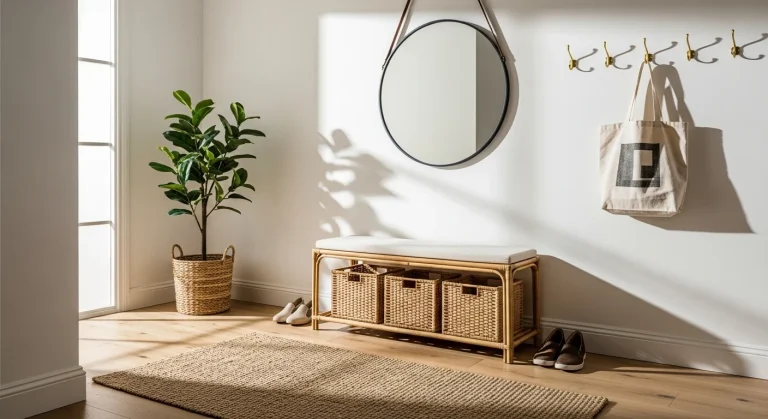
- Decorative Hooks and Organized Drop Zone
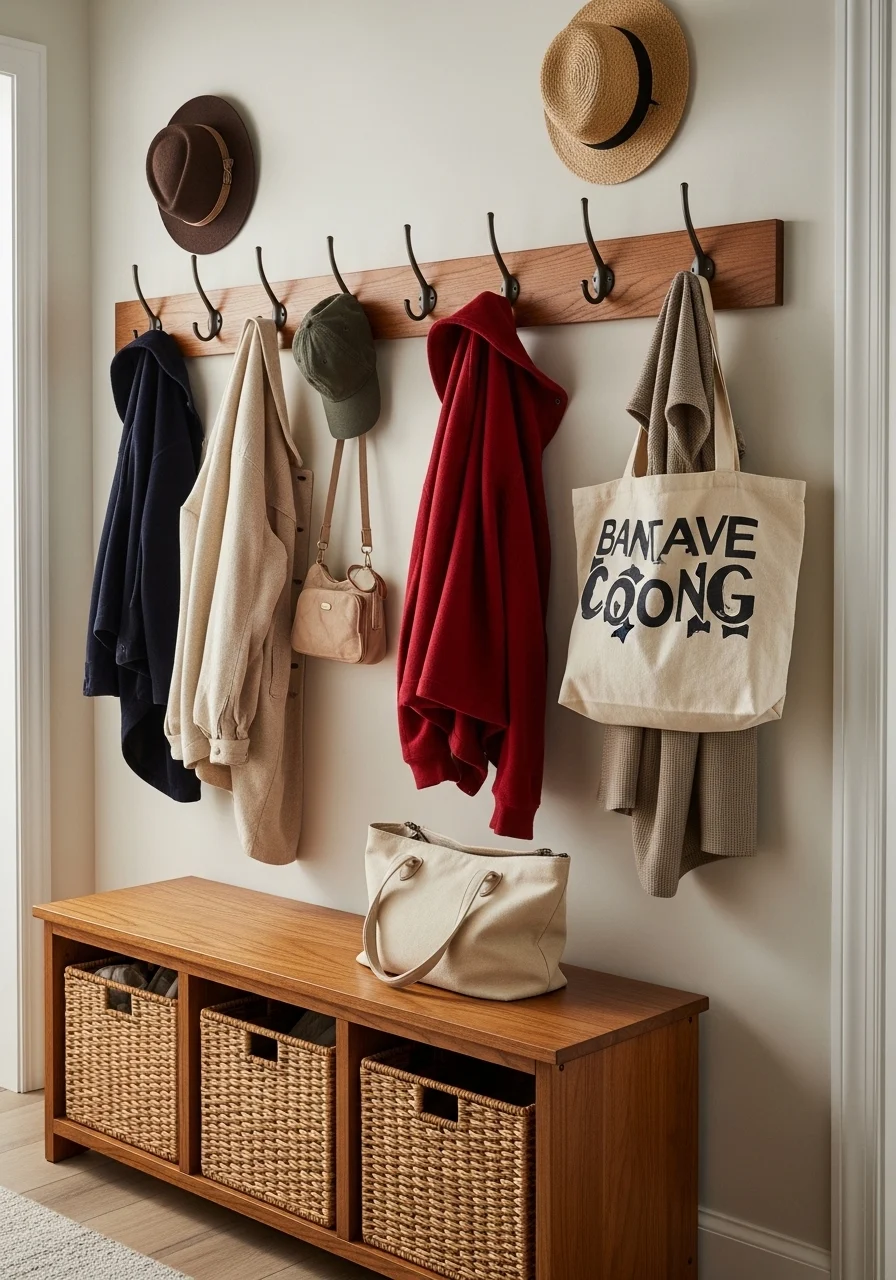
Stylish hooks add function and charm. Group them above a bench or console for an organized drop zone. This is perfect for busy families and small entry corridors. Hooks keep things off the floor and add visual rhythm.
Key Elements
- Row of decorative hooks or pegs
- Slim bench or floating shelf beneath
- Woven baskets for shoes and gear
- Labels or small trays for keys
- Durable screw anchors for heavy coats
- Paint-matched wall for clean look
- Runner or rug to catch dirt
- Hooks spaced 12–18 inches apart
- Small mirror above for last-minute checks
- Cleaning brush for baskets
How to Achieve This Look (drop zone setup)
- Measure and mark hook heights—about 60–66" from floor.
- Install hooks into studs or use anchors.
- Place bench or basket below for storage.
- Add trays for keys and mail on the bench.
- Include shoe baskets underneath.
- Keep seasonal rotation of coats.
- Clean baskets weekly and vacuum runner.
- Encourage family to use designated spots.
How to Style / Use It
Designate a hook per family member to cut clutter. Use baskets labeled by use—shoes, sports gear, scarves. Keep bench cushion removable for cleaning. Choose durable finishes for heavy use. Rotate hooks to balance wear.
- Wallpaper Accent Stripe Panel — A Bold Hallway Wall Decor Idea
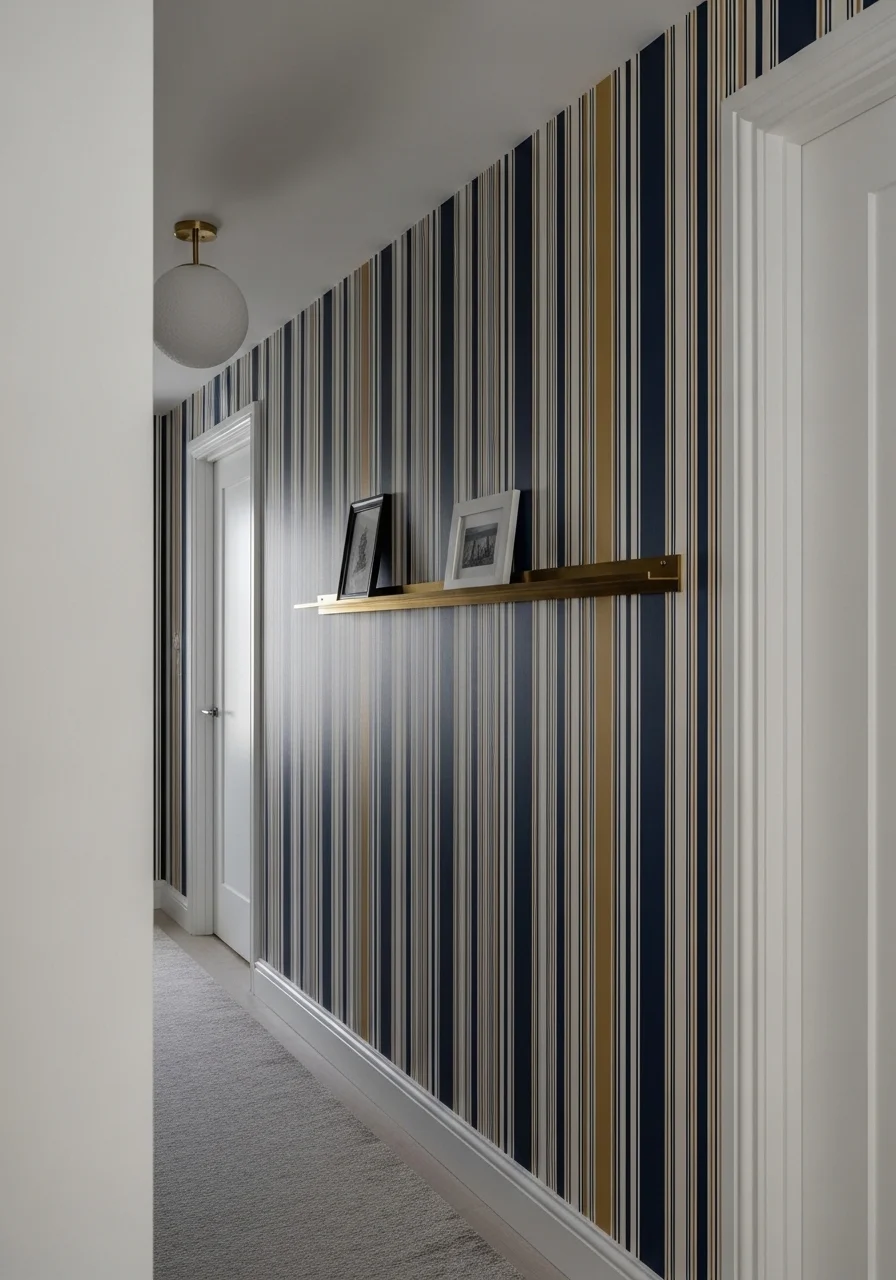
A wallpaper stripe panel makes a narrow hall feel taller. It adds color and pattern without covering the entire hallway. This is one of the most dramatic hallway wall decor ideas for short DIY time. You’ll get a built-in focal point with minimal fuss. The result reads modern and tailored.
Key Elements
- Bold wallpaper sample strip or panel
- Wallpaper paste and smoothing tools
- Painter’s tape and sharp utility knife
- Trim to frame the panel (optional)
- Primer on wall for adhesion
- Level and measuring tape
- Runner that complements wallpaper tones
- Small art or mirror to break up pattern
- Seam roller for clean joins
- Clean cloth for smoothing
How to Achieve This Look (wallpaper panel steps)
- Test wallpaper pattern and pick panel width.
- Prime the wall where wallpaper will be applied.
- Measure and mark vertical panel edges.
- Apply adhesive as directed.
- Smooth wallpaper with a smoothing tool.
- Trim excess with a sharp knife.
- Add trim around panel for a framed look.
- Let adhesive dry fully before styling.
- Add a slim ledge or lighting to highlight panel.
How to Style / Use It
Use wallpaper panels to add height and drama to short halls. Pair with simple furniture and neutral accents. Choose washable wallpapers for high-traffic areas. Change the panel with peel-and-stick options for rentals. Coordinate the runner with one wallpaper color.
- Plate Wall Arrangement
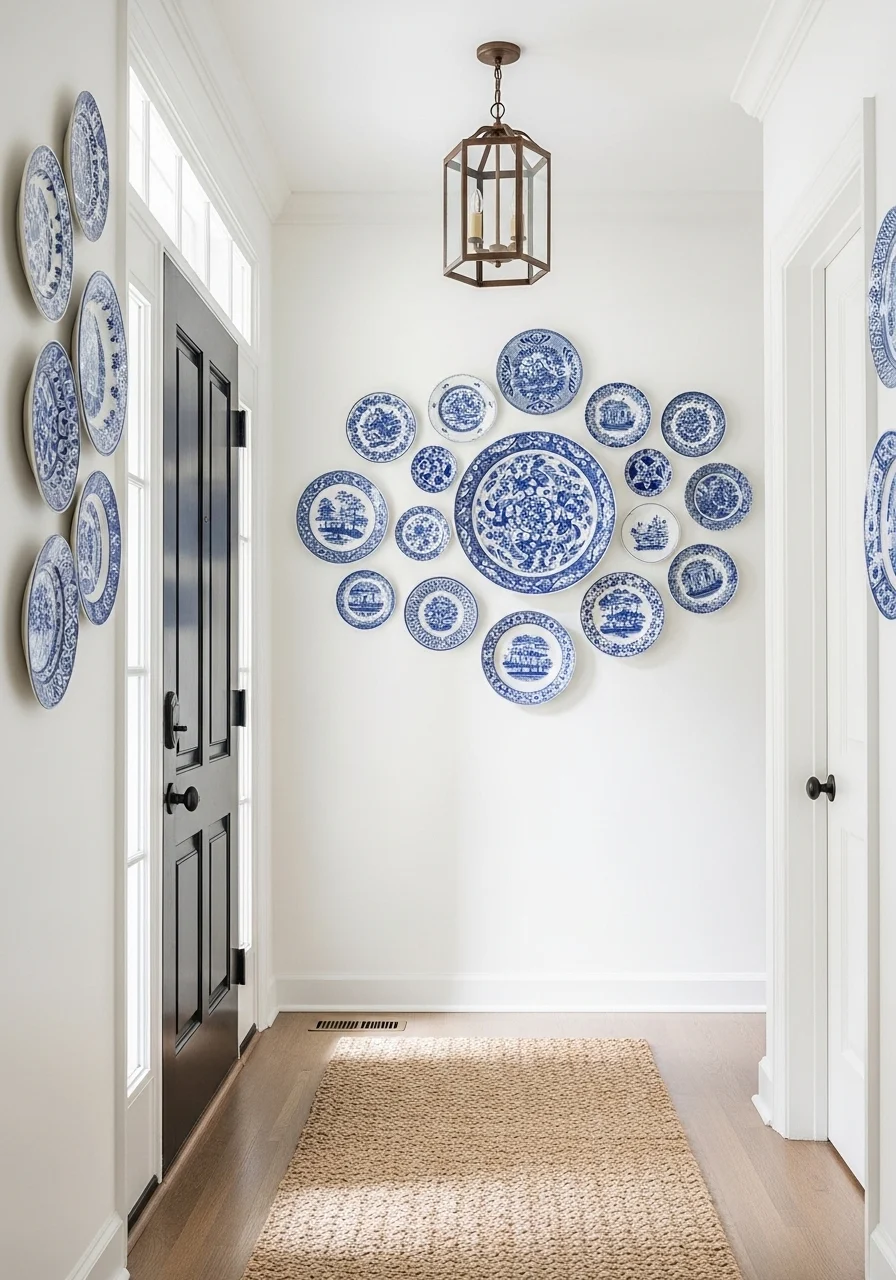
A plate wall offers playful pattern and texture. Plates add a collected, global vibe. It’s lighter than heavy frames and works well in narrow spaces. You’ll enjoy mixing vintage finds with modern ceramics. The arrangement feels curated and approachable.
Key Elements
- Assortment of decorative plates
- Plate hangers or sawtooth hooks
- Measuring tape and level
- Central anchor plate as focal point
- Variety of sizes and patterns
- Neutral wall paint as backdrop
- Thin spacing 1–2 inches between plates
- Dusting brush for ceramics
- Secure anchors for heavy plates
- Protective bumpers on plate backs
How to Achieve This Look (plate arrangement steps)
- Lay plates on floor to create balanced composition.
- Mark placement with paper templates on the wall.
- Start by hanging central or largest plate.
- Work outward with medium and small plates.
- Use secure hangers rated for plate weight.
- Keep spacing consistent for rhythm.
- Check stability and adjust as needed.
- Clean plates gently after hanging.
How to Style / Use It
Mix patterns and solids for visual interest. Include a single color family to unify the display. Use in kitchens-adjacent hallways for continuity. Dust plates periodically to keep colors bright. Replace a plate or two each season to refresh the look.
- Chalkboard/Family Command Center
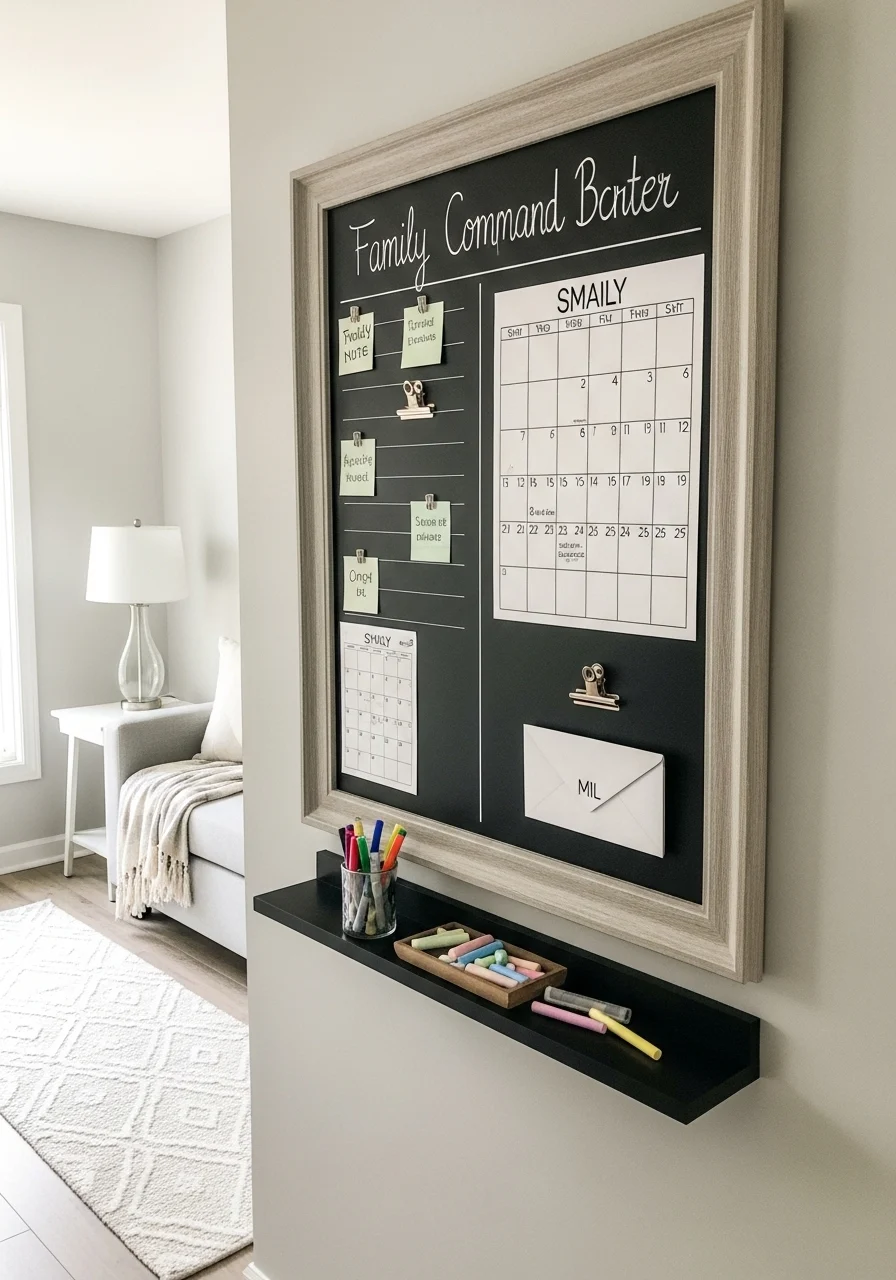
A chalkboard command center turns hallway space into a family hub. It helps organize schedules and notes. This is especially useful near entries. You’ll love the practical vibe and the ability to update it daily. The wall becomes both useful and decorative.
Key Elements
- Framed chalkboard or chalkboard paint
- Dry-erase marker area for different notes
- Wall-mounted mail clip and key tray
- Small shelf for chalk, eraser, pens
- Monthly calendar grid
- Ruler or list template for weekly chores
- Magnetic strip for notes (optional)
- Washable surface for easy cleaning
- Chalk or liquid chalk markers
- Small stool for kids to reach
How to Achieve This Look (command center setup)
- Choose a location near the entry or kitchen.
- Frame and mount chalkboard at reachable height.
- Add a small shelf below for supplies.
- Install clips or baskets for mail and keys.
- Create a monthly calendar section.
- Add hooks for reusable bags or masks.
- Teach family how to use the space.
- Erase and update weekly to keep it fresh.
How to Style / Use It
Use color-coded markers for family members. Keep supplies organized in labeled cups on the shelf. Wipe clean weekly to avoid ghosting. Add small artwork or kids’ drawings around the board to keep it warm. Switch to seasonal messages for variety.
- Bold Wallpaper Panel — A Memorable Hallway Wall Decor Idea

A bold wallpaper panel gives high-impact style with limited wallpapering. You get color and pattern within a defined section. This is a standout among hallway wall decor ideas when you want a single dramatic move. It feels curated and intentional without overwhelming the space.
Key Elements
- Statement wallpaper (peel-and-stick or traditional)
- Framed molding to contain the panel
- Neutral surrounding wall paint
- Matching runner or accents
- Adhesive and smoothing tools
- Measuring tape and level
- Seam roller for clean joins
- Small shelf or mirror to balance
- Soft lighting to highlight pattern
- Cleaning instructions for wallpaper type
How to Achieve This Look (bold wallpaper panel steps)
- Choose wallpaper with scale suited to the wall height.
- Frame area with moulding if desired.
- Prime wall and cut wallpaper to panel size.
- Apply adhesive or peel-and-stick carefully.
- Smooth out bubbles and align pattern.
- Trim edges and install moulding if using.
- Add coordinating runner and small decor.
- Maintain according to wallpaper care.
How to Style / Use It
Pair bold wallpaper with simple furnishings to avoid clutter. Use one wallpaper color in small accessories to tie the look together. Consider a washable wallpaper for high-traffic halls. Replace the panel with peel-and-stick options in rentals.
- 3D Wall Panels or Textured Tiles
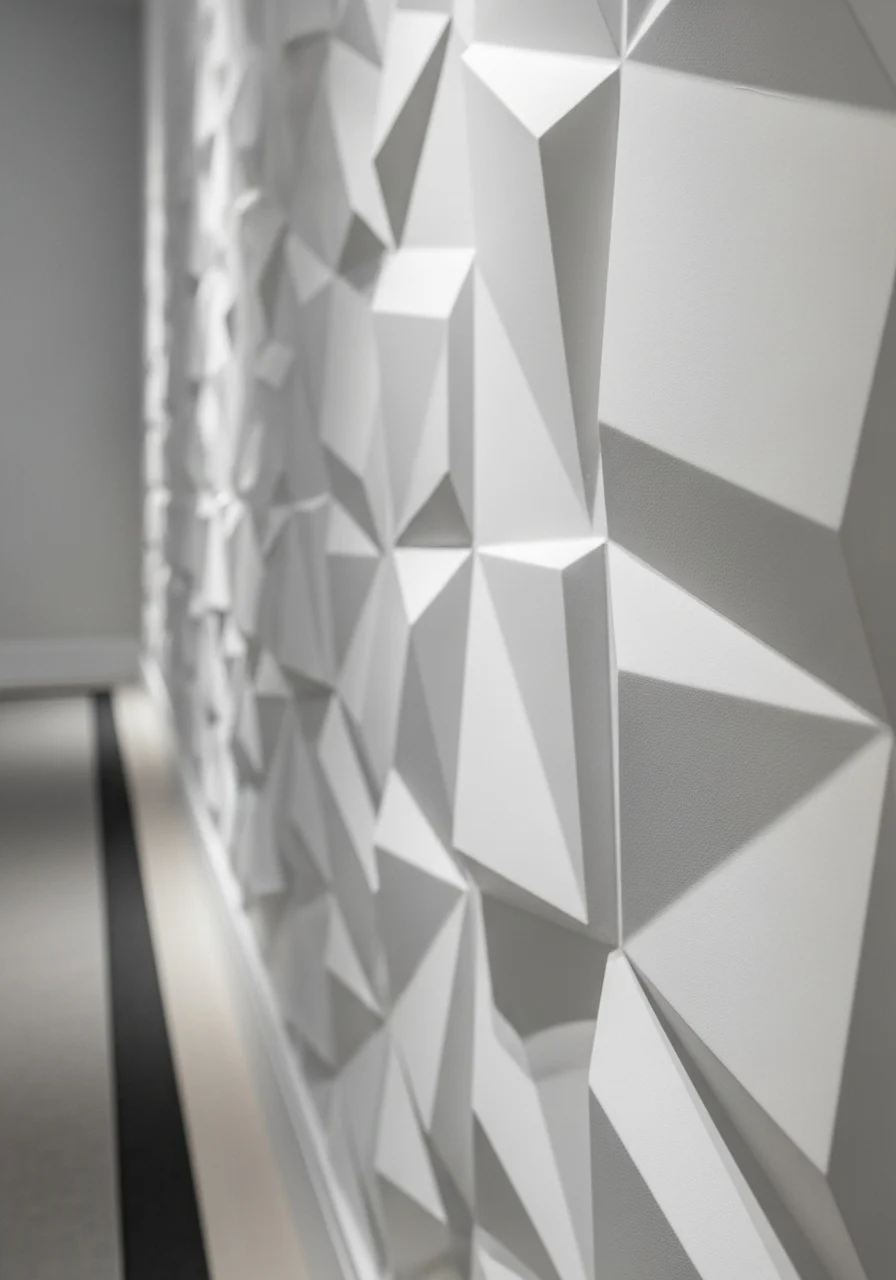
Textured 3D panels add sculptural depth and interest. They create shadow play that changes as light shifts. This is ideal for modern, minimal hallways. You’ll appreciate the tactile quality and subtle drama. Panels can be painted to match your palette.
Key Elements
- Lightweight 3D wall panels (PVC, gypsum)
- Construction adhesive and finishing nails
- Sanding block and paint primer
- Paint matched to room palette
- Level and spacers for seam alignment
- Soft runner to complement texture
- Caulk for seamless edges
- Protective sealant for durability
- Vacuum and dusting tools
- Professional installer if needed
How to Achieve This Look (3D panel installation)
- Clean and prime wall surface.
- Measure and plan panel layout.
- Apply adhesive to panel backs.
- Press panels into place, using spacers for seams.
- Nail edges if recommended by manufacturer.
- Fill seams and sand smooth.
- Prime and paint panels as needed.
- Seal surface for easy cleaning.
- Add lighting to enhance shadows.
How to Style / Use It
Use white or neutral tones to keep the hallway bright. Add directional lighting to dramatize panels. Keep other wall decor minimal to let texture shine. Dust gently and avoid abrasive cleaners. Consider an accent color on a single row for contrast.
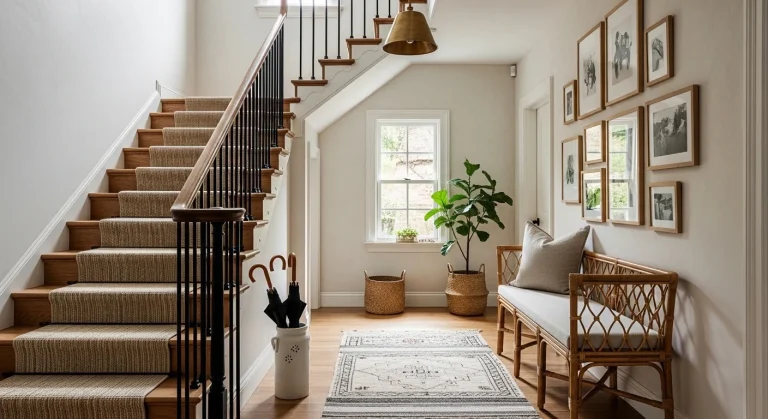
- Vintage Frames with Black & White Photos
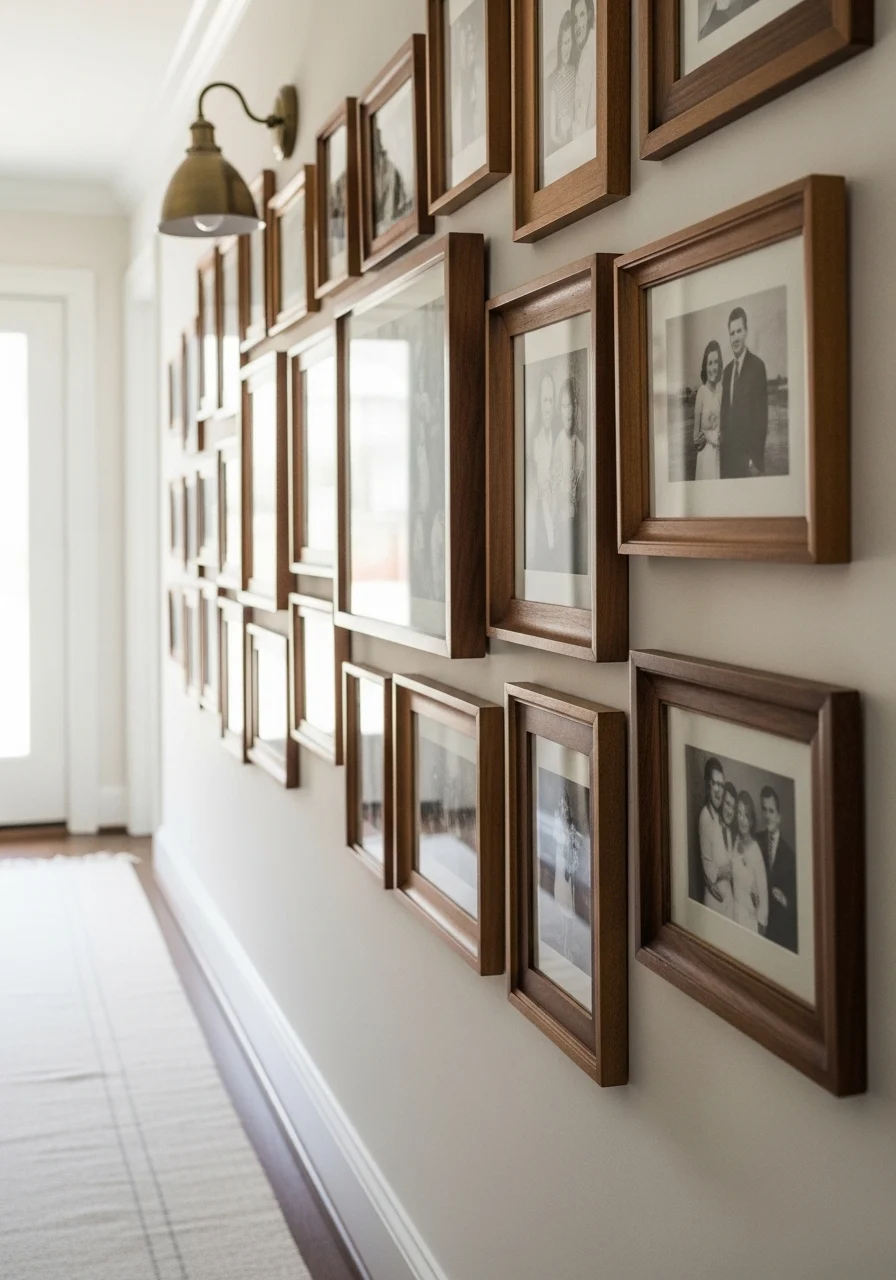
A vintage frame wall with black-and-white photos feels timeless. It adds heritage and emotional warmth. The monochrome palette keeps the look cohesive and elegant. This suits anyone who loves heirlooms and storytelling. The space feels personal and steady.
Key Elements
- Vintage or thrifted frames variety
- High-quality black-and-white prints
- Archival matting for preservation
- Picture hanging kit and level
- Consistent spacing and alignment
- Neutral wall paint to frame photos
- Soft runner or carpet for warmth
- Dust protector for frames
- UV-filtering glass to protect photos
- Label or small plaque for dates (optional)
How to Achieve This Look (vintage gallery steps)
- Scan or print photos in high resolution.
- Choose frames of similar color family for cohesion.
- Mat photos for a classic look.
- Lay frames out on the floor to test arrangement.
- Hang with consistent spacing and secure anchors.
- Use UV glass for long-term protection.
- Step back and adjust for balanced rhythm.
- Clean frames with a soft cloth.
How to Style / Use It
Hang photos in a linear or salon-style layout. Keep frames slightly mismatched for collected charm. Avoid direct sunlight for photo longevity. Swap prints in and out to spotlight different stories. Use archival materials for treasured images.
- Leaning Art on Narrow Ledge
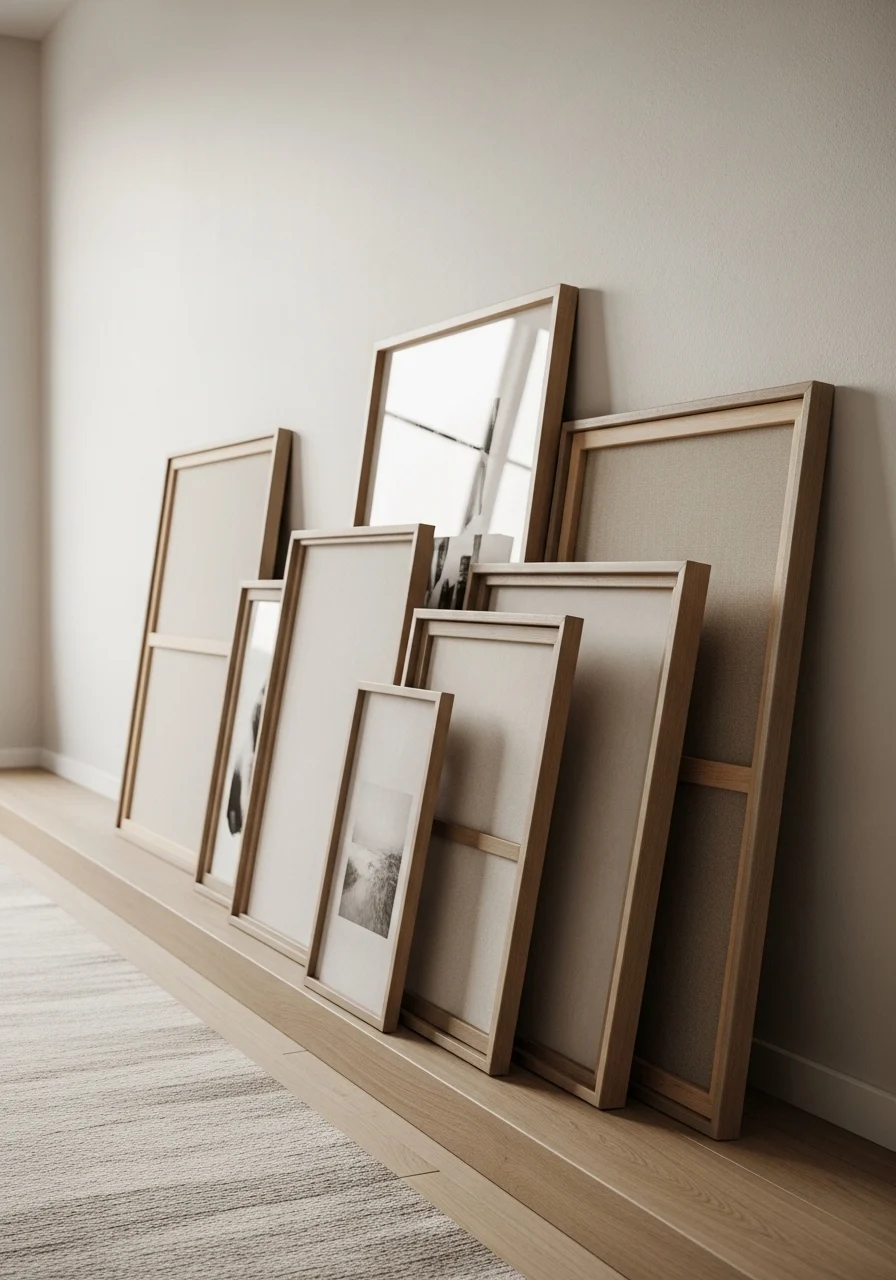
Leaning art on a narrow ledge gives a relaxed gallery feel. It’s renter-friendly and easy to refresh. You can layer different sizes and swap seasons quickly. This suits those who like effortless, casual styling. The result reads personal and modern.
Key Elements
- Narrow picture ledge or thin shelf
- 2–4 large frames for layering
- Non-slip adhesive dots behind frames
- Neutral wall paint to let art stand out
- Small plant or book for balance
- Measuring tape and level for shelf
- Dust cloth for frames and ledge
- Lightweight frames for safety
- Wall anchors for ledge stability
- Childproofing if needed
How to Achieve This Look (leaning art steps)
- Install a narrow ledge level along the wall.
- Place the largest frame as the back anchor.
- Layer smaller frames in front, slightly overlapping.
- Add a small plant or object for balance.
- Use adhesive dots to keep frames from sliding.
- Adjust spacing until composition feels right.
- Switch out art periodically to refresh.
- Vacuum and dust frames regularly.
How to Style / Use It
Keep the ledge sparse to avoid an overfilled look. Lean art slightly forward for depth. Pair with a slim console or runner. Swap frames seasonally to change mood. Avoid heavy frames on a narrow ledge.
- Tile Accent or Mosaic Panel
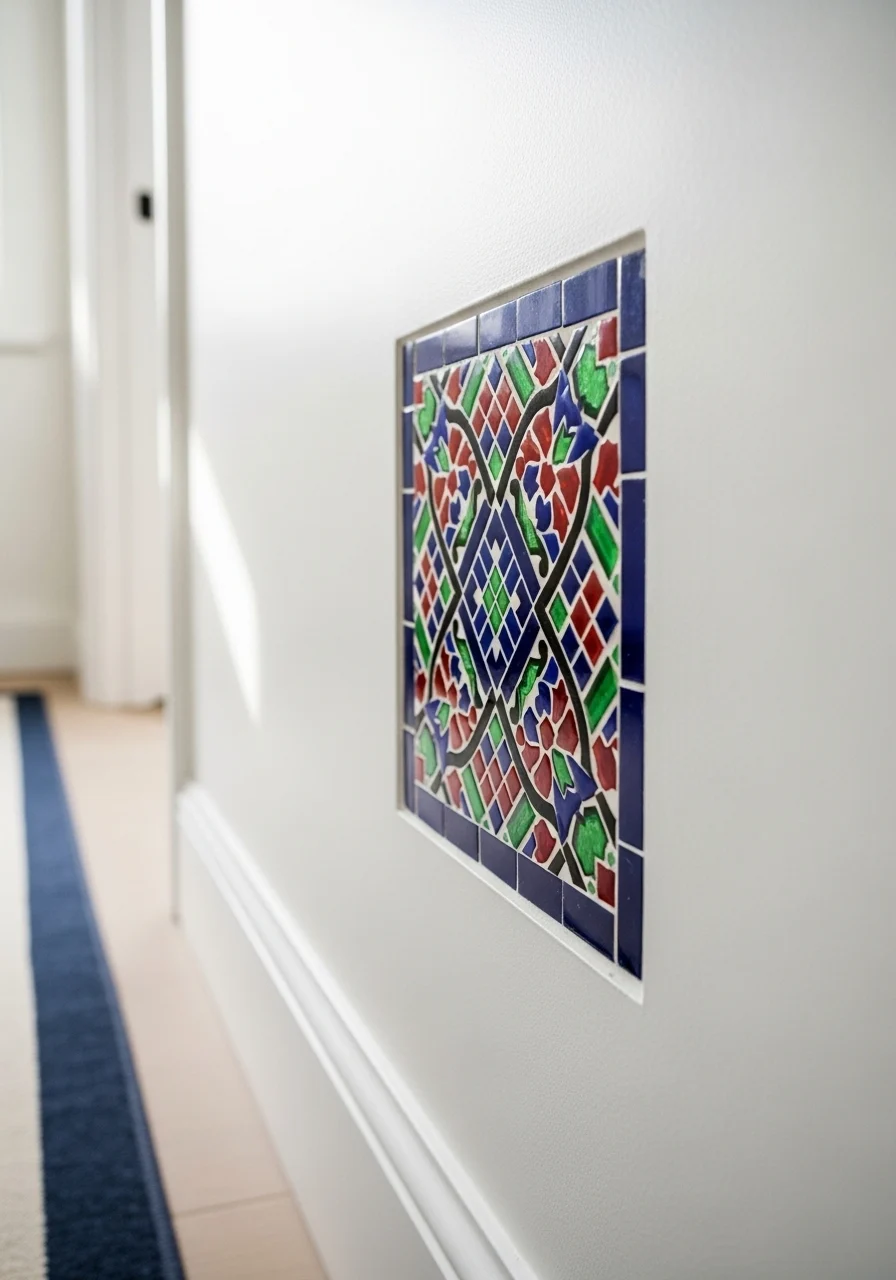
A tiled accent panel adds color and craft to a hallway. Tiles bring texture and are easy to clean. This idea suits homes looking for a durable, decorative focal point. You’ll love the handmade quality and pattern. It feels artisanal and long-lasting.
Key Elements
- Mosaic or patterned tiles
- Thinset adhesive and grout
- Tile cutter and spacers
- Sealer for grout protection
- Primer and backer board if needed
- Level and measuring tape
- Protective eyewear and gloves
- Runner that complements tile colors
- Cleaning brush and grout cleaner
- Professional tiler for complex patterns
How to Achieve This Look (tile panel steps)
- Choose tile color and pattern suited to space.
- Prepare wall with backer board if required.
- Lay out tiles on the floor to plan pattern.
- Apply thinset and press tiles into place.
- Let adhesive set before grouting.
- Grout joints and clean excess immediately.
- Seal grout after full cure.
- Add lighting to enhance the mosaic.
- Maintain with grout cleaner and sealant reapplication.
How to Style / Use It
Use tiles as a splash of color near high-traffic areas. Pair with neutral walls to keep focus on pattern. Seal grout annually in moist climates. Combine with small ledge or sconce for a finished look. Consider wallpaper alternatives for lower-cost updates.
- Statement Coat Rack + Bench Combo — Hallway Wall Decor Ideas with Practical Storage
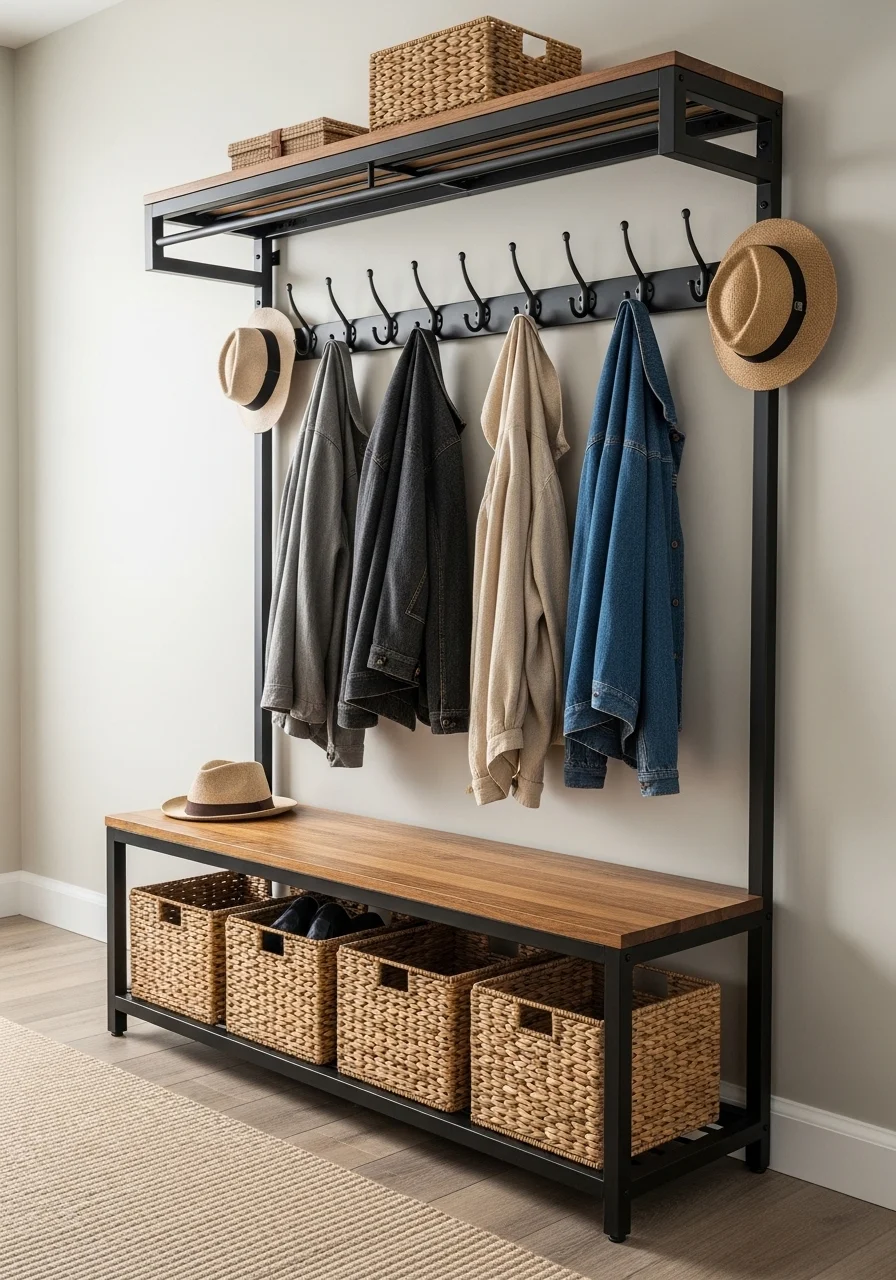
A statement coat rack plus bench combines function and fashion. It creates an organized entry with visual punch. This is one of the most practical hallway wall decor ideas for busy households. You get hanging, sitting, and hidden storage in one wall-friendly setup. The area reads tidy and purposeful.
Key Elements
- Wall-mounted coat rack or peg rail
- Slim bench with storage or baskets
- Heavy-duty wall anchors for load
- Hooks spaced for coats and bags
- Cushioned bench seat for comfort
- Woven baskets for shoes or scarves
- Runner to protect the floor
- Small tray for keys and sunnies
- Easy-clean finishes for durability
- Step stool for high hooks if needed
How to Achieve This Look (coat rack and bench steps)
- Choose rack style and bench depth to fit width.
- Mount rack into studs for heavy coats.
- Position bench directly beneath rack.
- Add cushions and baskets under bench.
- Install hooks at multiple heights for kids.
- Use labels or color-coded hooks for family members.
- Keep a small tray on bench for loose items.
- Clean and declutter monthly to maintain function.
How to Style / Use It
Use a mix of open hooks and closed baskets for tidy storage. Place seasonal items on higher hooks. Keep one basket for daily shoes to reduce mess. Choose durable finishes if kids use it often. Add a small doormat to protect floors.
- Backlit Art or LED Picture Lighting
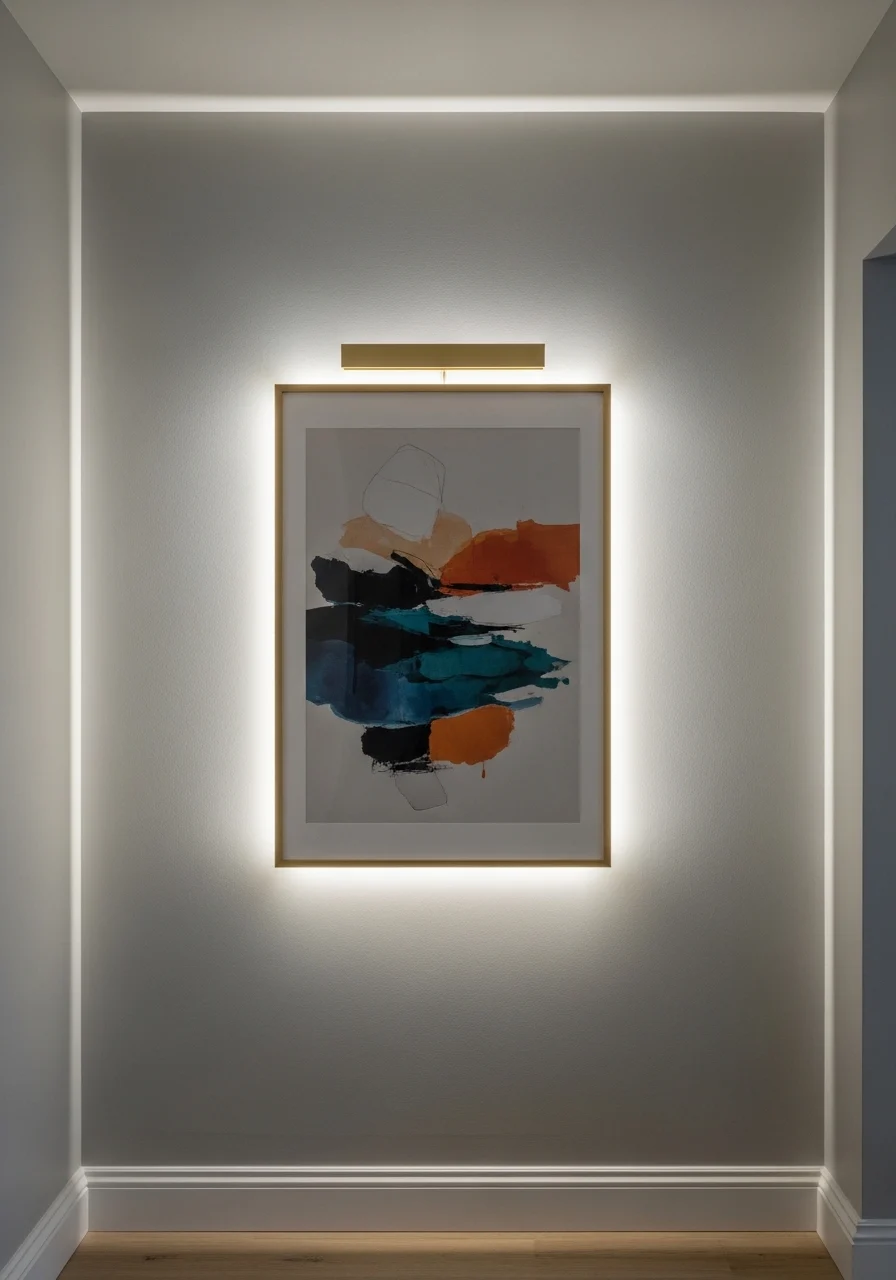
Backlit art creates a museum-like glow in a narrow hallway. LED strips highlight texture and color without visible fixtures. It feels modern and slightly theatrical. You’ll admire the subtle drama and refined finish. The wall becomes a calm focal point, especially at night.
Key Elements
- Frame with LED backlighting or LED picture lights
- Dimmer-capable LED strips (warm white)
- Cable management and power source
- Properly mounted art/hardware
- Tape measure and level
- Remote dimmer or wall dimmer switch
- Clean, dust-free surface for installation
- Cord covers to match wall color
- Low-heat LEDs for art safety
- Professional installation for hardwired lights
How to Achieve This Look (backlit art steps)
- Choose an artwork that benefits from halo lighting.
- Install LED strip on frame back or wall recess.
- Hide wires with cable covers or conduit.
- Attach dimmer to control intensity.
- Mount art securely over the LED source.
- Test lighting and adjust for even glow.
- Use low-heat LEDs to protect art.
- Clean LEDs and art faces periodically.
How to Style / Use It
Use backlighting for single, special pieces. Keep ambient lighting low for best effect. Use dimmer to adjust mood for evenings. Avoid direct heat sources near art. In rentals, opt for plug-in LED options.
- Rotating Photo Ledge with Seasonal Art
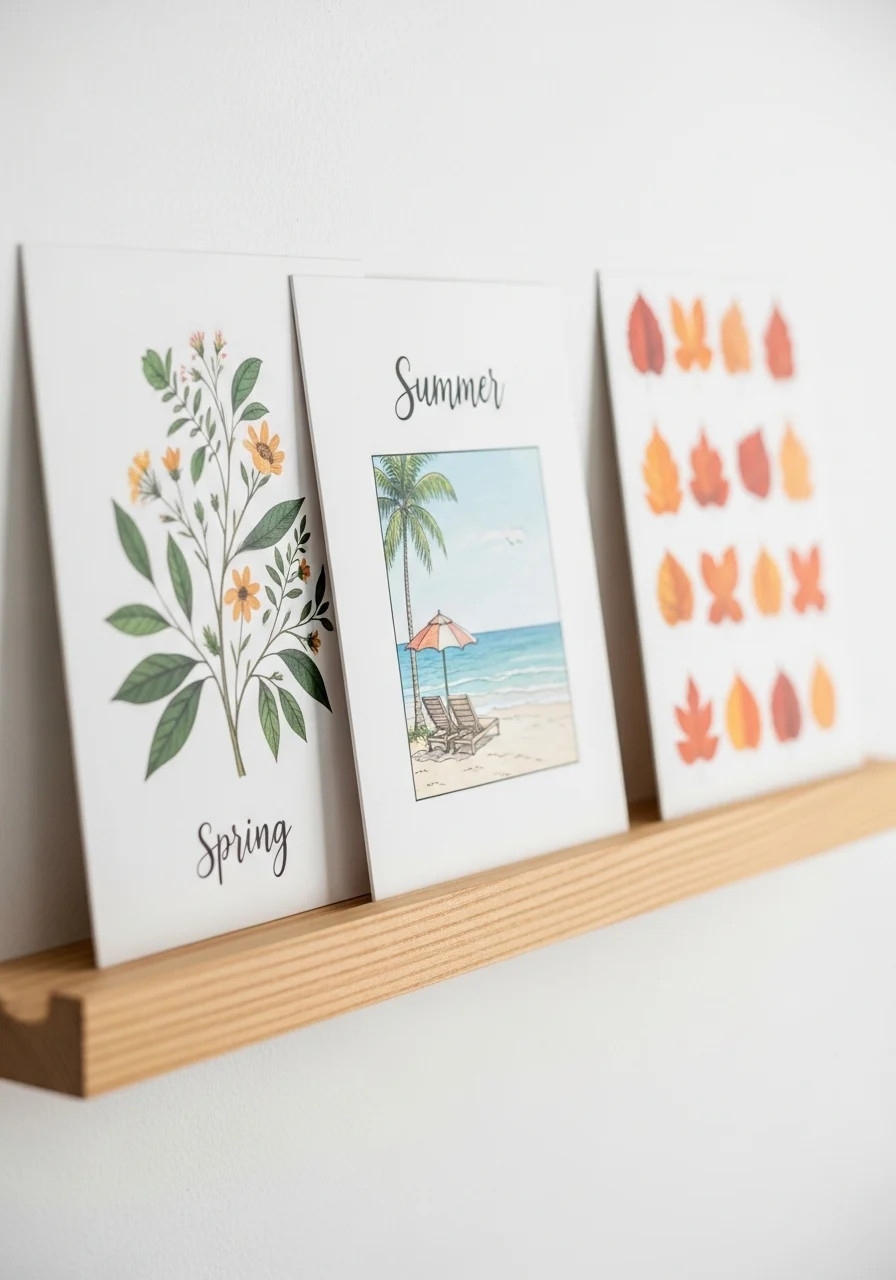
A rotating photo ledge lets you update the hallway with seasons. This keeps the space fresh and personal. You can highlight recent trips, seasonal finds, or kids’ art. It’s perfect if you like frequent updates without tools.
Key Elements
- Long picture ledge or slim shelf
- Collection of prints or frames for rotation
- Seasonal themes and color palettes
- Non-slip dots behind frames
- Measuring tape and level for shelf
- Small plant or ceramic accent for variety
- Storage box for off-season prints
- Light dusting cloth for upkeep
- Labeling system for easy swaps
- Neutral wall paint to support changing art
How to Achieve This Look (rotating ledge steps)
- Install a level, sturdy ledge at eye level.
- Curate a set of seasonal prints and frames.
- Lean large pieces as anchors and smaller pieces layered.
- Swap artwork at the start of each season.
- Store off-season prints in protective sleeves.
- Refresh accent plants and fabrics with each change.
- Keep a consistent color thread to unify rotations.
- Dust and clean frames when rotating.
How to Style / Use It
Choose a theme for each season—botanicals for spring, warm tones for fall. Keep most frames neutral so colors stand out. Use one small object to tie the display together. Rotate often to keep the hallway lively. Store prints flat to avoid damage.
- Seasonal Rotating Wall Display (Hooks + Baskets)
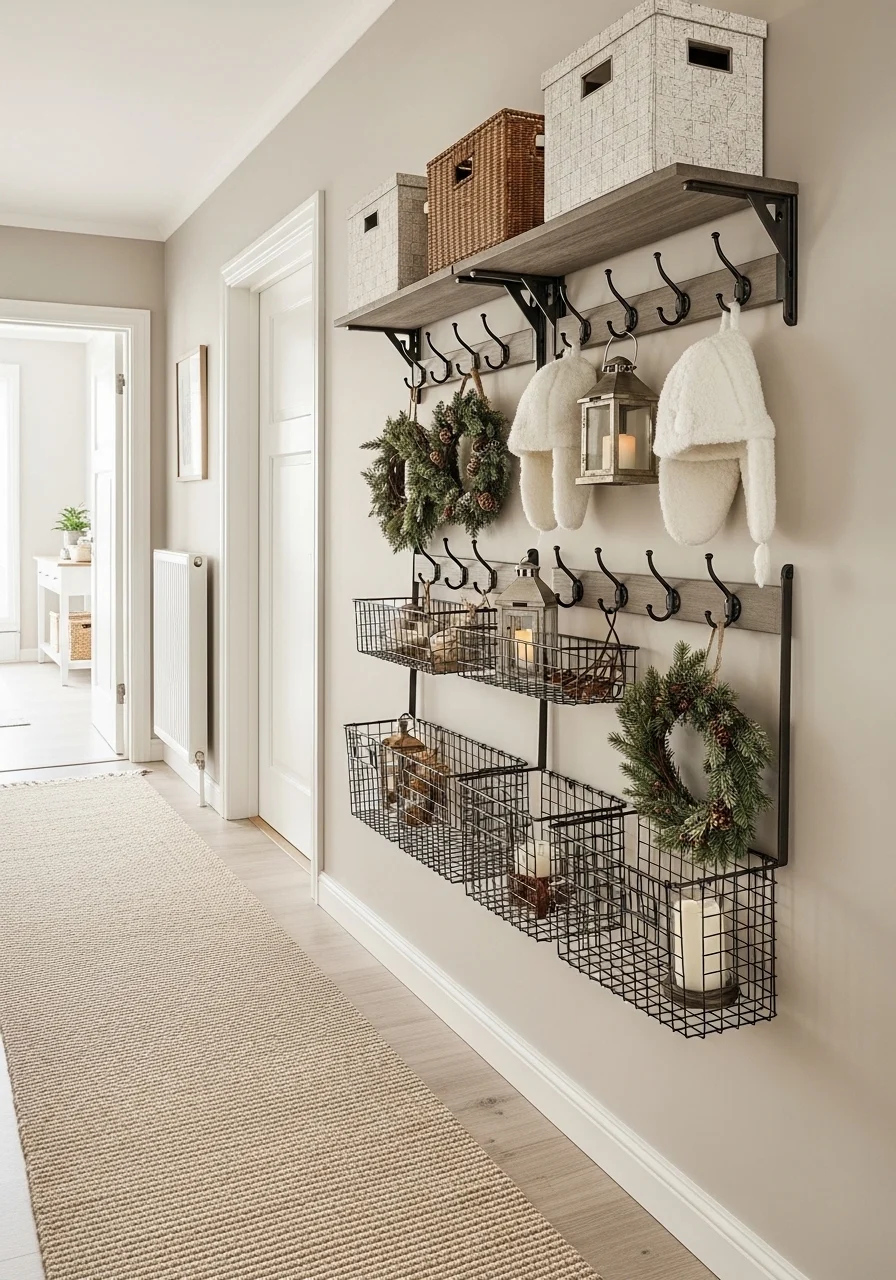
A seasonal rotating wall display keeps the hallway engaging year-round. Hooks and baskets make swapping decor quick and simple. This works well if you enjoy holiday styling and small changes. The wall becomes a living calendar of the year.
Key Elements
- Modular hook system or pegboard
- Hanging baskets for lightweight decor
- Seasonal items—wreaths, lanterns, textiles
- Labelled storage for off-season pieces
- Neutral wall-to-rotate background
- Ladder or step stool for easy swaps
- Protective wall pads for wreaths
- Small spotlight for evening display
- Cleaning supplies for decor upkeep
- Hooks at varying heights for interest
How to Achieve This Look (seasonal display steps)
- Install modular hooks or pegboard on wall.
- Curate seasonal items and store labeled boxes.
- Hang anchor piece (e.g., wreath) to start the season.
- Add baskets with small accessories and textiles.
- Balance the display with negative space.
- Swap items at season start and end.
- Clean decor items before storage.
- Update lighting to suit the mood of the season.
How to Style / Use It
Keep anchor pieces consistent in size for easy swaps. Use neutral baskets to unify different seasonal palettes. Store out-of-season items in labeled, breathable boxes. Rotate slowly—change one or two items each season for continuity. Avoid heavy items on hooks to protect walls.
You're now loaded with 23 practical, stylish hallway wall decor ideas you can copy or mix and match. Some ideas are simple swaps, while others are weekend projects. Try one that fits your time and tools, then pin the ones you love for later.
Which idea are you most excited to try? Save your favorites, then share them with a friend who’s redecorating. Small changes to a hallway can reshape how your whole home feels, and you’ll be surprised how much personality a narrow wall can hold.